
Replacing A Bad Rotten Balcony
Replacing A Bad Rotten Balcony Deck In Melbourne Beach, Florida by Florida Roofing and Renovations Inc.
Replacing A Balcony Deck
Like many of our jobs, this one started out with a new trek decking and roof replacement but inevitably became a full-blown makeover. In this case, water had been entering through old roof material under the decking behind the stucco, unbeknownst to the homeowner, causing considerable damage to the rotten structural beams.
No one in this complex was aware that their balconies had such an issue. The damage was fully hidden behind the stucco. And none of them knew their balcony deck had 3-4 inches of concrete on top. Which is a tremendous amount of weight.
Demo
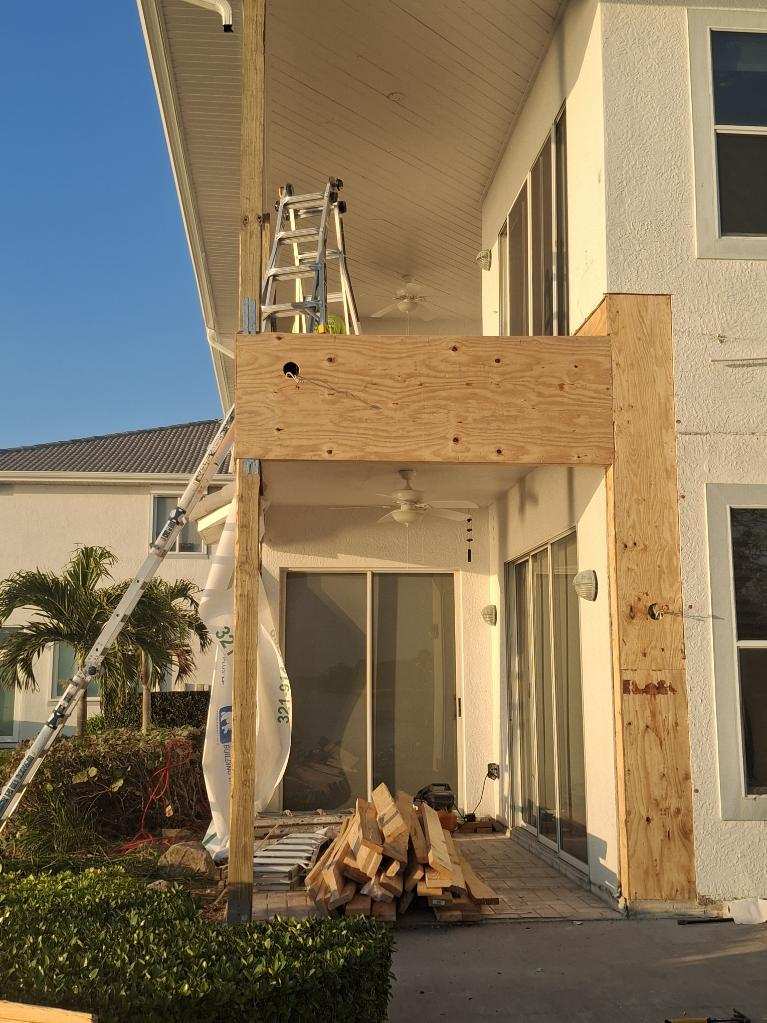
To protect the glass sliding doors on the balcony and porch below from damage while we worked on the balcony floor, we covered the exposed sliders with plywood sheeting.
We also removed three bushes to access the backyard with equipment, which we later replaced
After securing the onwers property form any damage during the course of the balcony rebuild. We started tearing into the balcony to expose all the rotten wood and damage from water leaking through the balcony deck.
Rotten Balcony Wood Damage
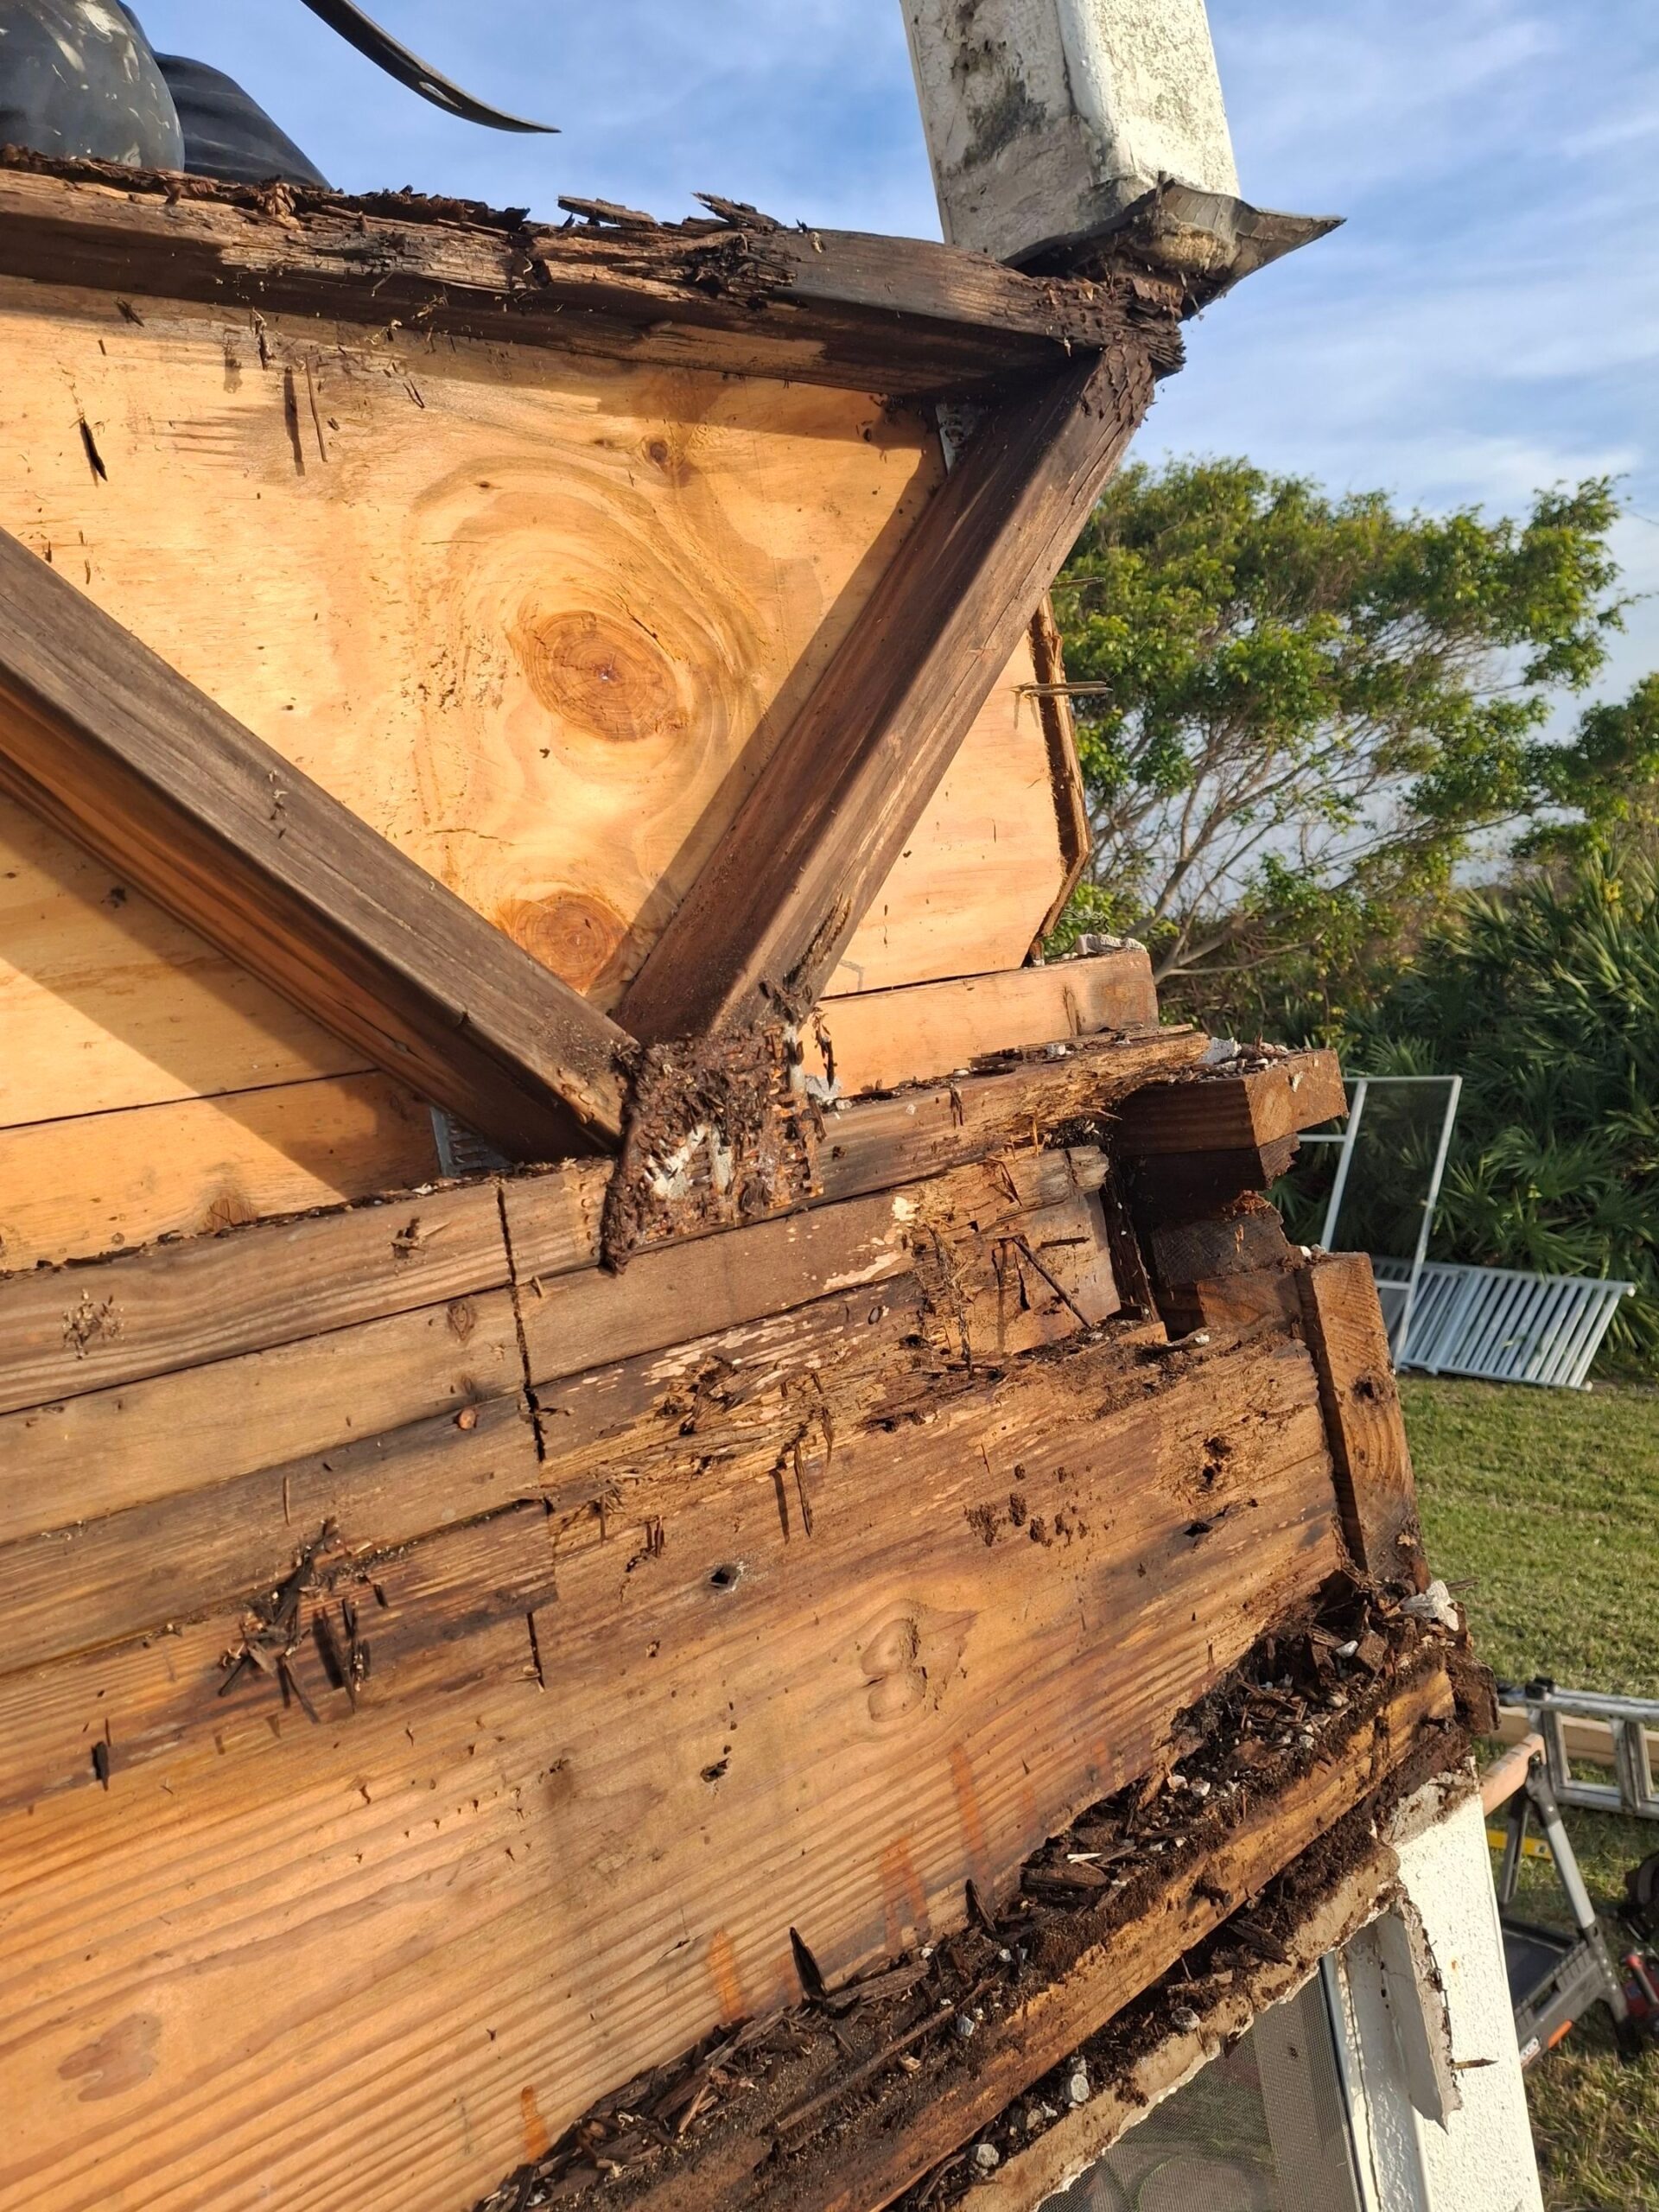
As we began removing stucco, the more damaged rotten wood we found. The rot was exceptionally bad at every bearing point ( a place where the beams that carry the balcony’s weight sit on a supporting post ), necessitating the replacement of the full beams. In this case, we installed LVLs for their ability to carry extreme weight and not sag.
Once we realized how severe the balcony damage was and how unsafe it was, we immediately shored up the roof. A” shored-up roof” means the roof was temporarily supported with props or braces to prevent it from collapsing or sagging, often during repairs or alterations. This is a crucial step in various construction and repair projects, ensuring structural stability and safety for the property and bodily injury.
The balcony featured a typical post and beam support structure, with floor trusses positioned on top. The outer floor truss, located at the roof edge, was so rotten that it needed to be removed. We continued to remove damage wood until we were confidant we had remove it all.
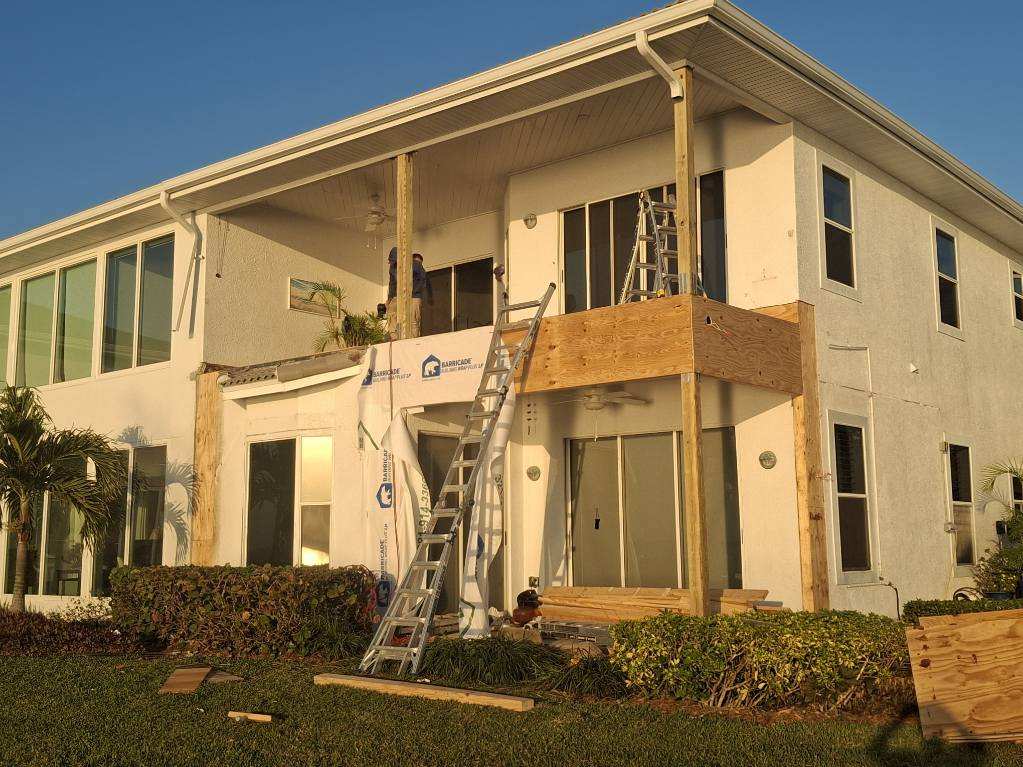
Building Balcony Back
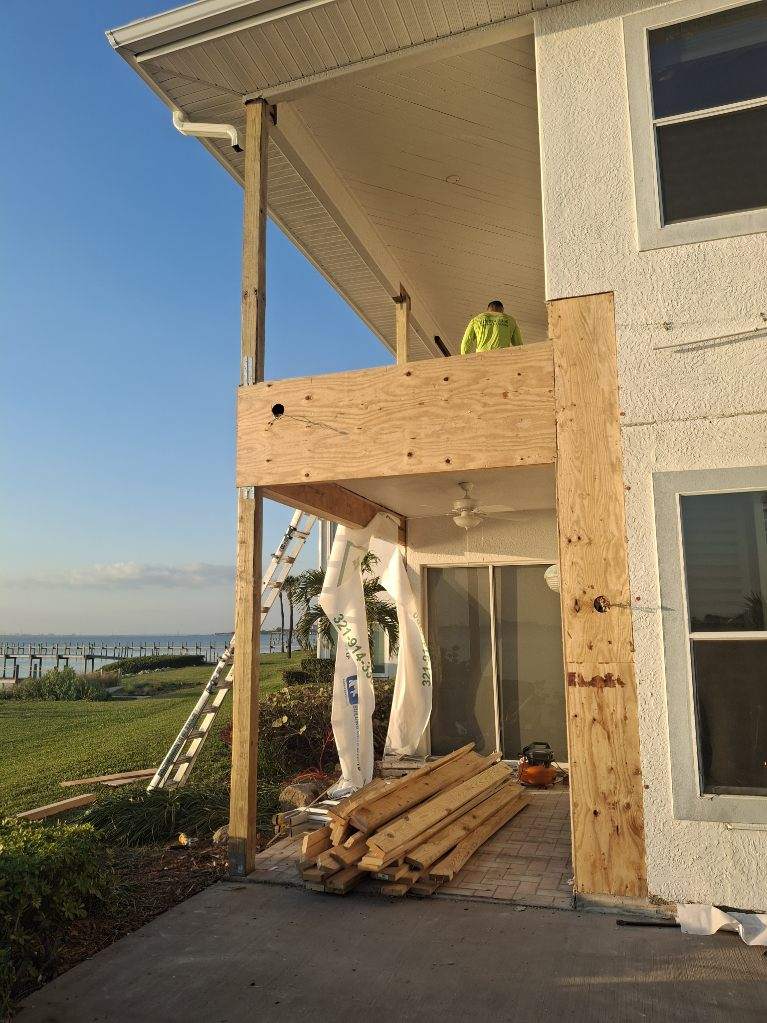
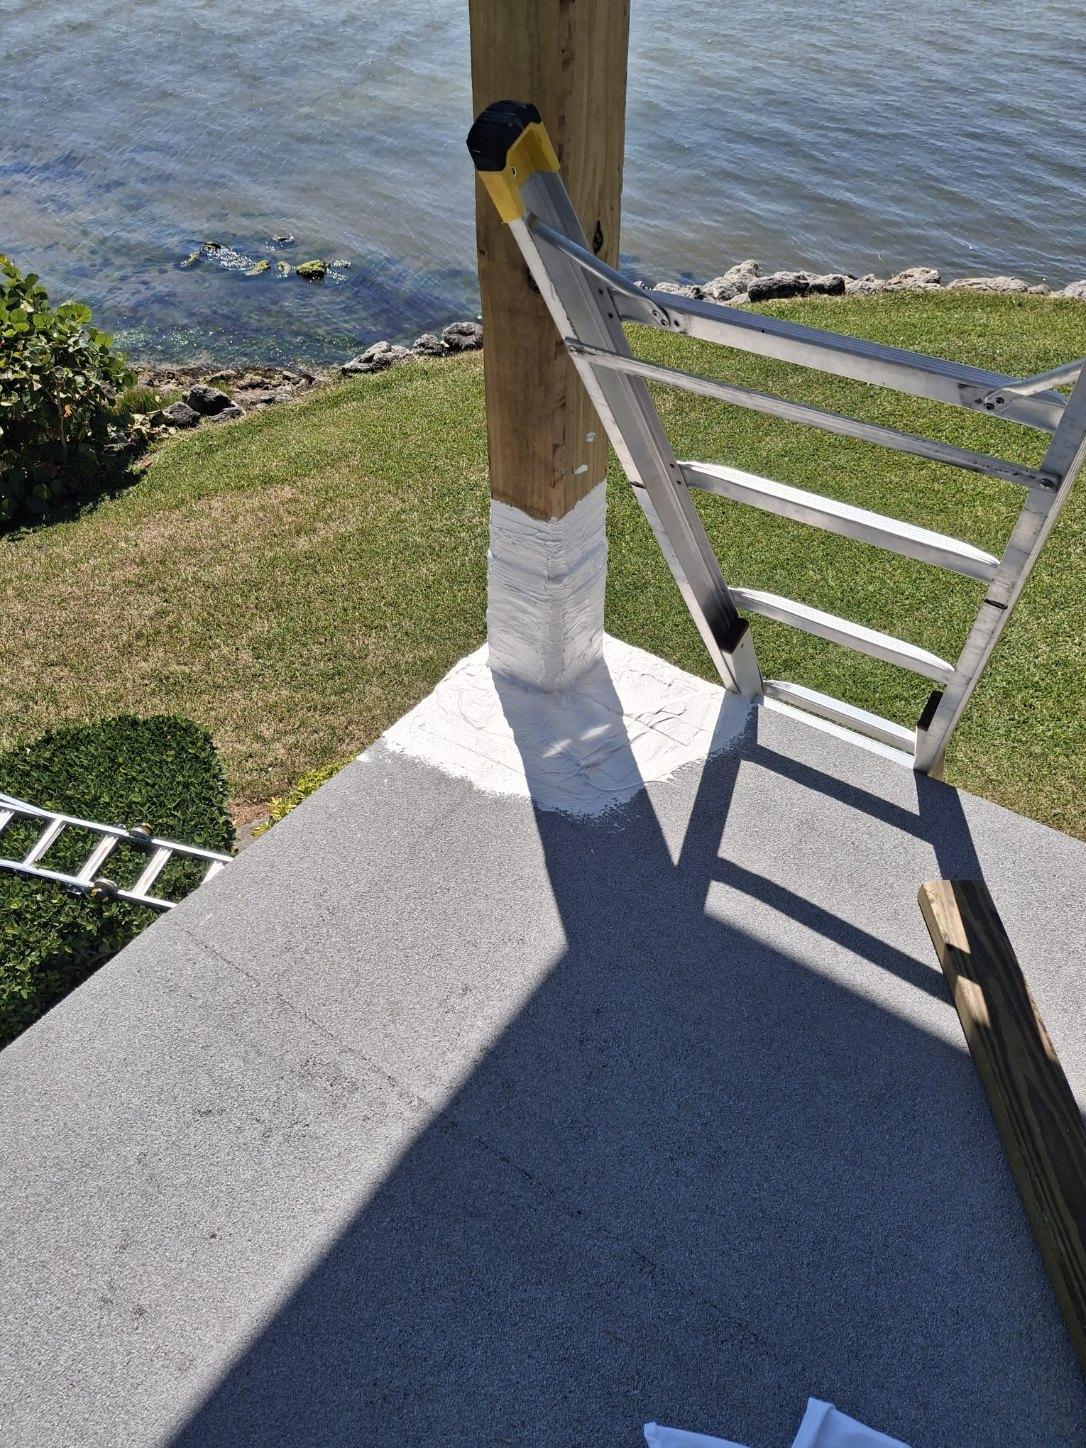
We then installed new 6” x 6” pressure-treated support posts with stainless steel post bottoms. On top of the posts, we installed structural beams called LVLs. These types of beams have replaced most wood beams for carry have loads and large spans.
Next, we built a new knee wall to replace the removed floor truss. Once everything was strapped with hurricane strapping, we installed 4-ply CDX plywood.
After the new wood was installed, we applied a weather barrier over it. Then we added wire lath and stucco to finish.
Post and Wall Flashing
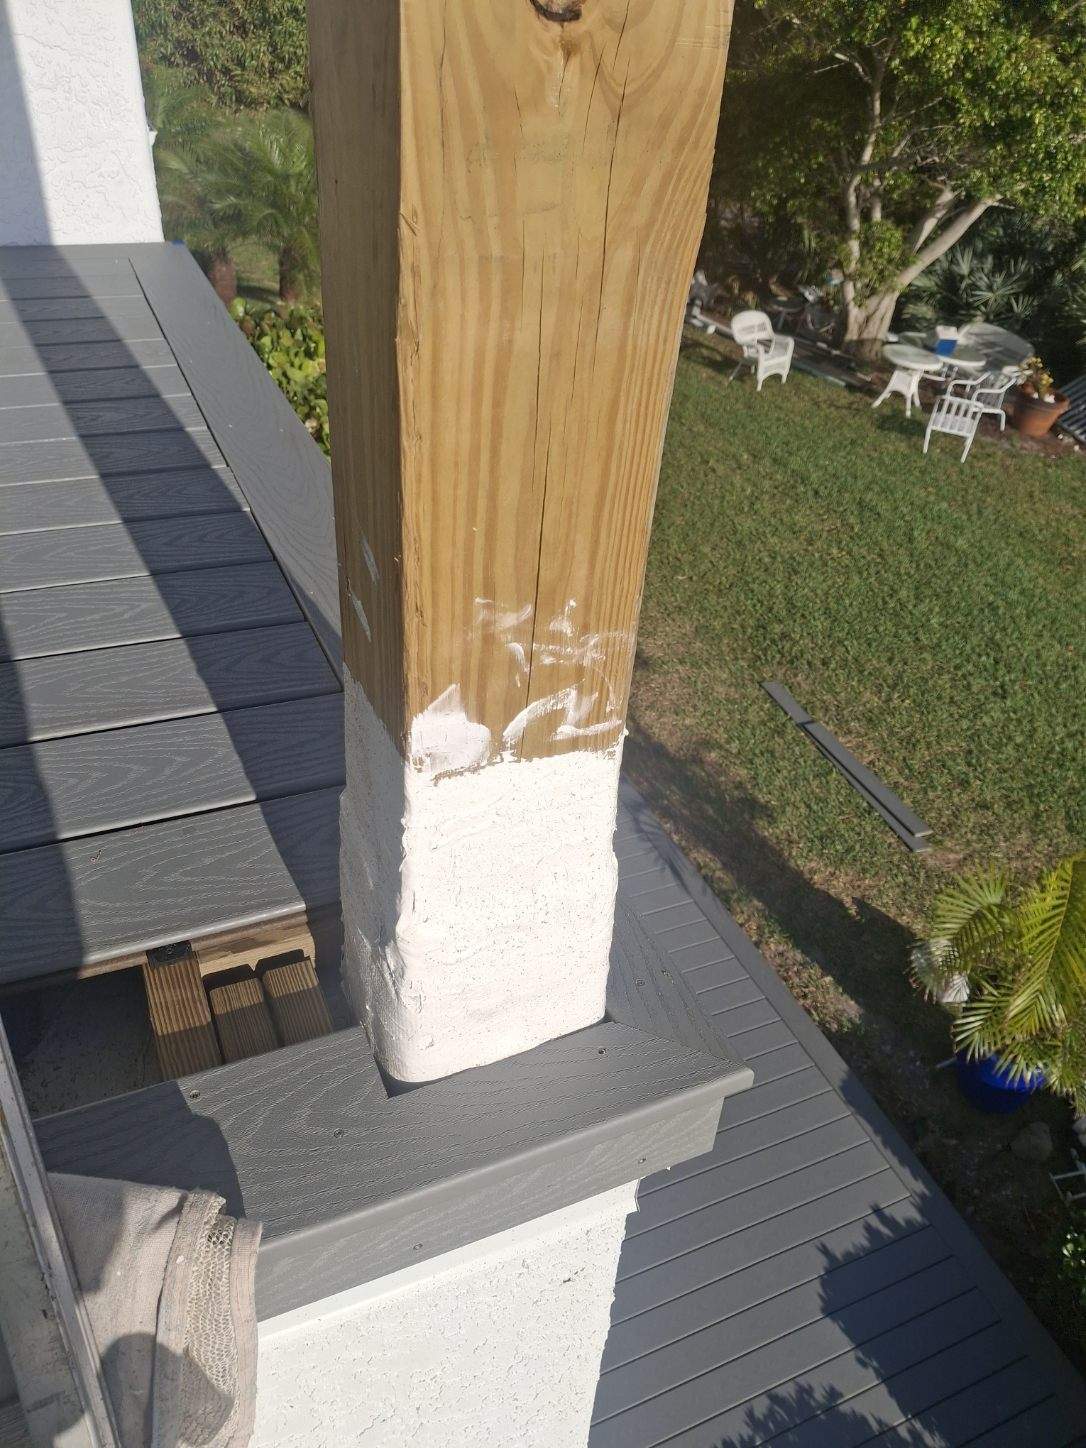
On the balcony roof above, we replaced the stucco wall flashing with heavy-gauge metal and reapplied the stucco. To ensure the posts never leak in the future, we wrapped the bottoms with the roofing material that we installed on the roof deck. For additional insurance, we also applied liquid waterproofing at the posts and deck.
Roof Material
The roof deck was installed using a self-adhered base and cap sheet system called SA by Shield. The base is applied directly to the wood decking under the drip and wall flashings. Once the flashings are nailed to the roof decking on top of the base, we primed the flashing. Then we sandwich the wall flashing and drip edge between the base and the cap sheet, providing a fully leak-proof and hurricane-ready roof edge.
Balcony Floor Decking
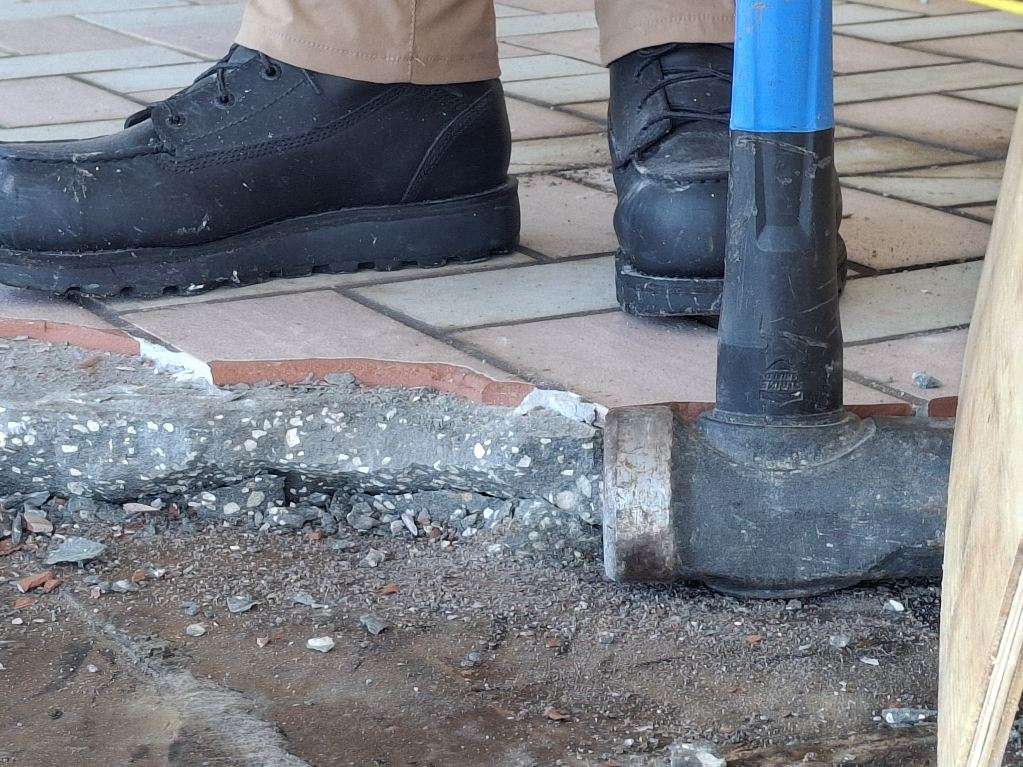
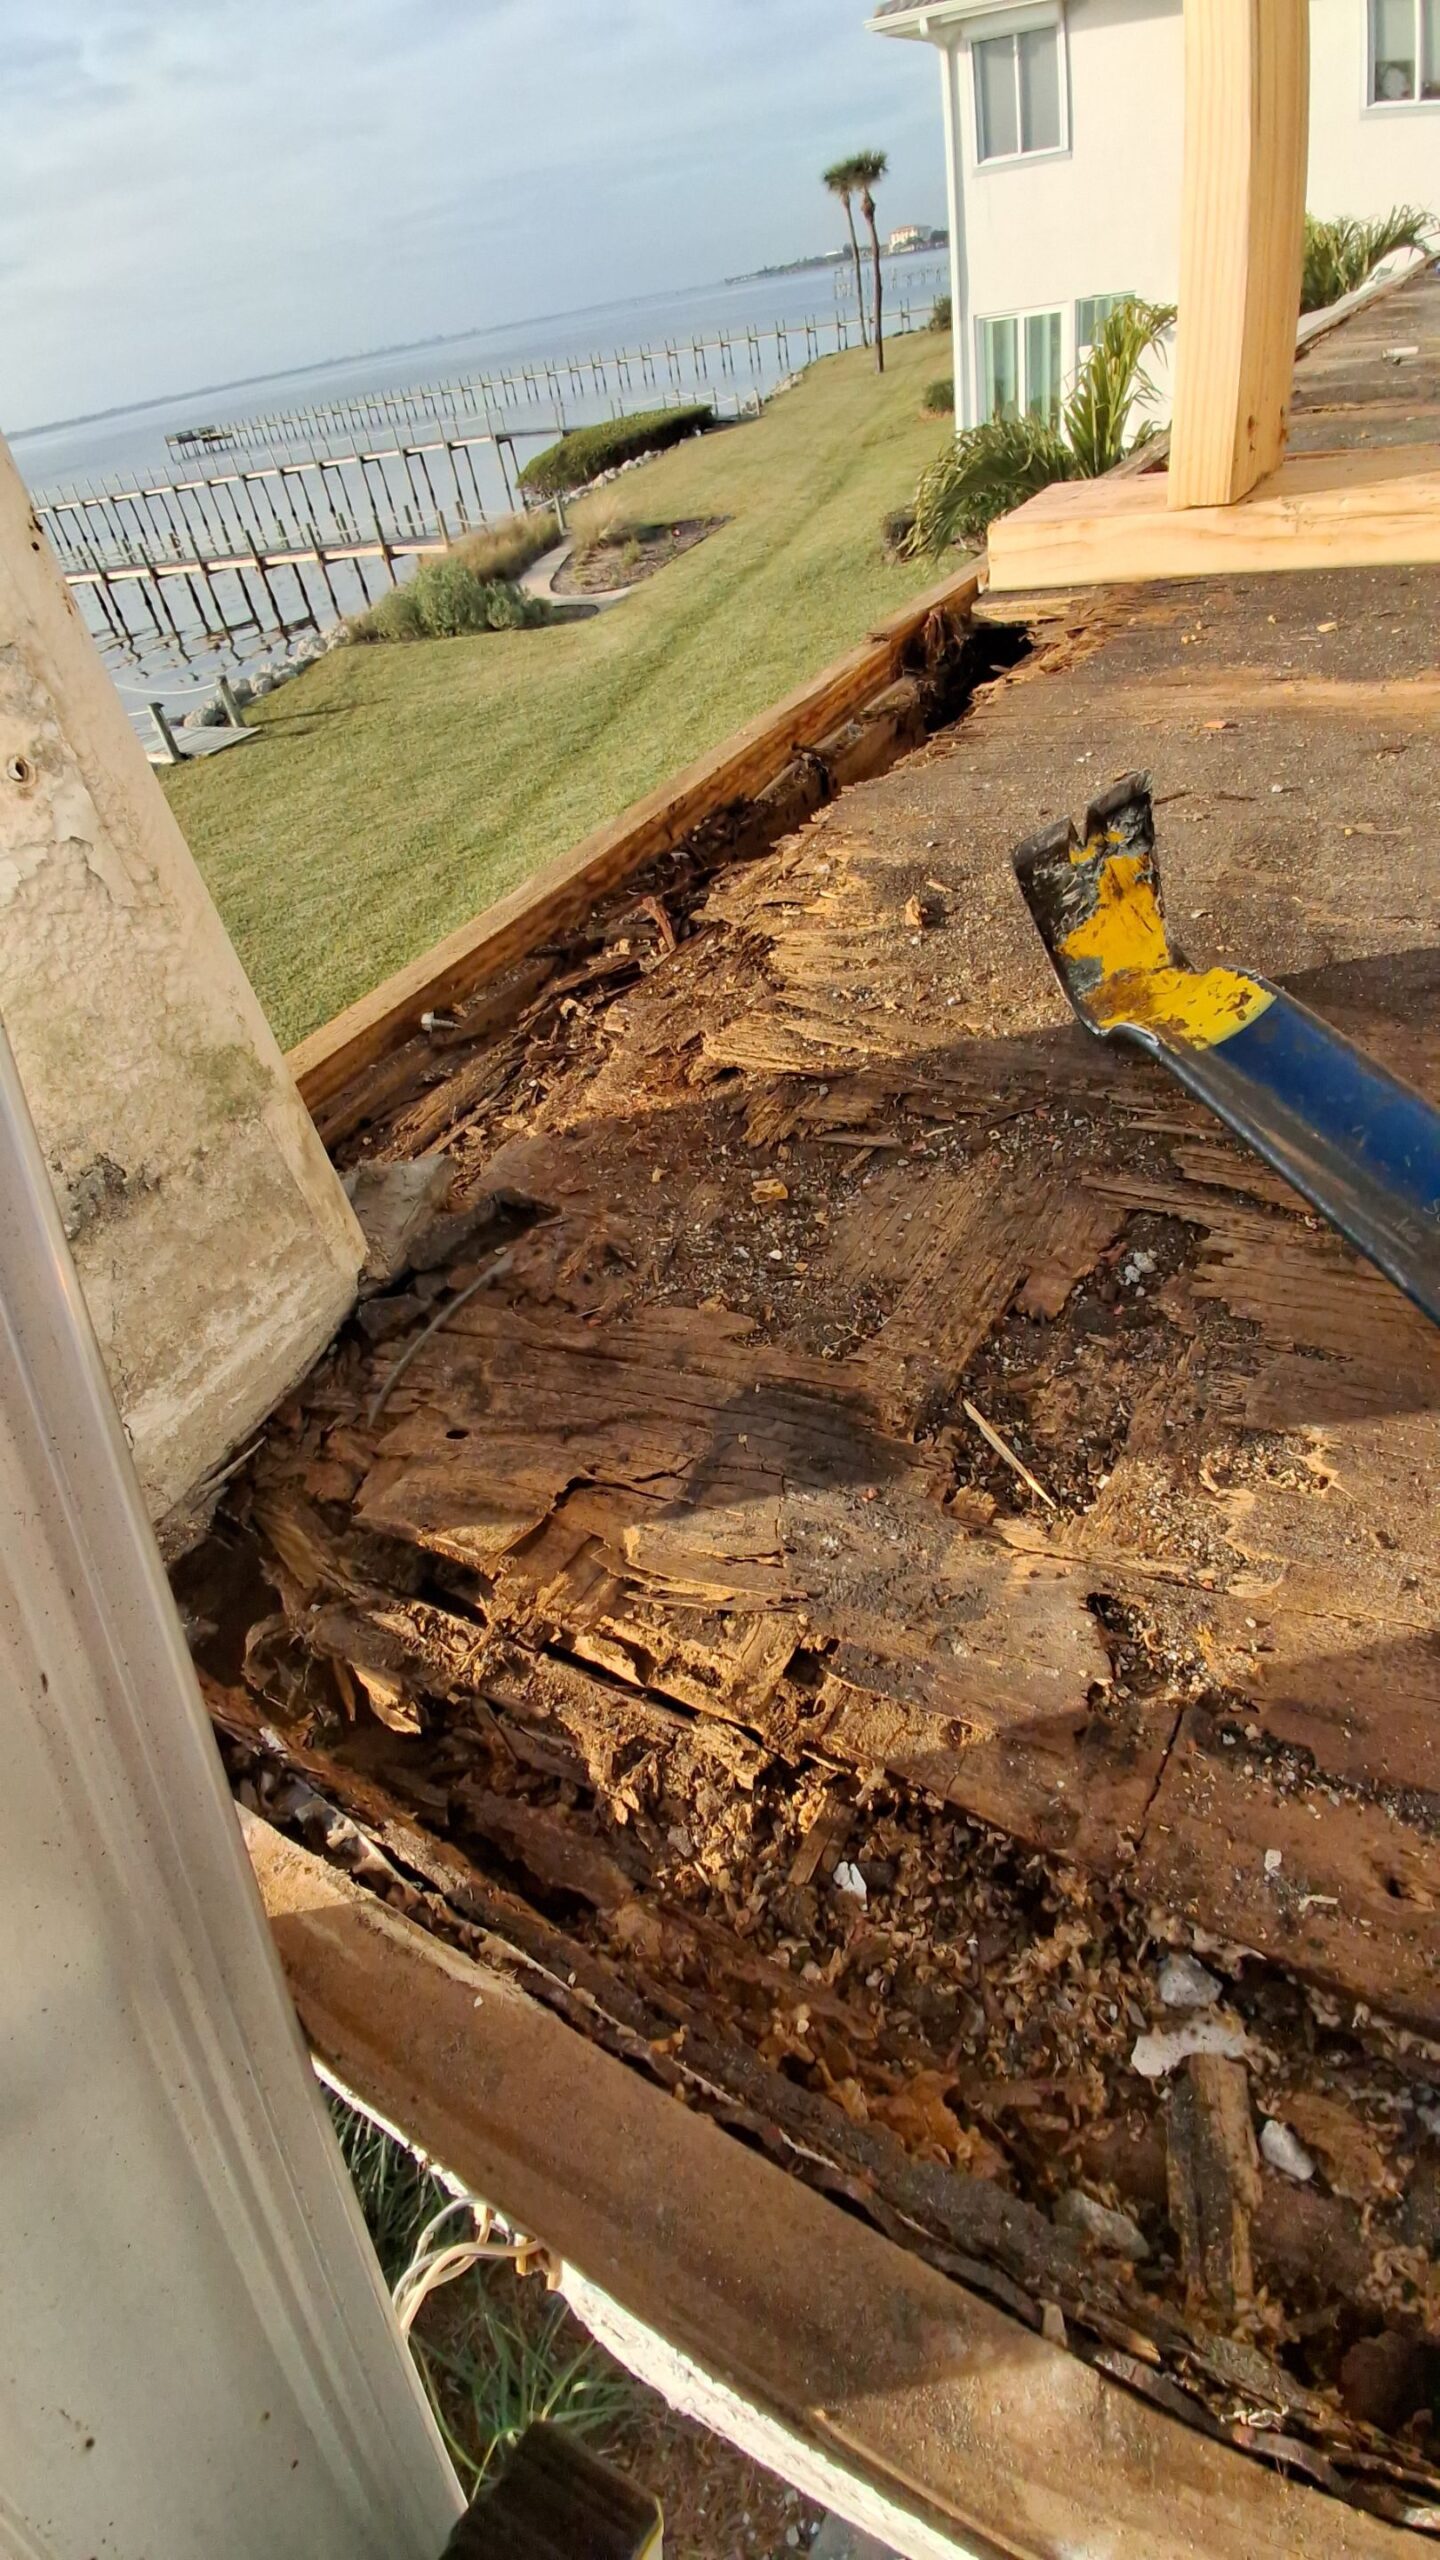
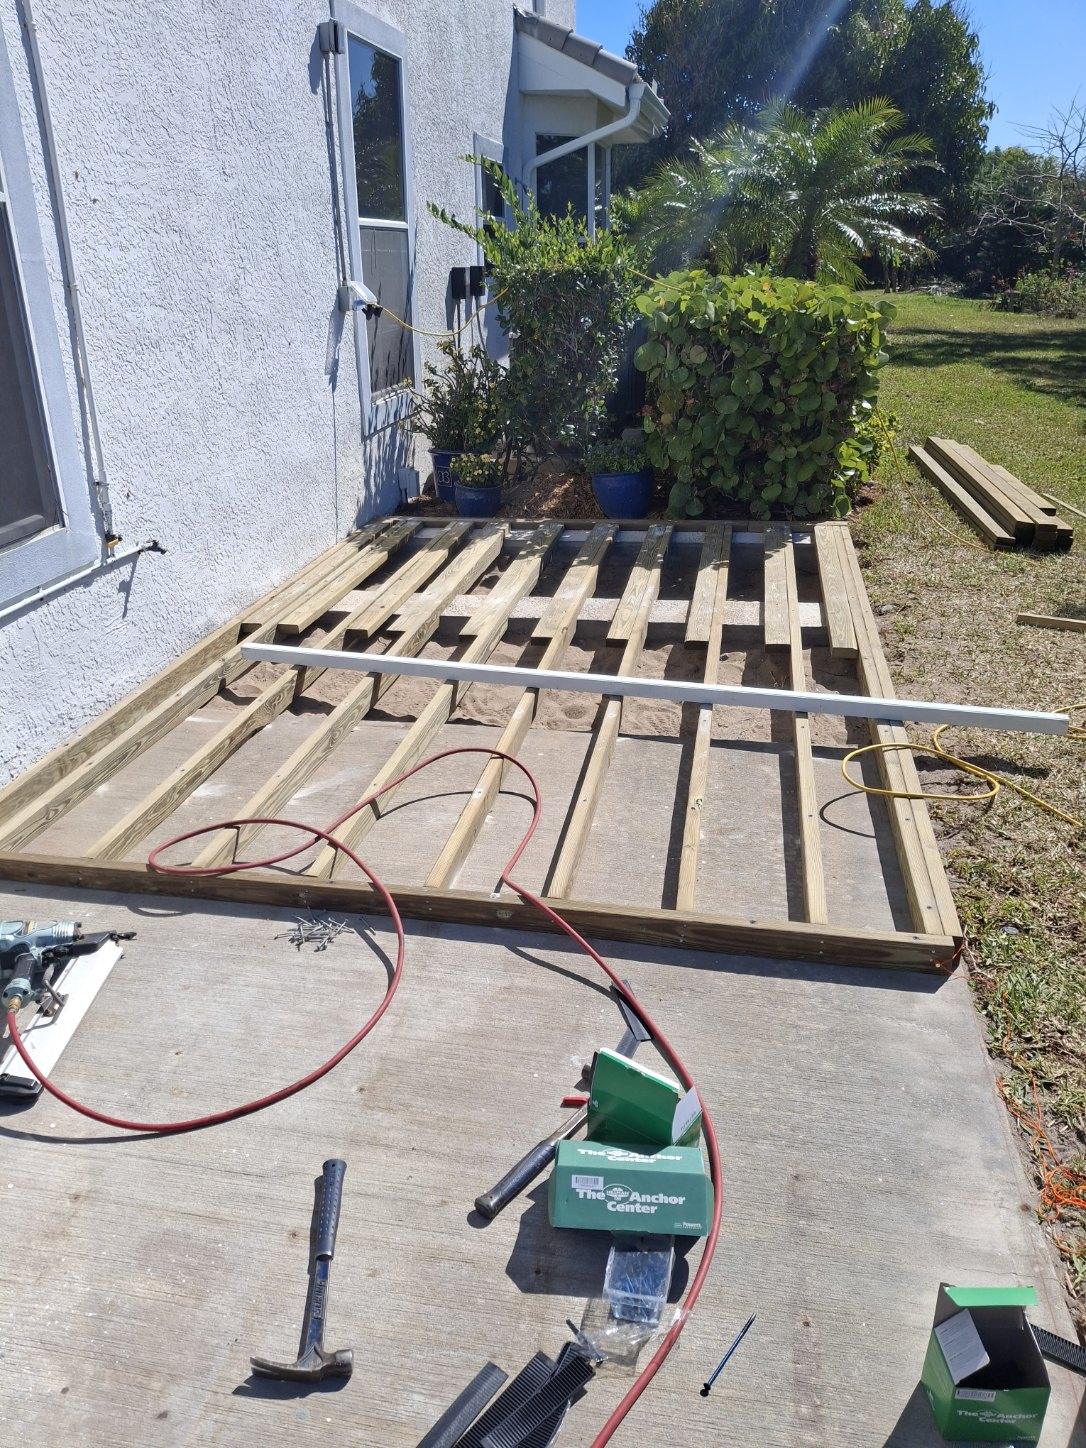
On the balcony, we installed pressure-treated boards called sleepers. We then edged the deck and picture-framed the decking. At the bottom, the original decking was laying in the dirt and slowly getting buried over time. It did not have any supports. So, we poured two footers for the new sleepers to rest on. The concrete slab outside of the back porch was very rough and uneven.
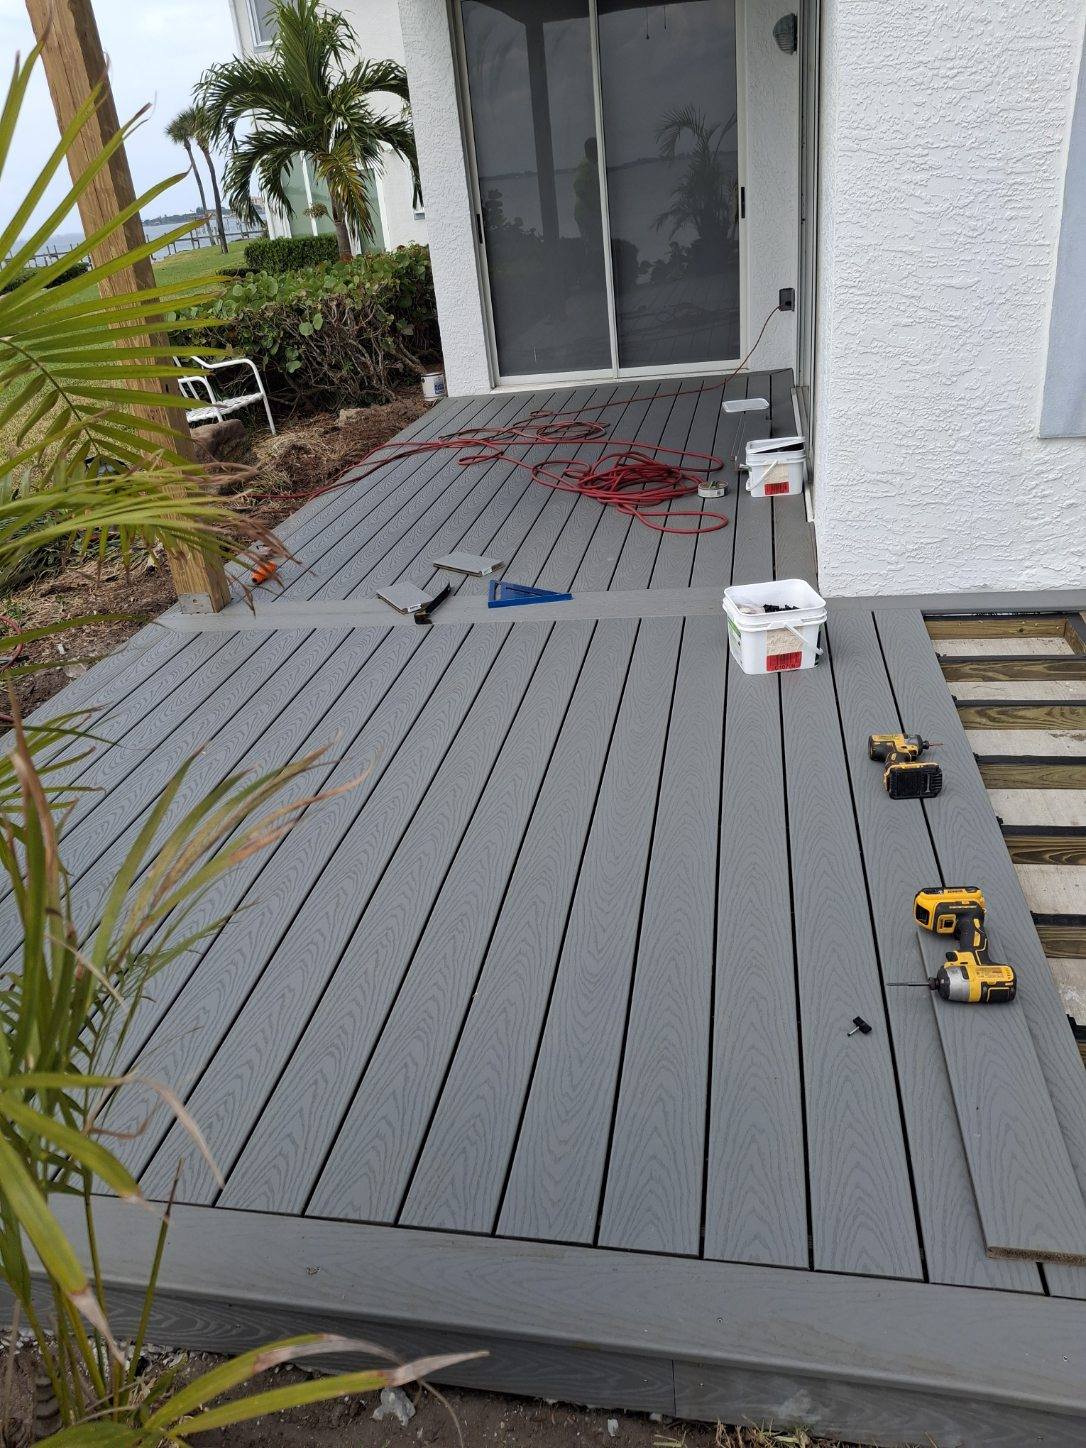
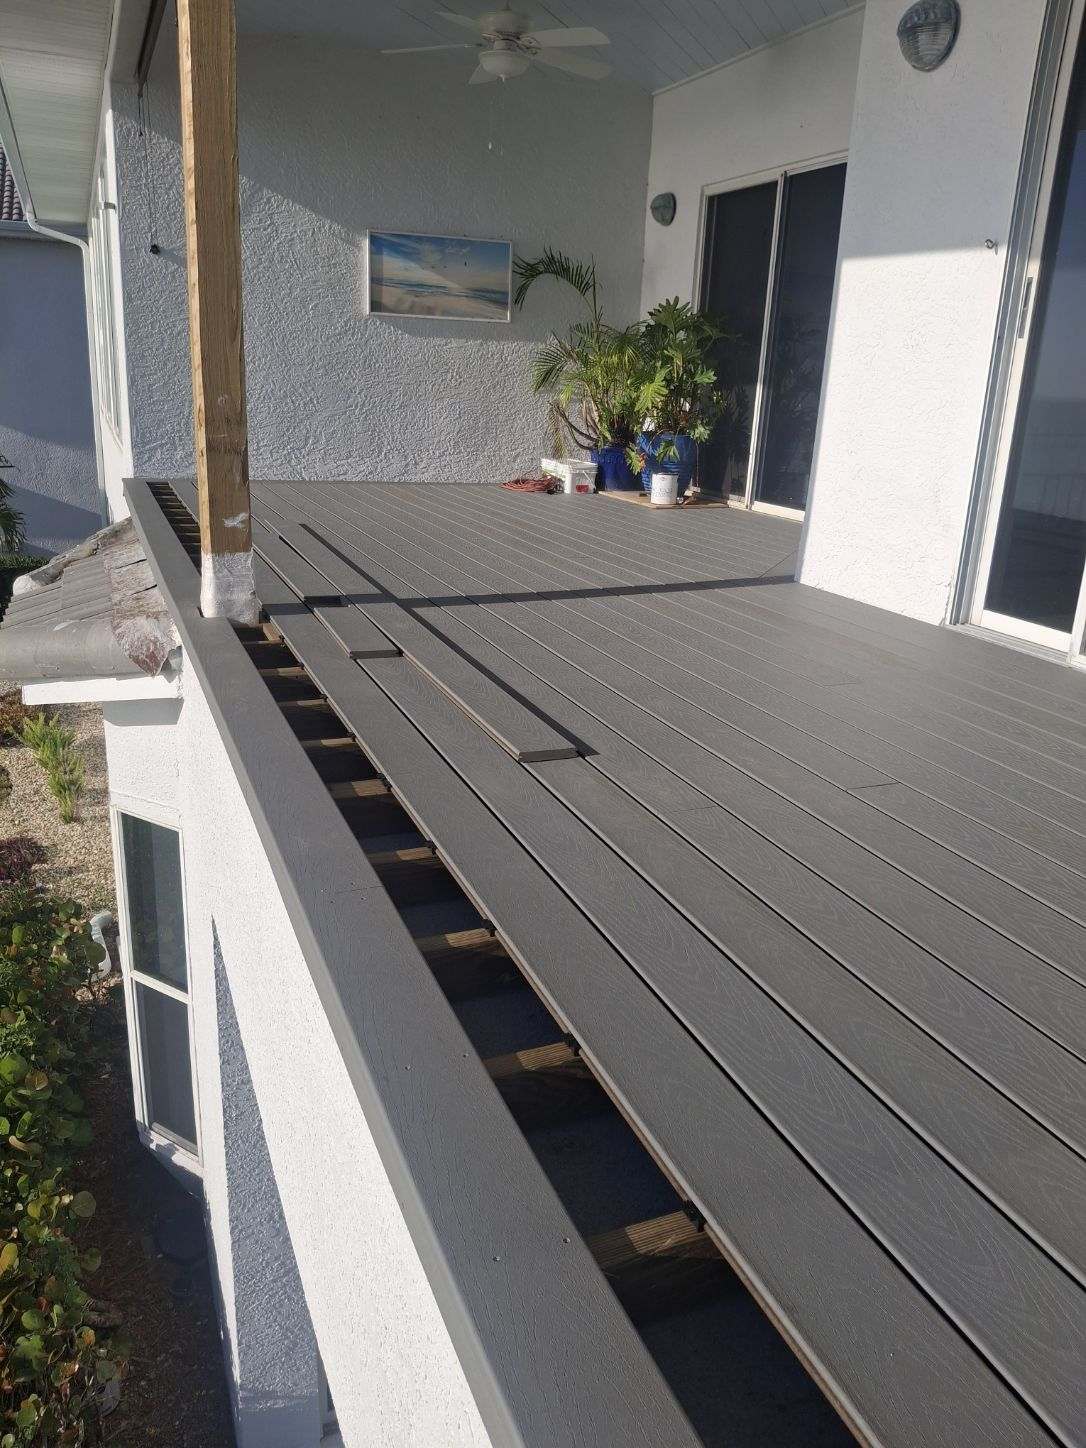
We spent a day ensuring all the sleepers were level and straight. Once we were assured it was correct, we installed a 3” tape sealant over all the pressure-treated sleepers so water runs off the boards, preventing the boards from rotting in the rain. Then we installed the Trex decking in a picture-framed style.
We installed Trex Select® with a 35-year limited warranty. The color was Pebble Grey. We used hidden fasteners. A baby can walk on it without hurting their feet.
Finishing Up
In finishing we only had to paint, put railing back and gutters. The homeowner elected to have a personal friend reinstall the awnings and screening.
If you have a balcony or deck that needs replaced or looked at to determine if there is balcony damage. Please call today at 321-451-3365 or fill out our contact form for a balcony estimate.
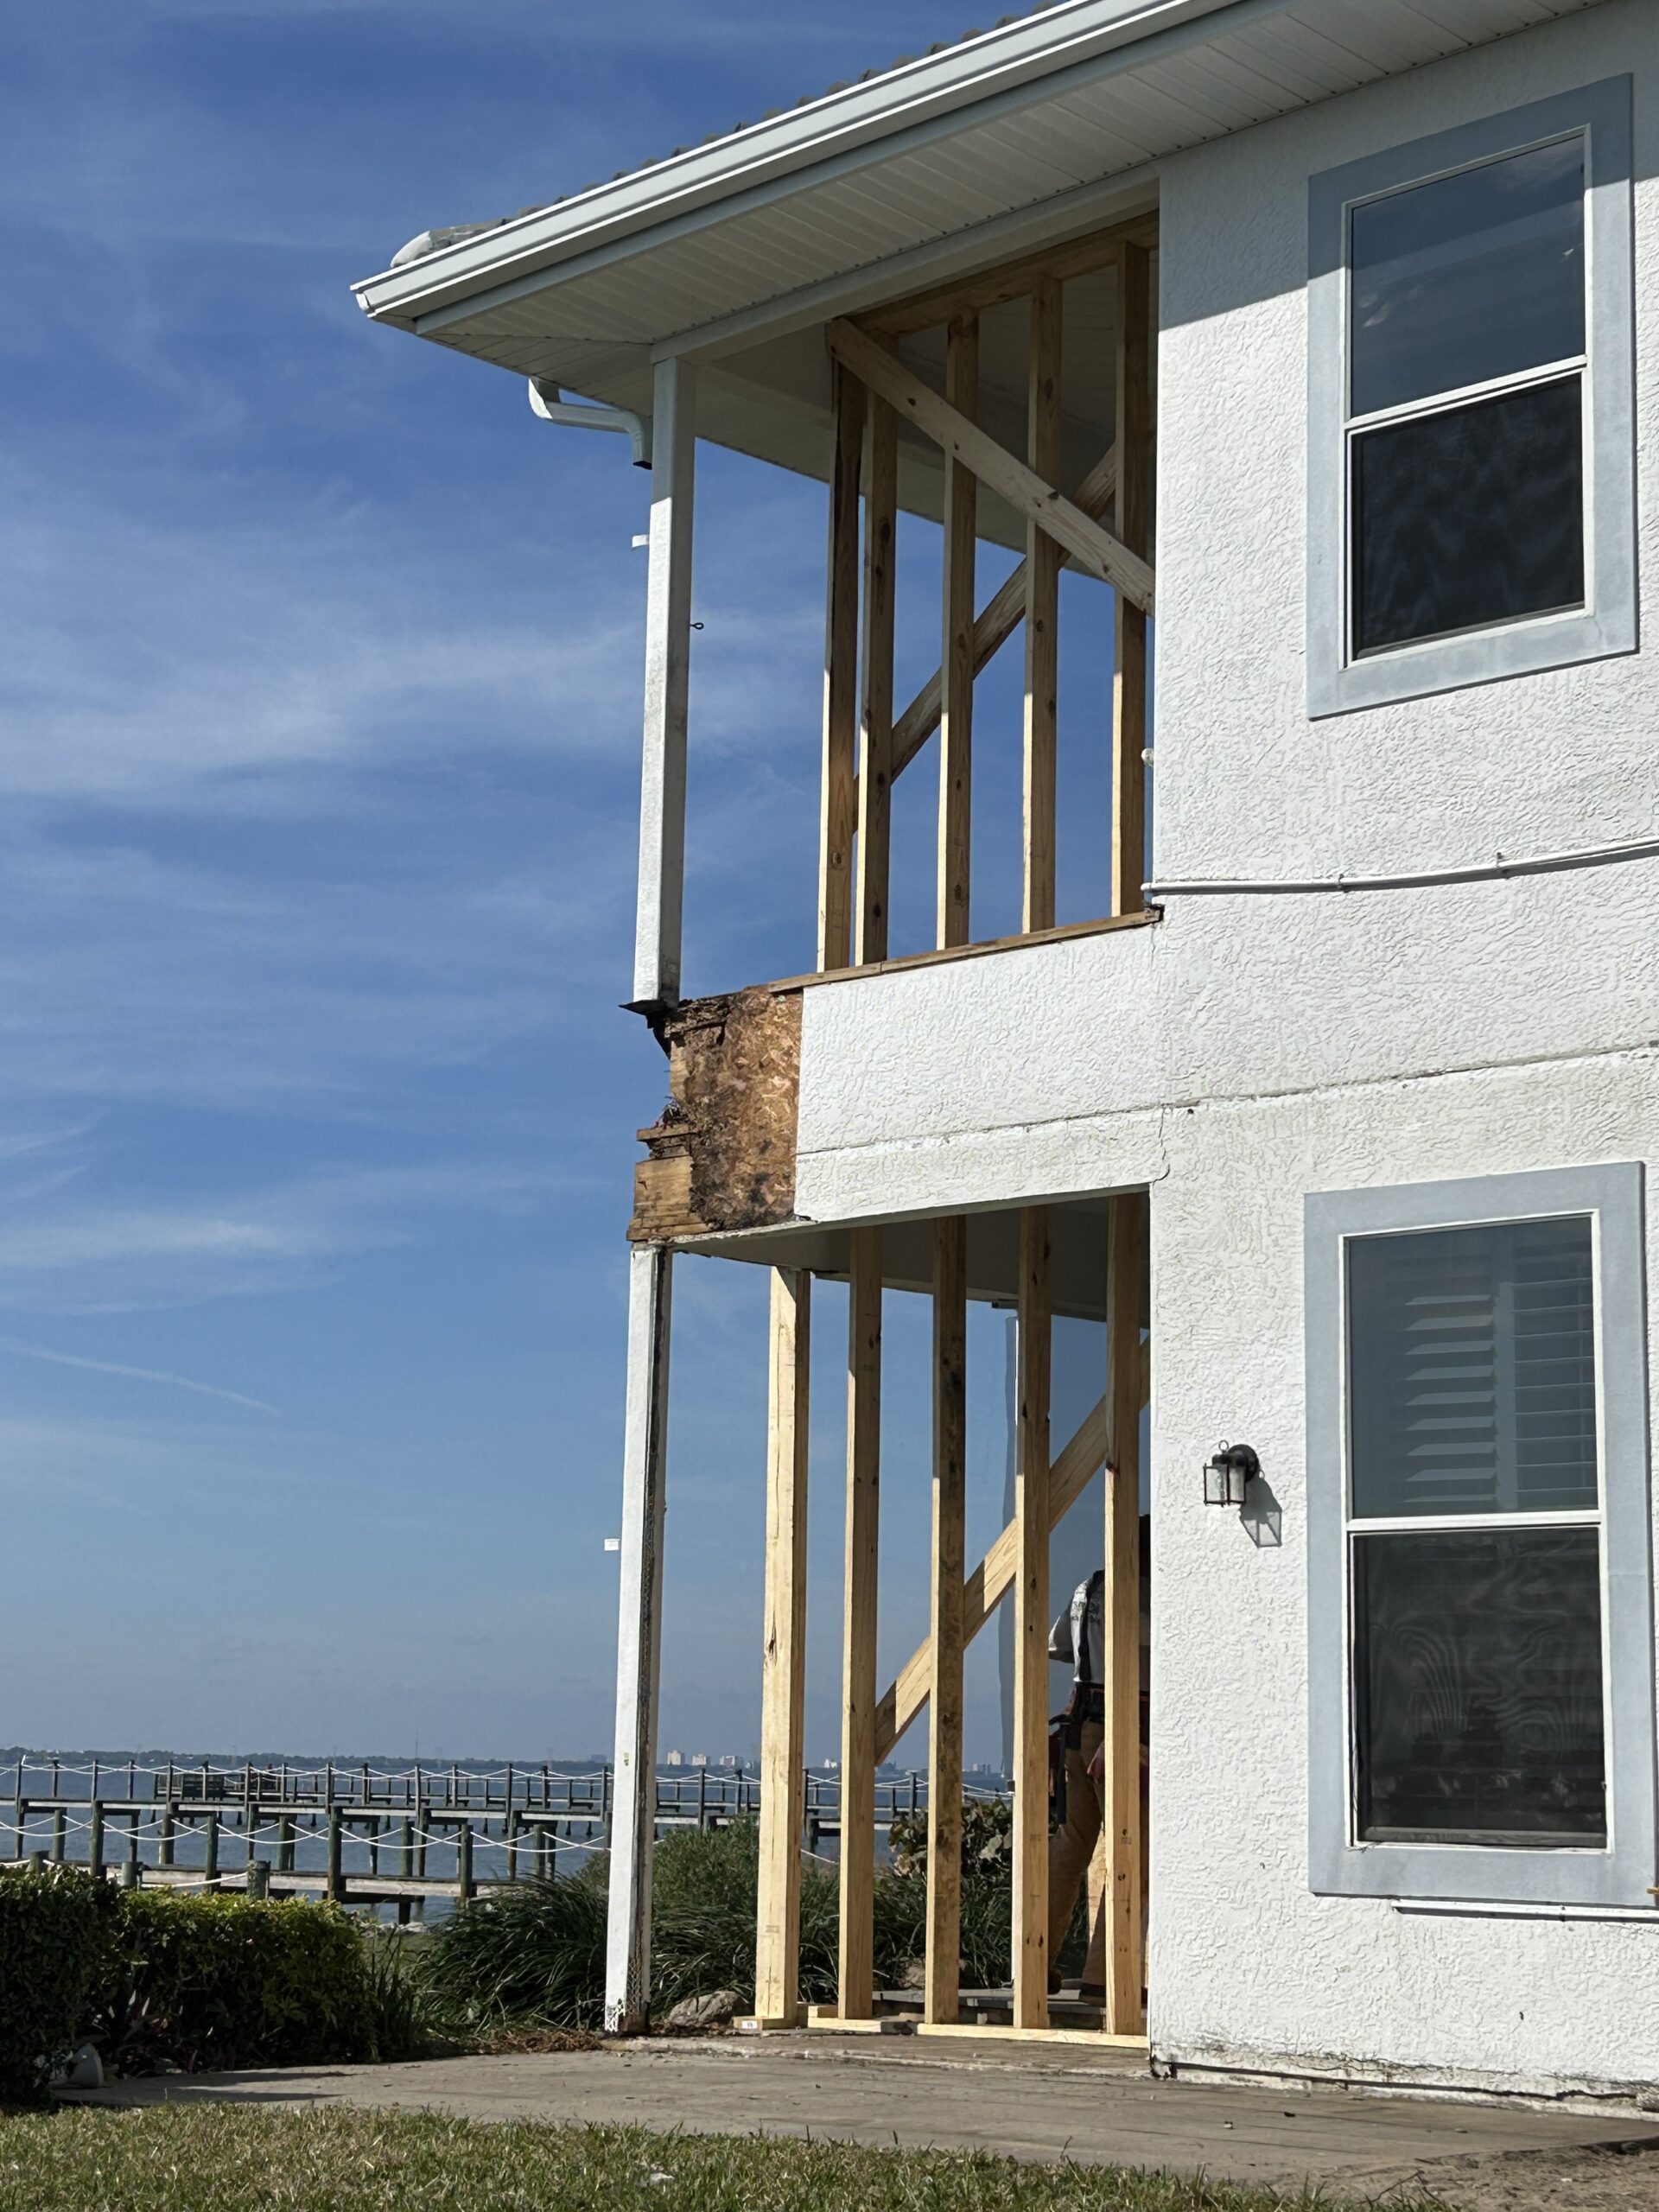
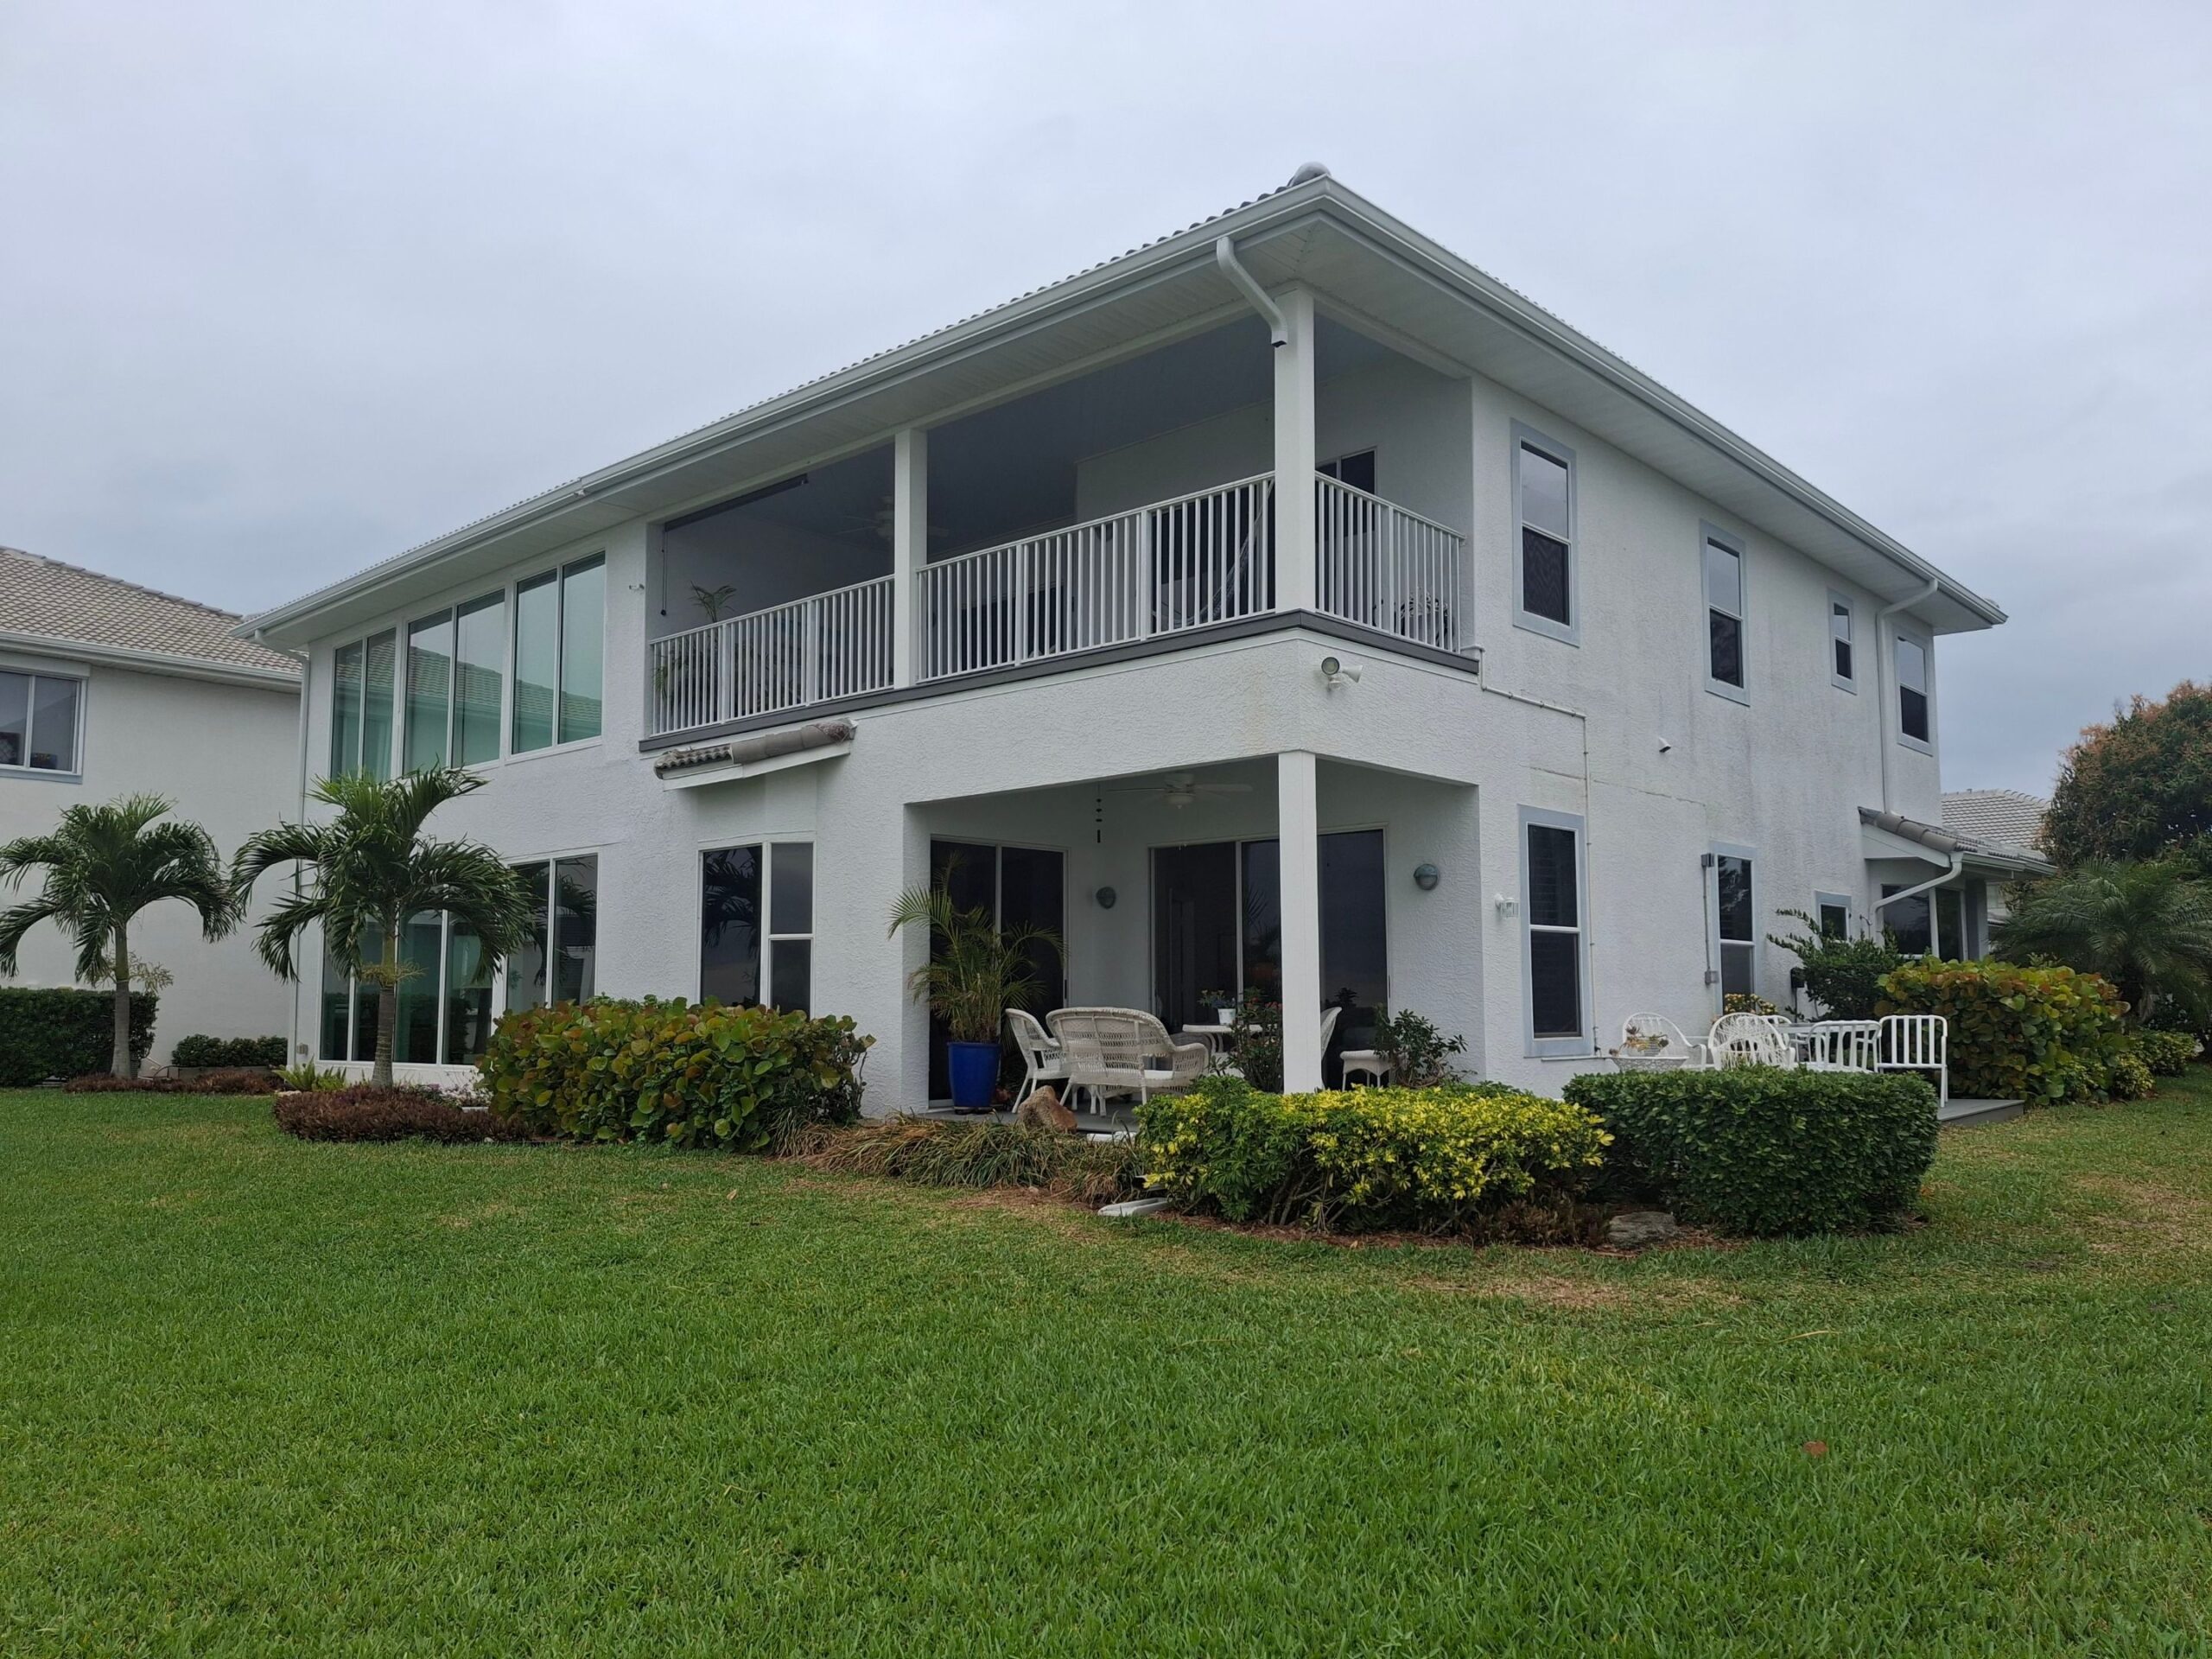
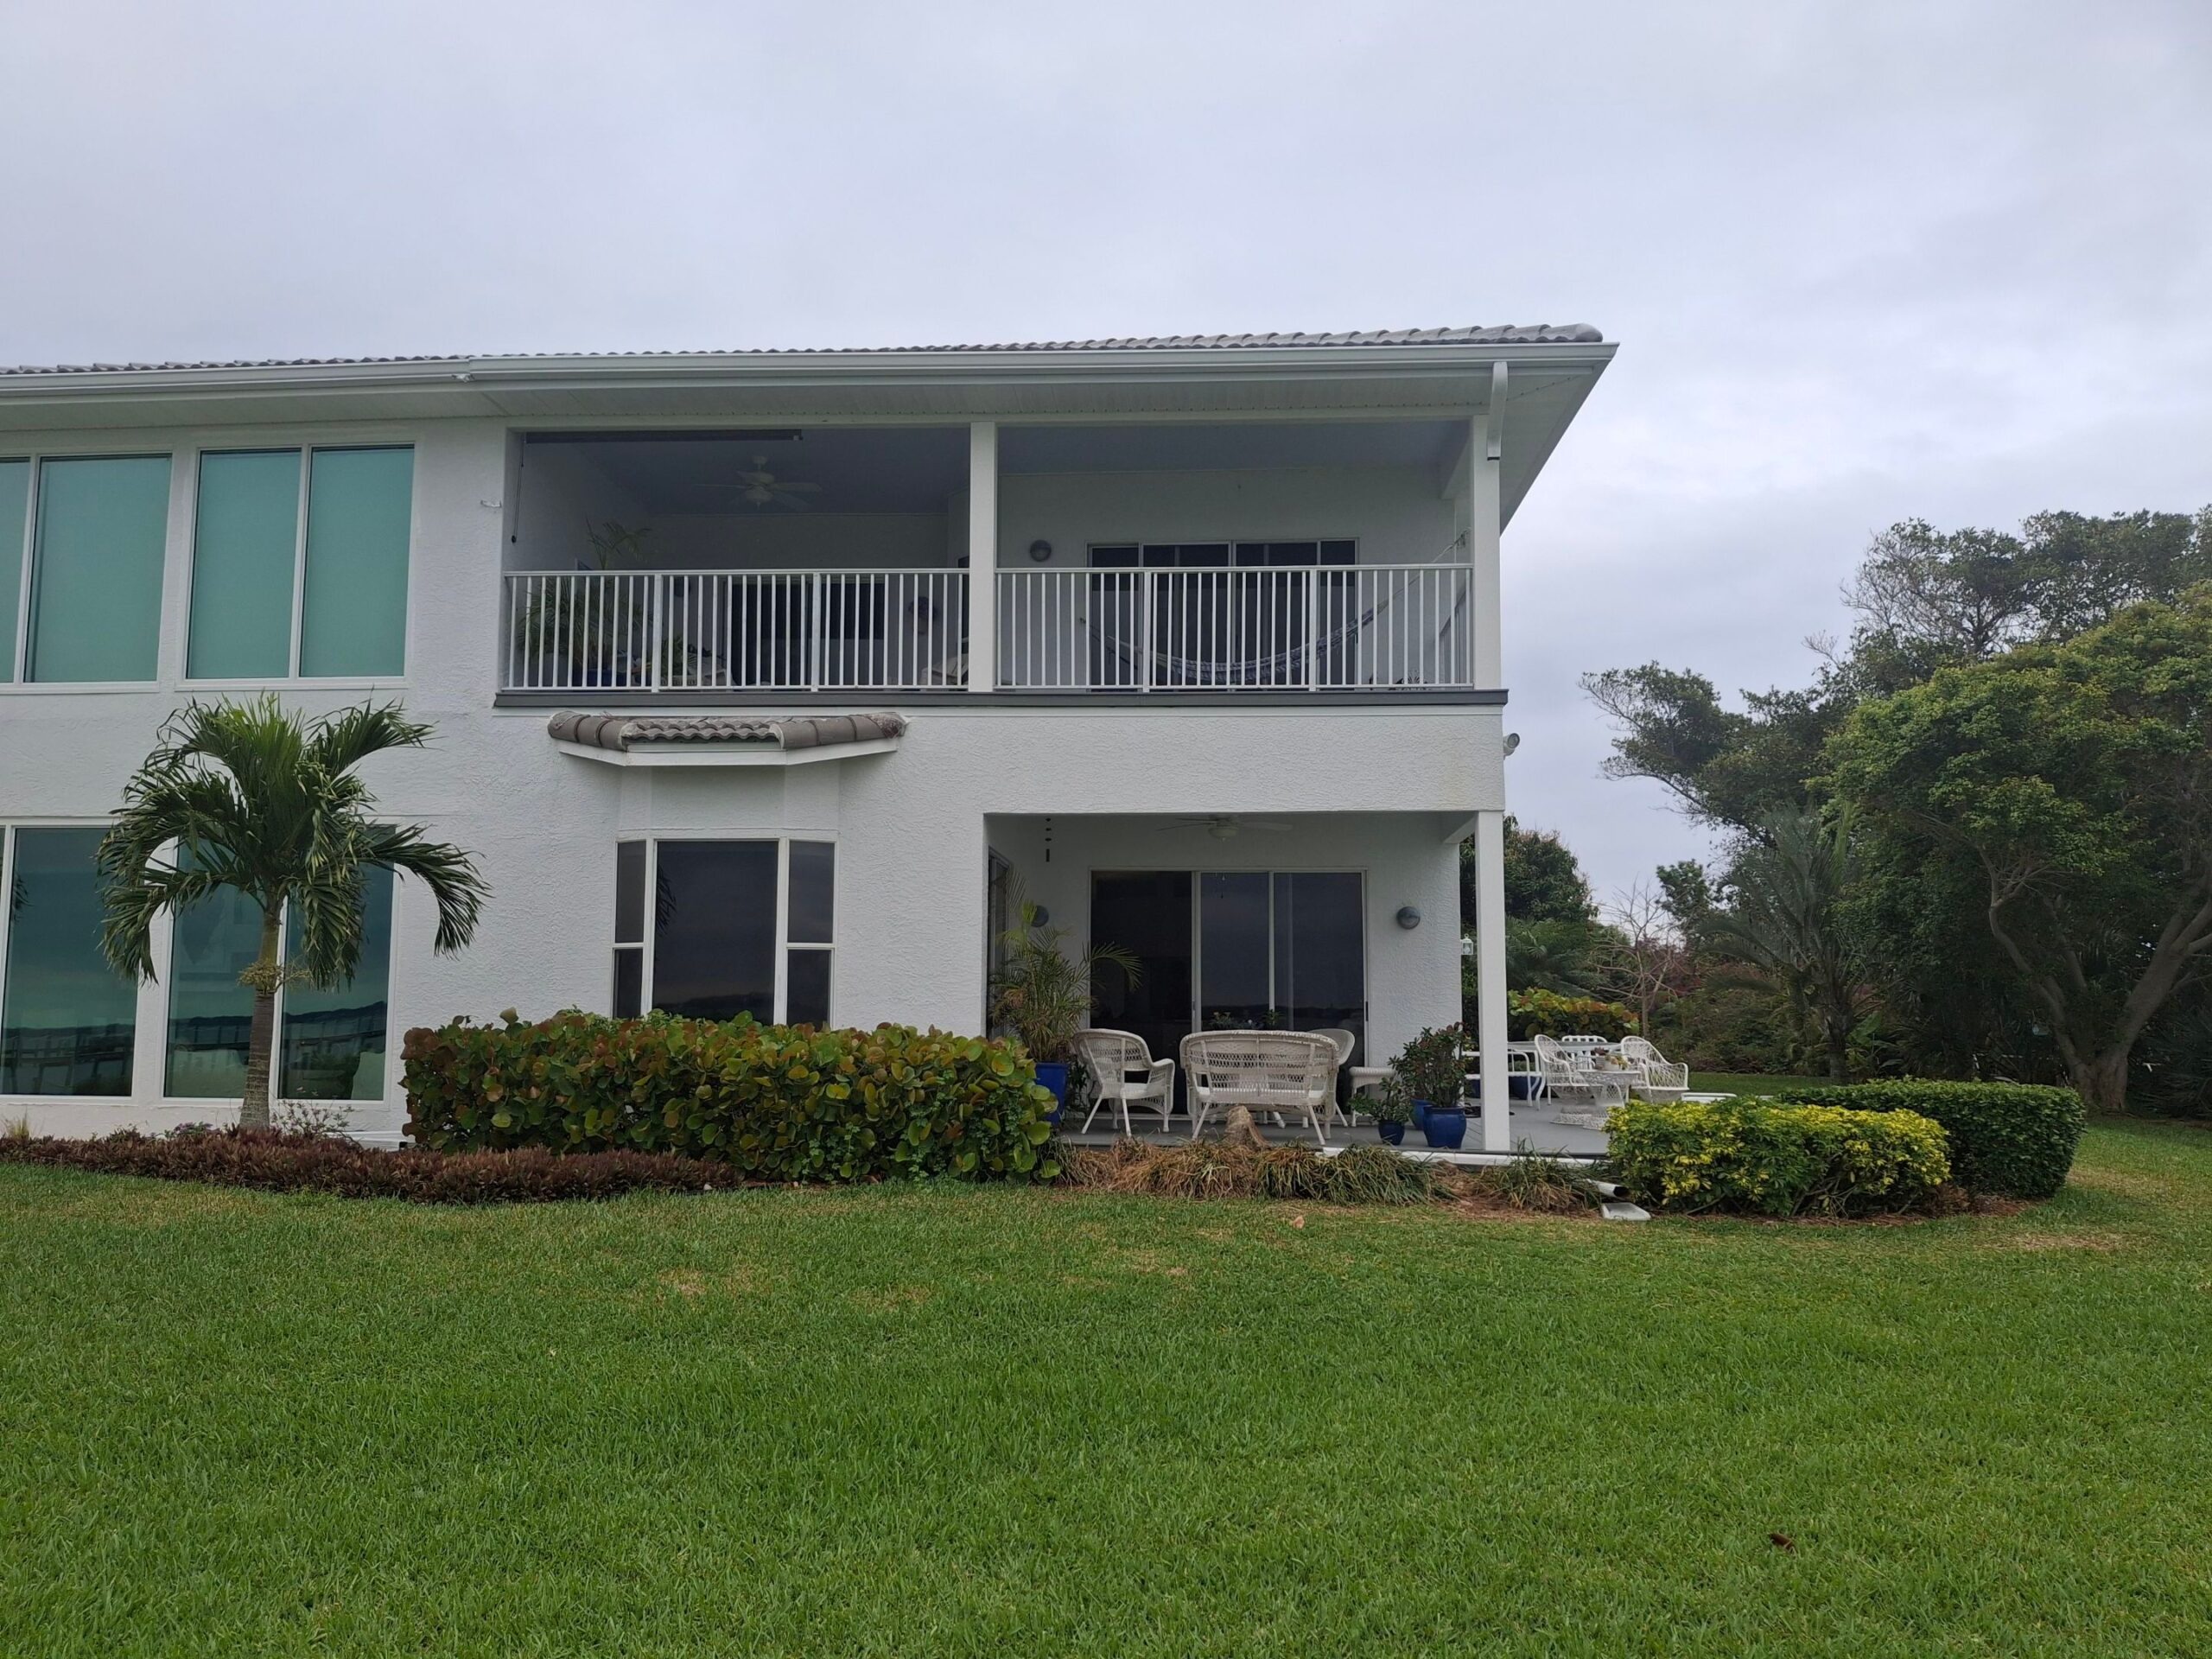
Before Pictures Of Rotten Balcony Deck
Replacing A Balcony Deck Before
Replacing A Balcony Deck Before
Balcony Roof Deck Was Failing and Leaking
Balcony Roof Deck Was Failing and Leaking
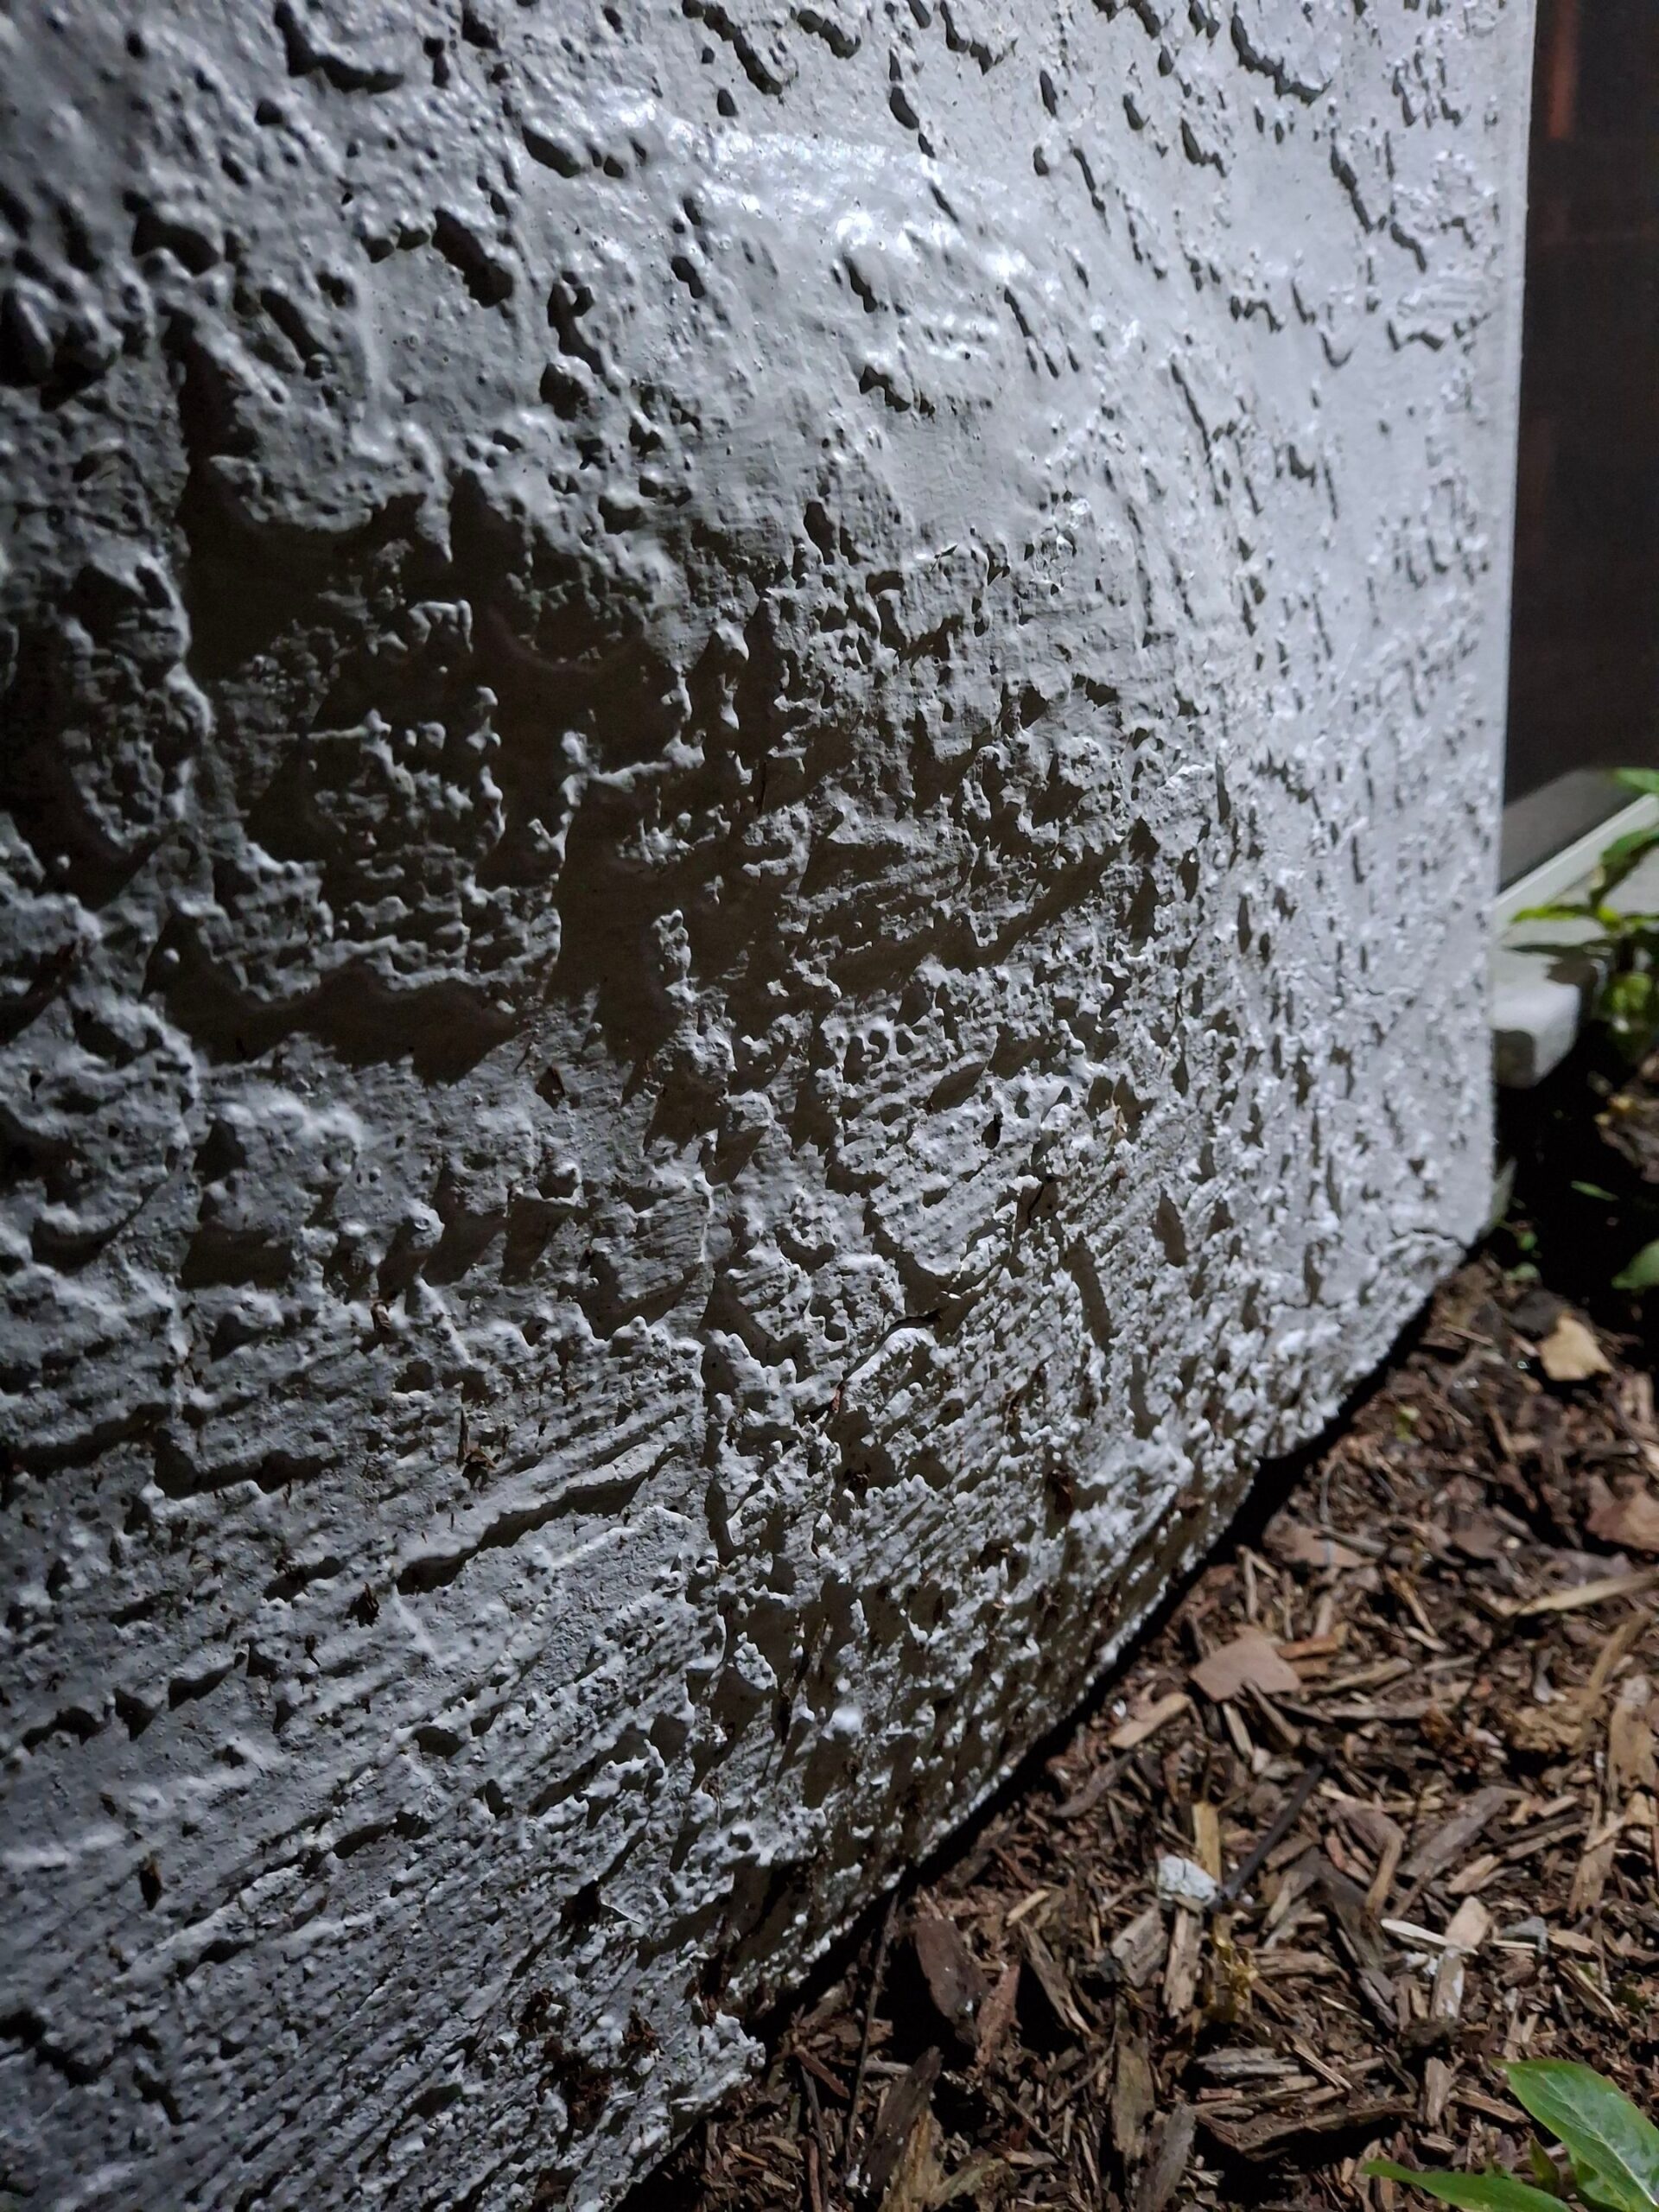
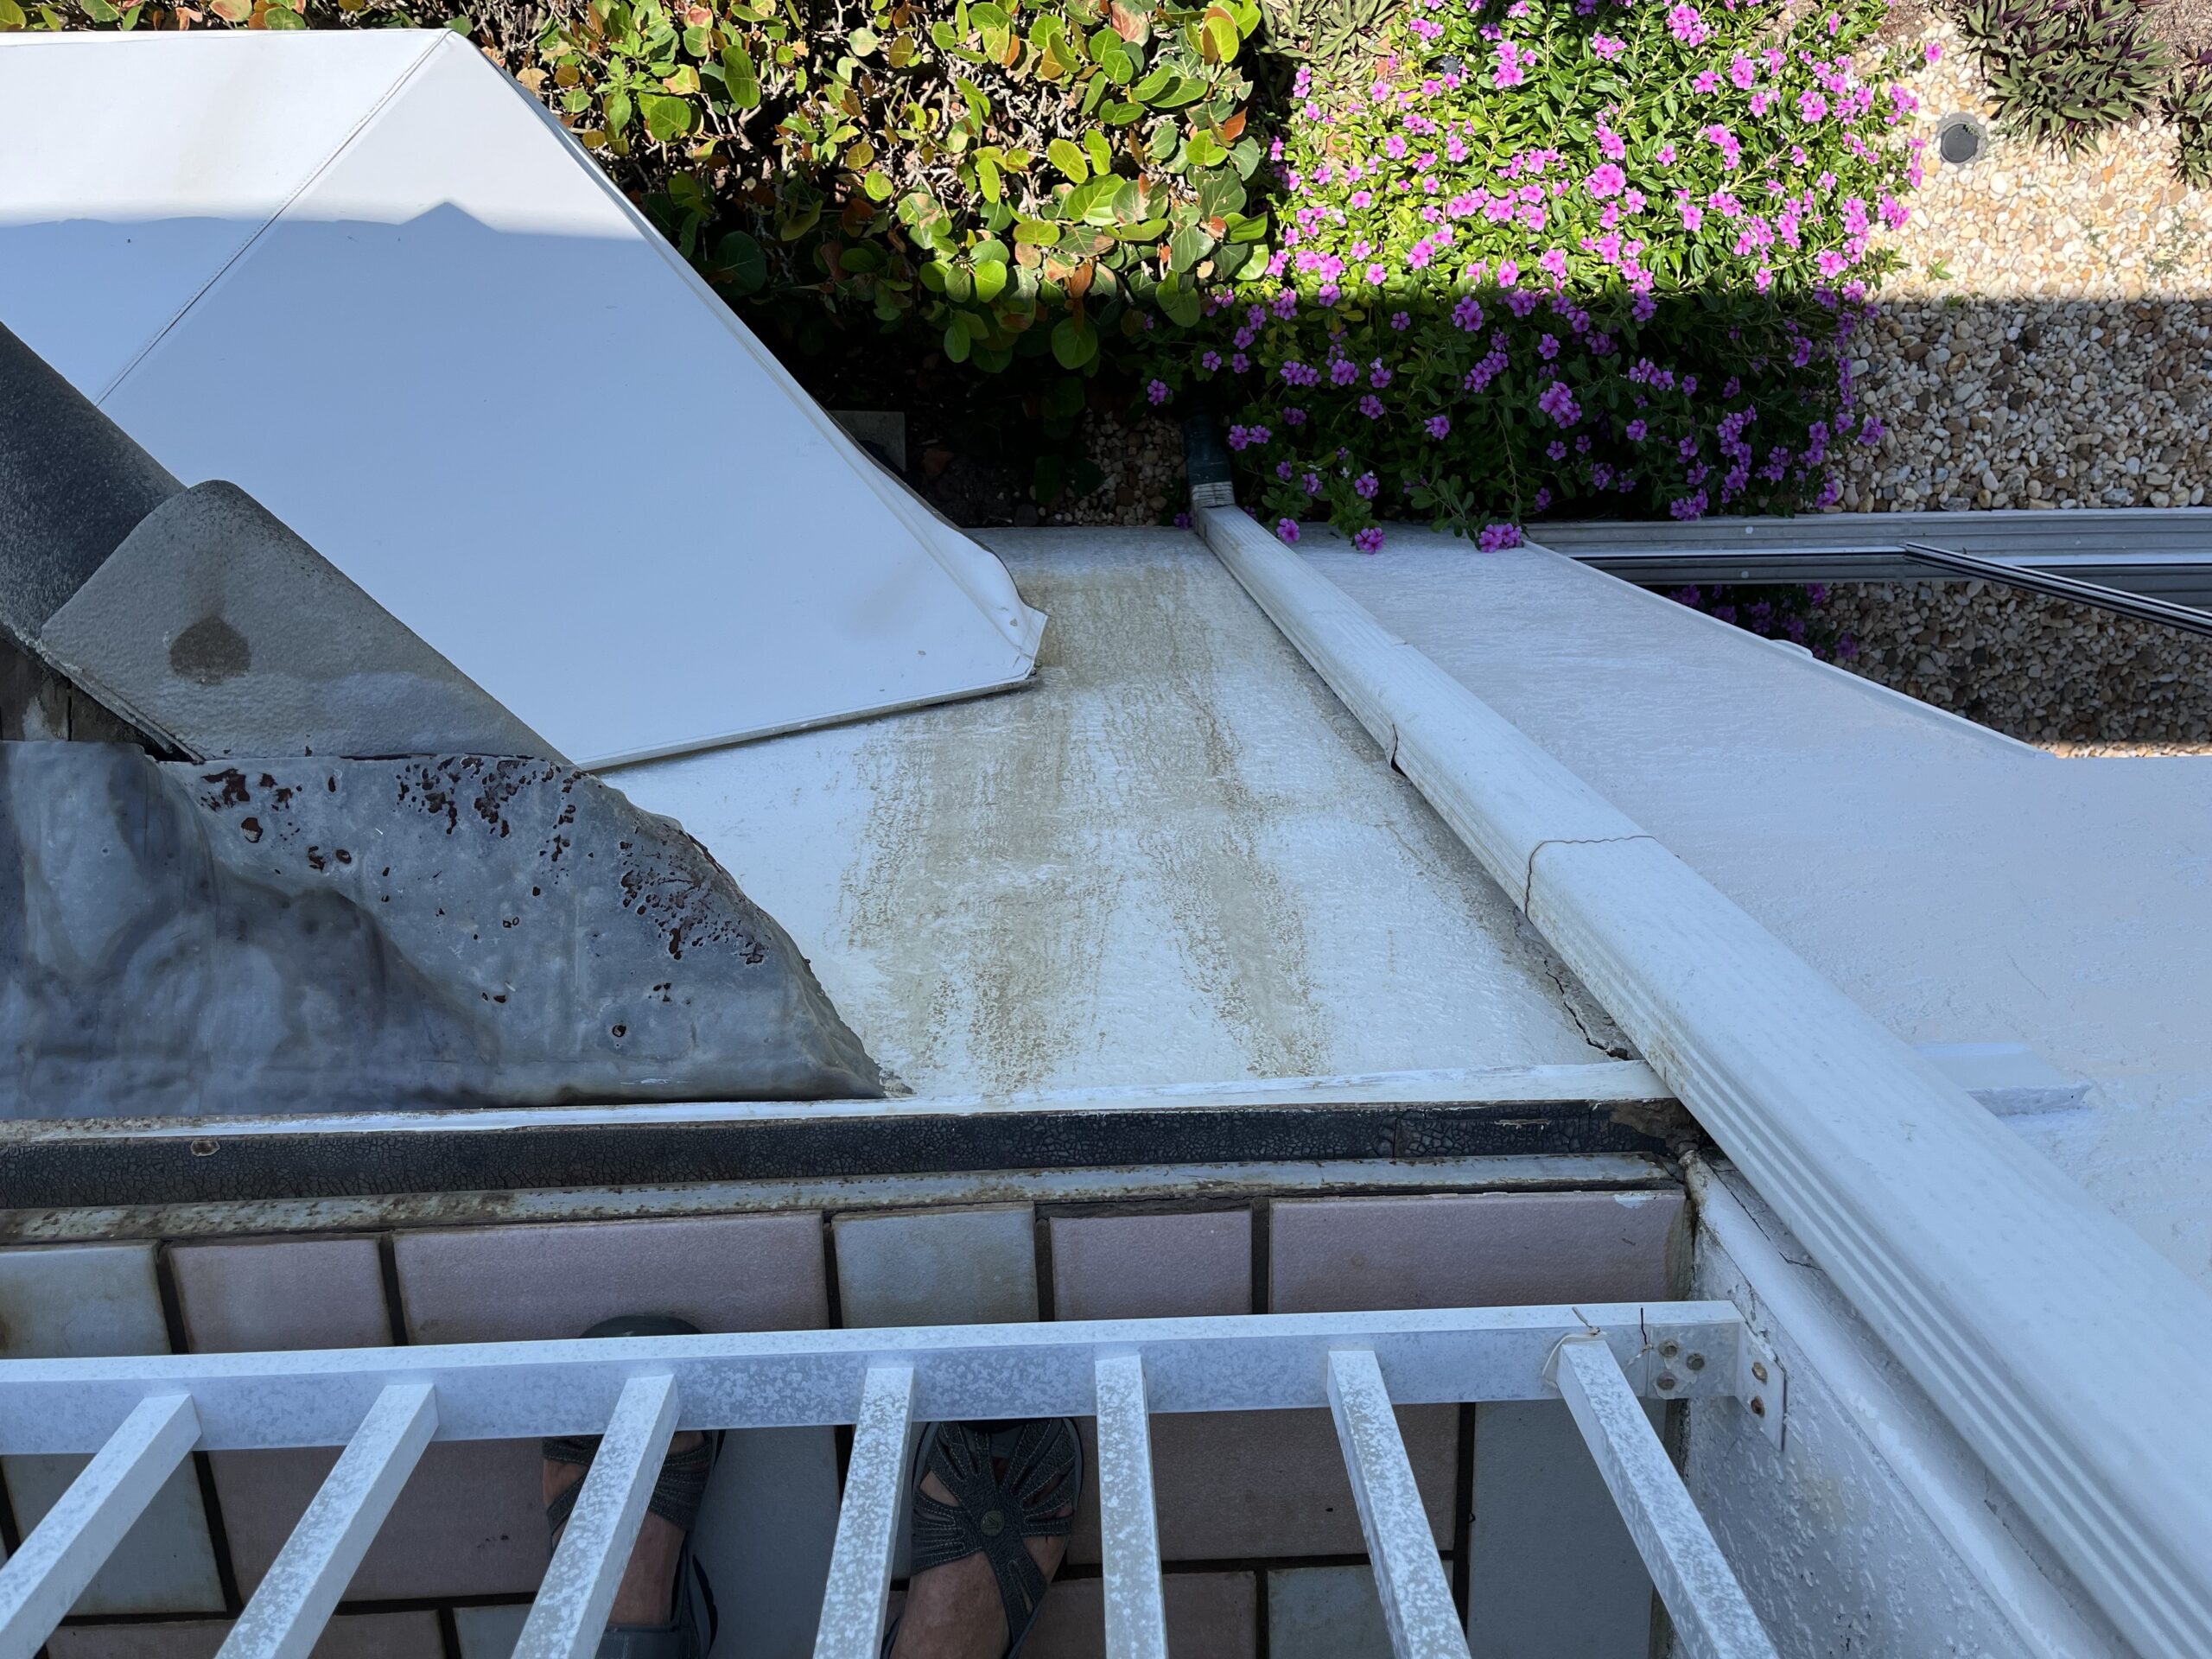
This Bubble In Stucco Is All That Was Visable Of Rotten Wood
This Bubble In Stucco Is All That Was Visable Of Rotten Wood

Post Bottom Rusted and Crushed
Post Bottom Rusted and Crushed
Balcony Decking Had Concrete 4 Inches Thick
Balcony Decking Had Concrete 4 Inches Thick
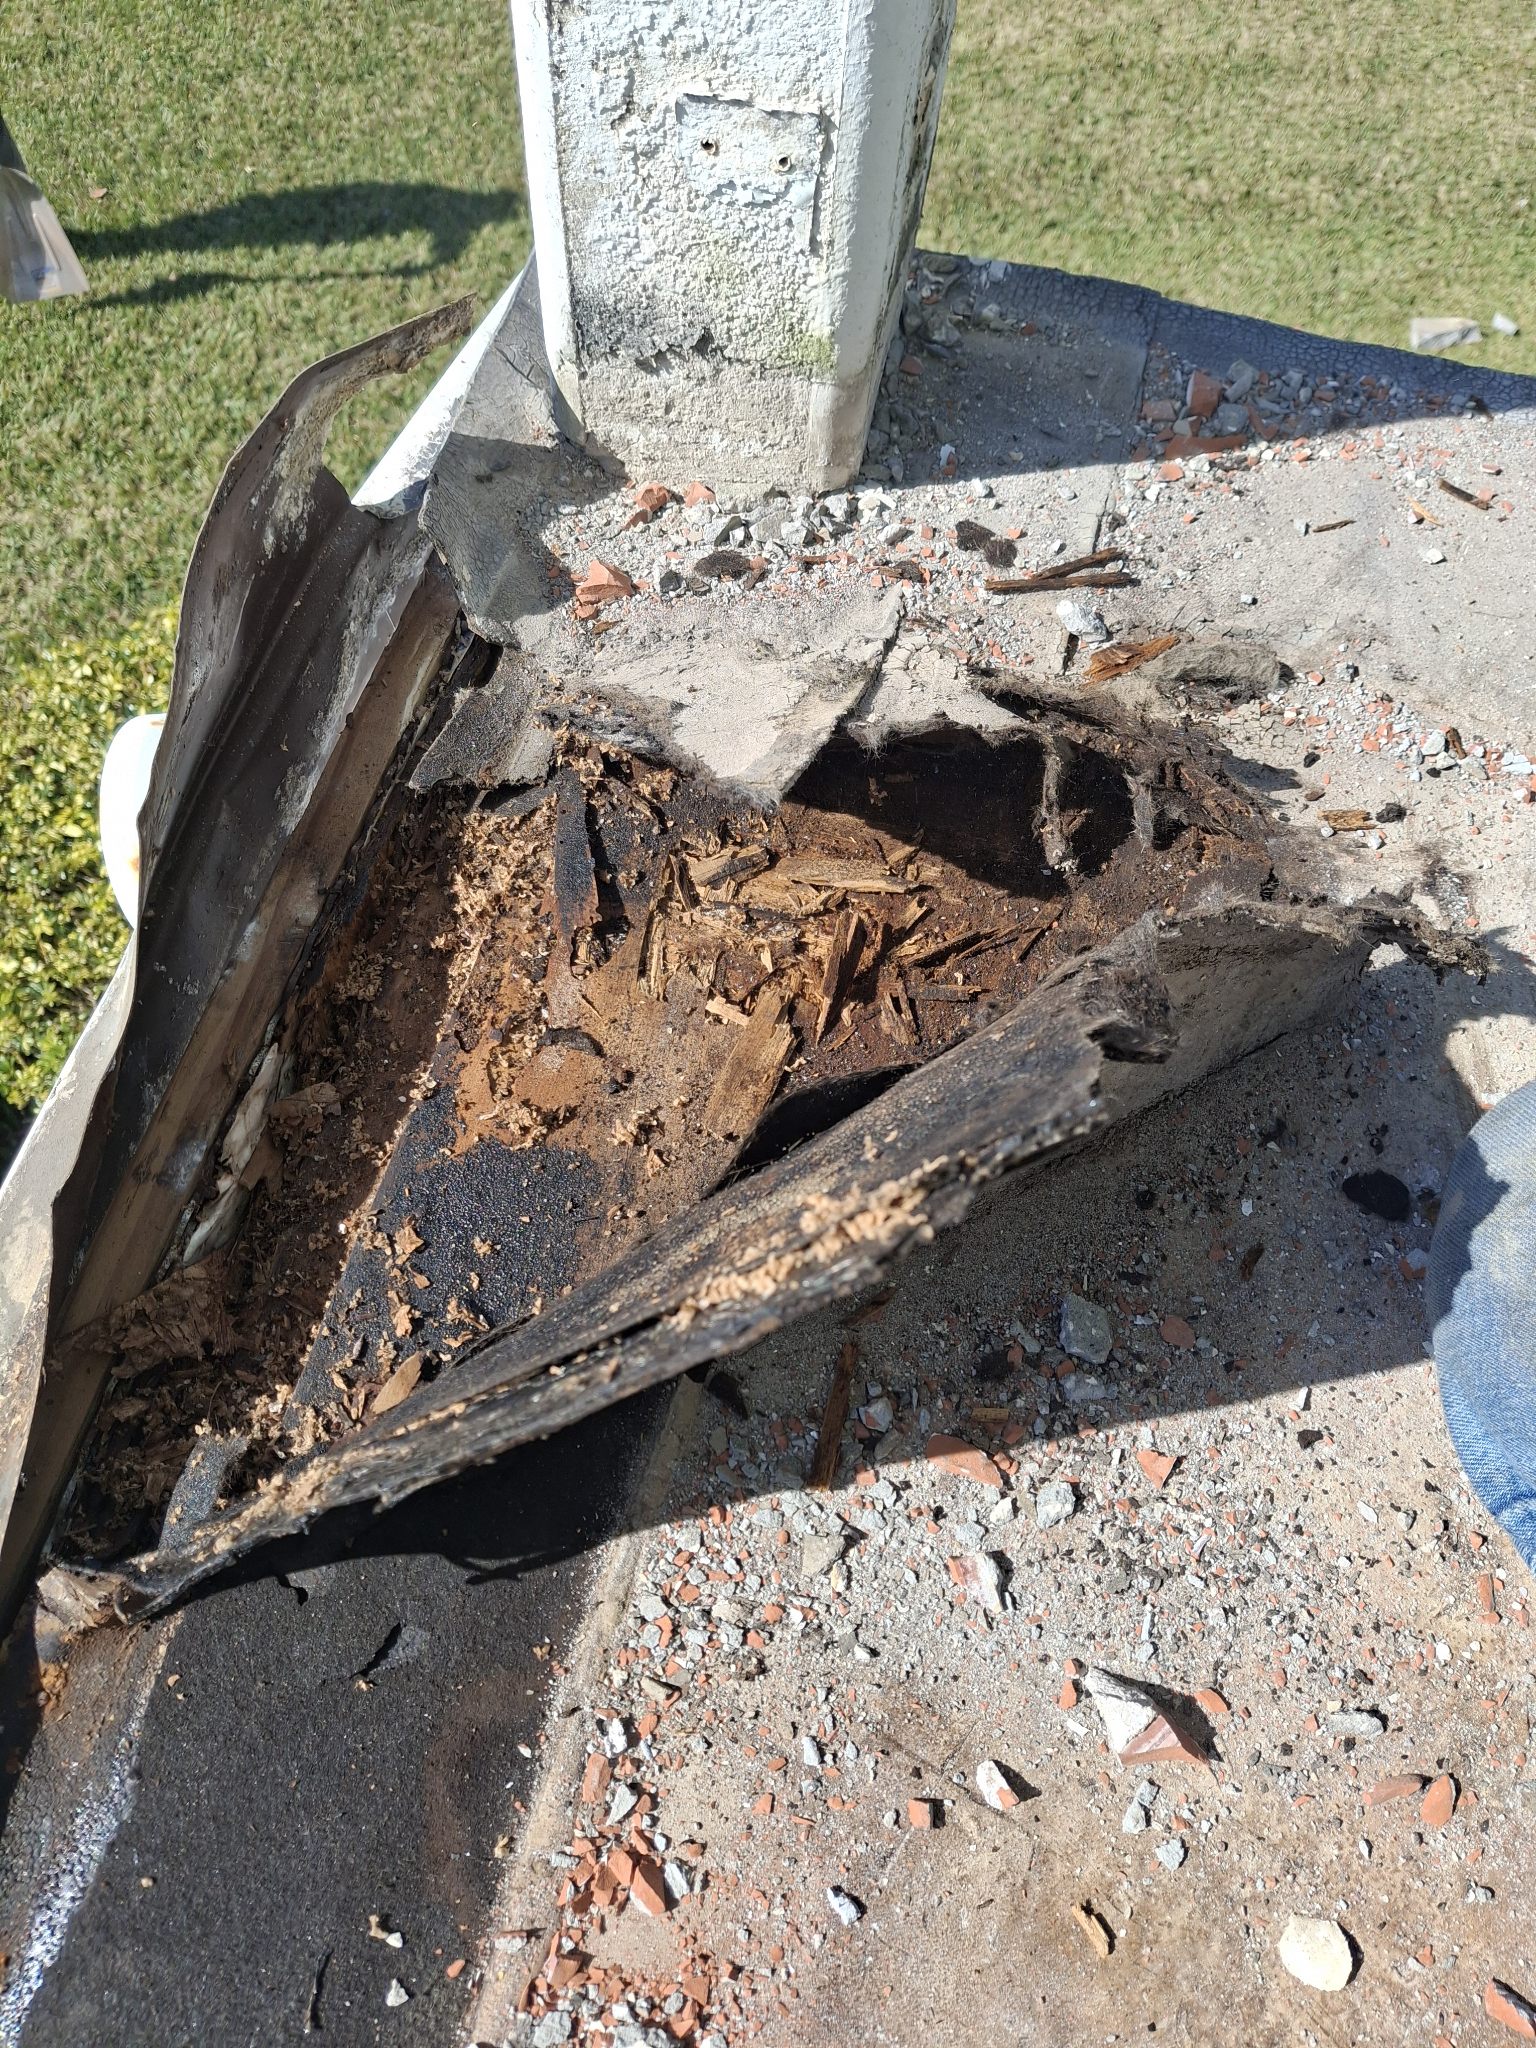
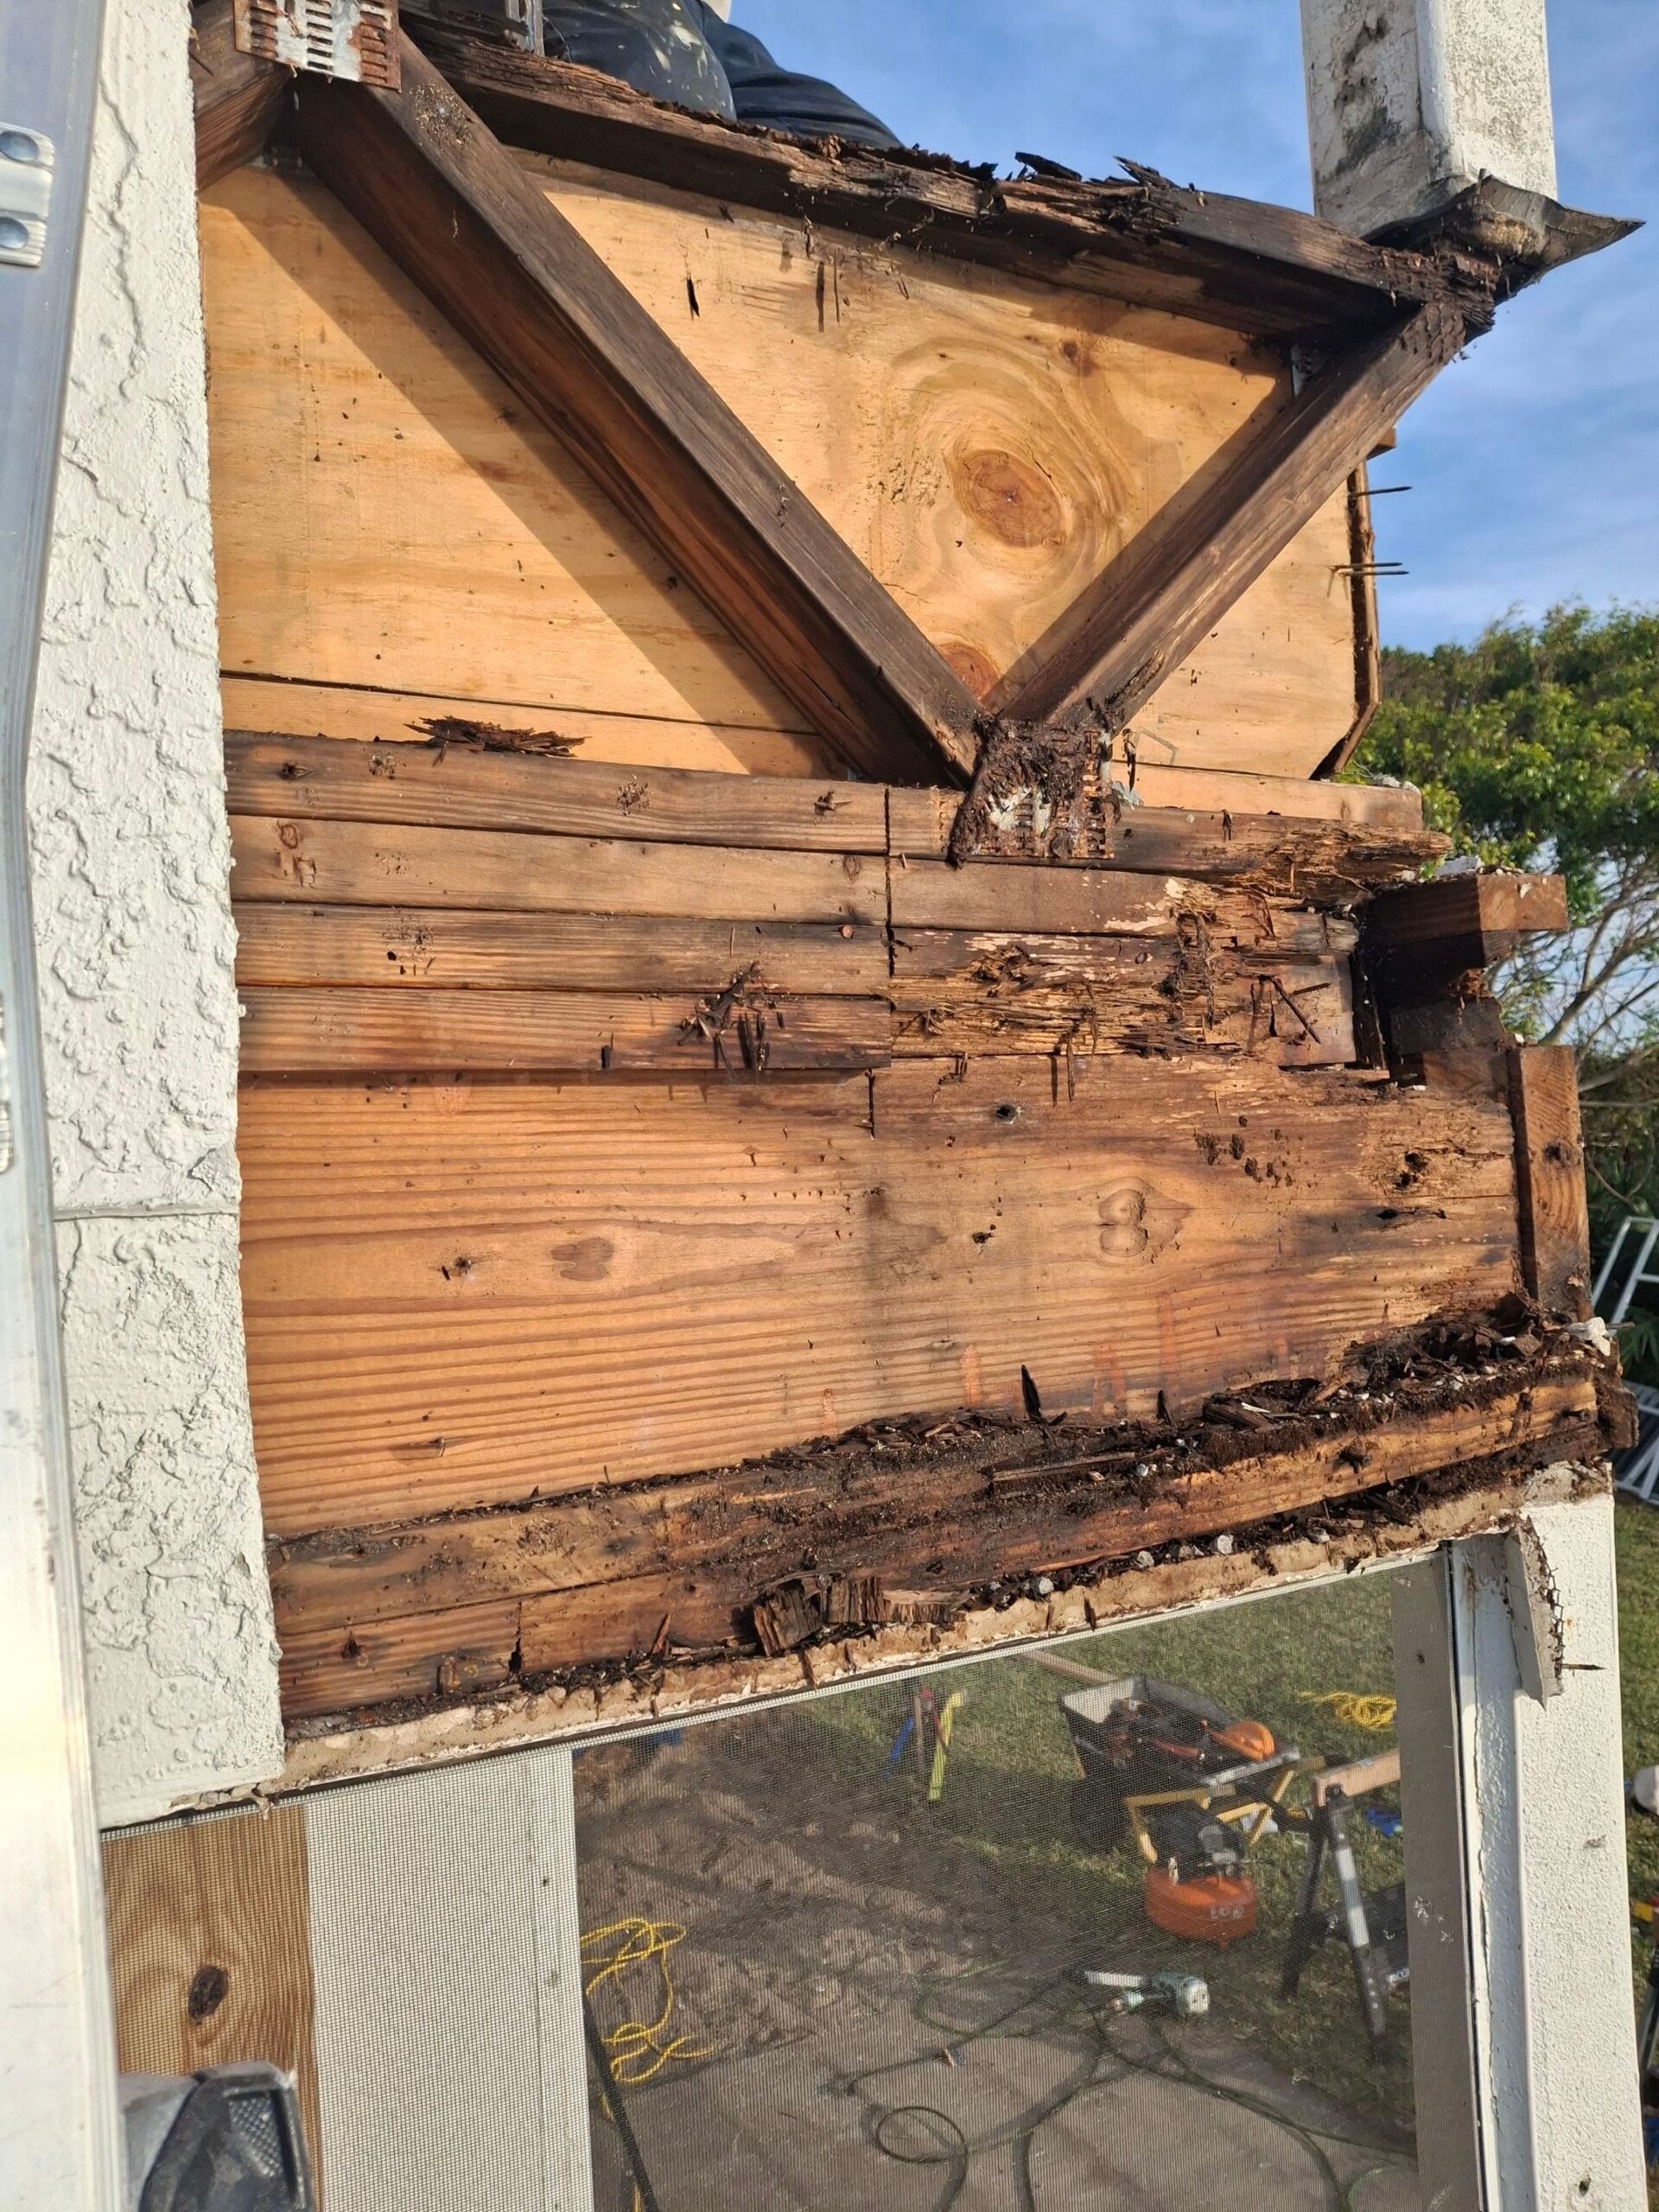
Discovering The Rotten Balcony Wood
Discovering The Rotten Balcony Wood
Rotten Damage Under Roof
Rotten Damage Under Roof
Balcony Roof was Failing
Balcony Roof was Failing
Miracle The Balcony Did Not Collapse
Miracle The Balcony Did Not Collapse
Stucco and Wire lath Held Balcony Together
Stucco and Wire lath Held Balcony Together
Beam Was Sagging With Weight
Beam Was Sagging With Weight
Bearing Points Rotted
Bearing Points Rotted
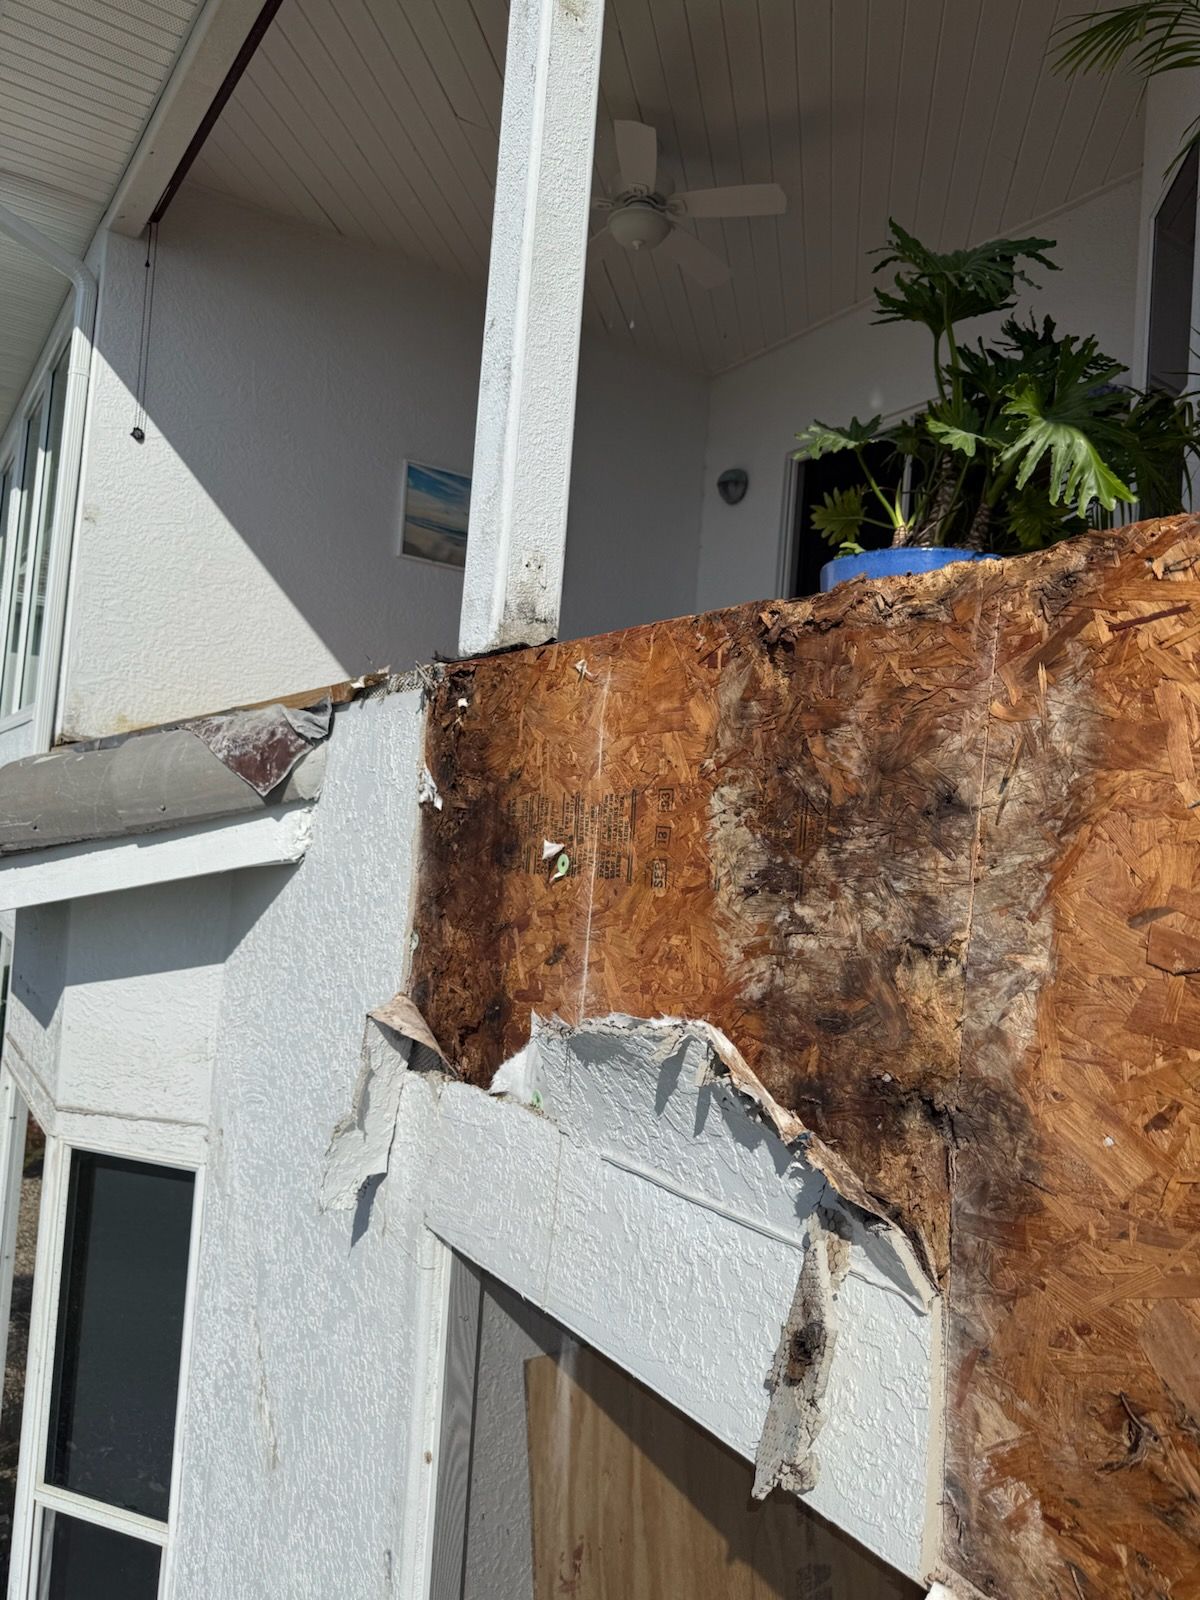
Plywood Rotting Behind Stucco
Plywood Rotting Behind Stucco
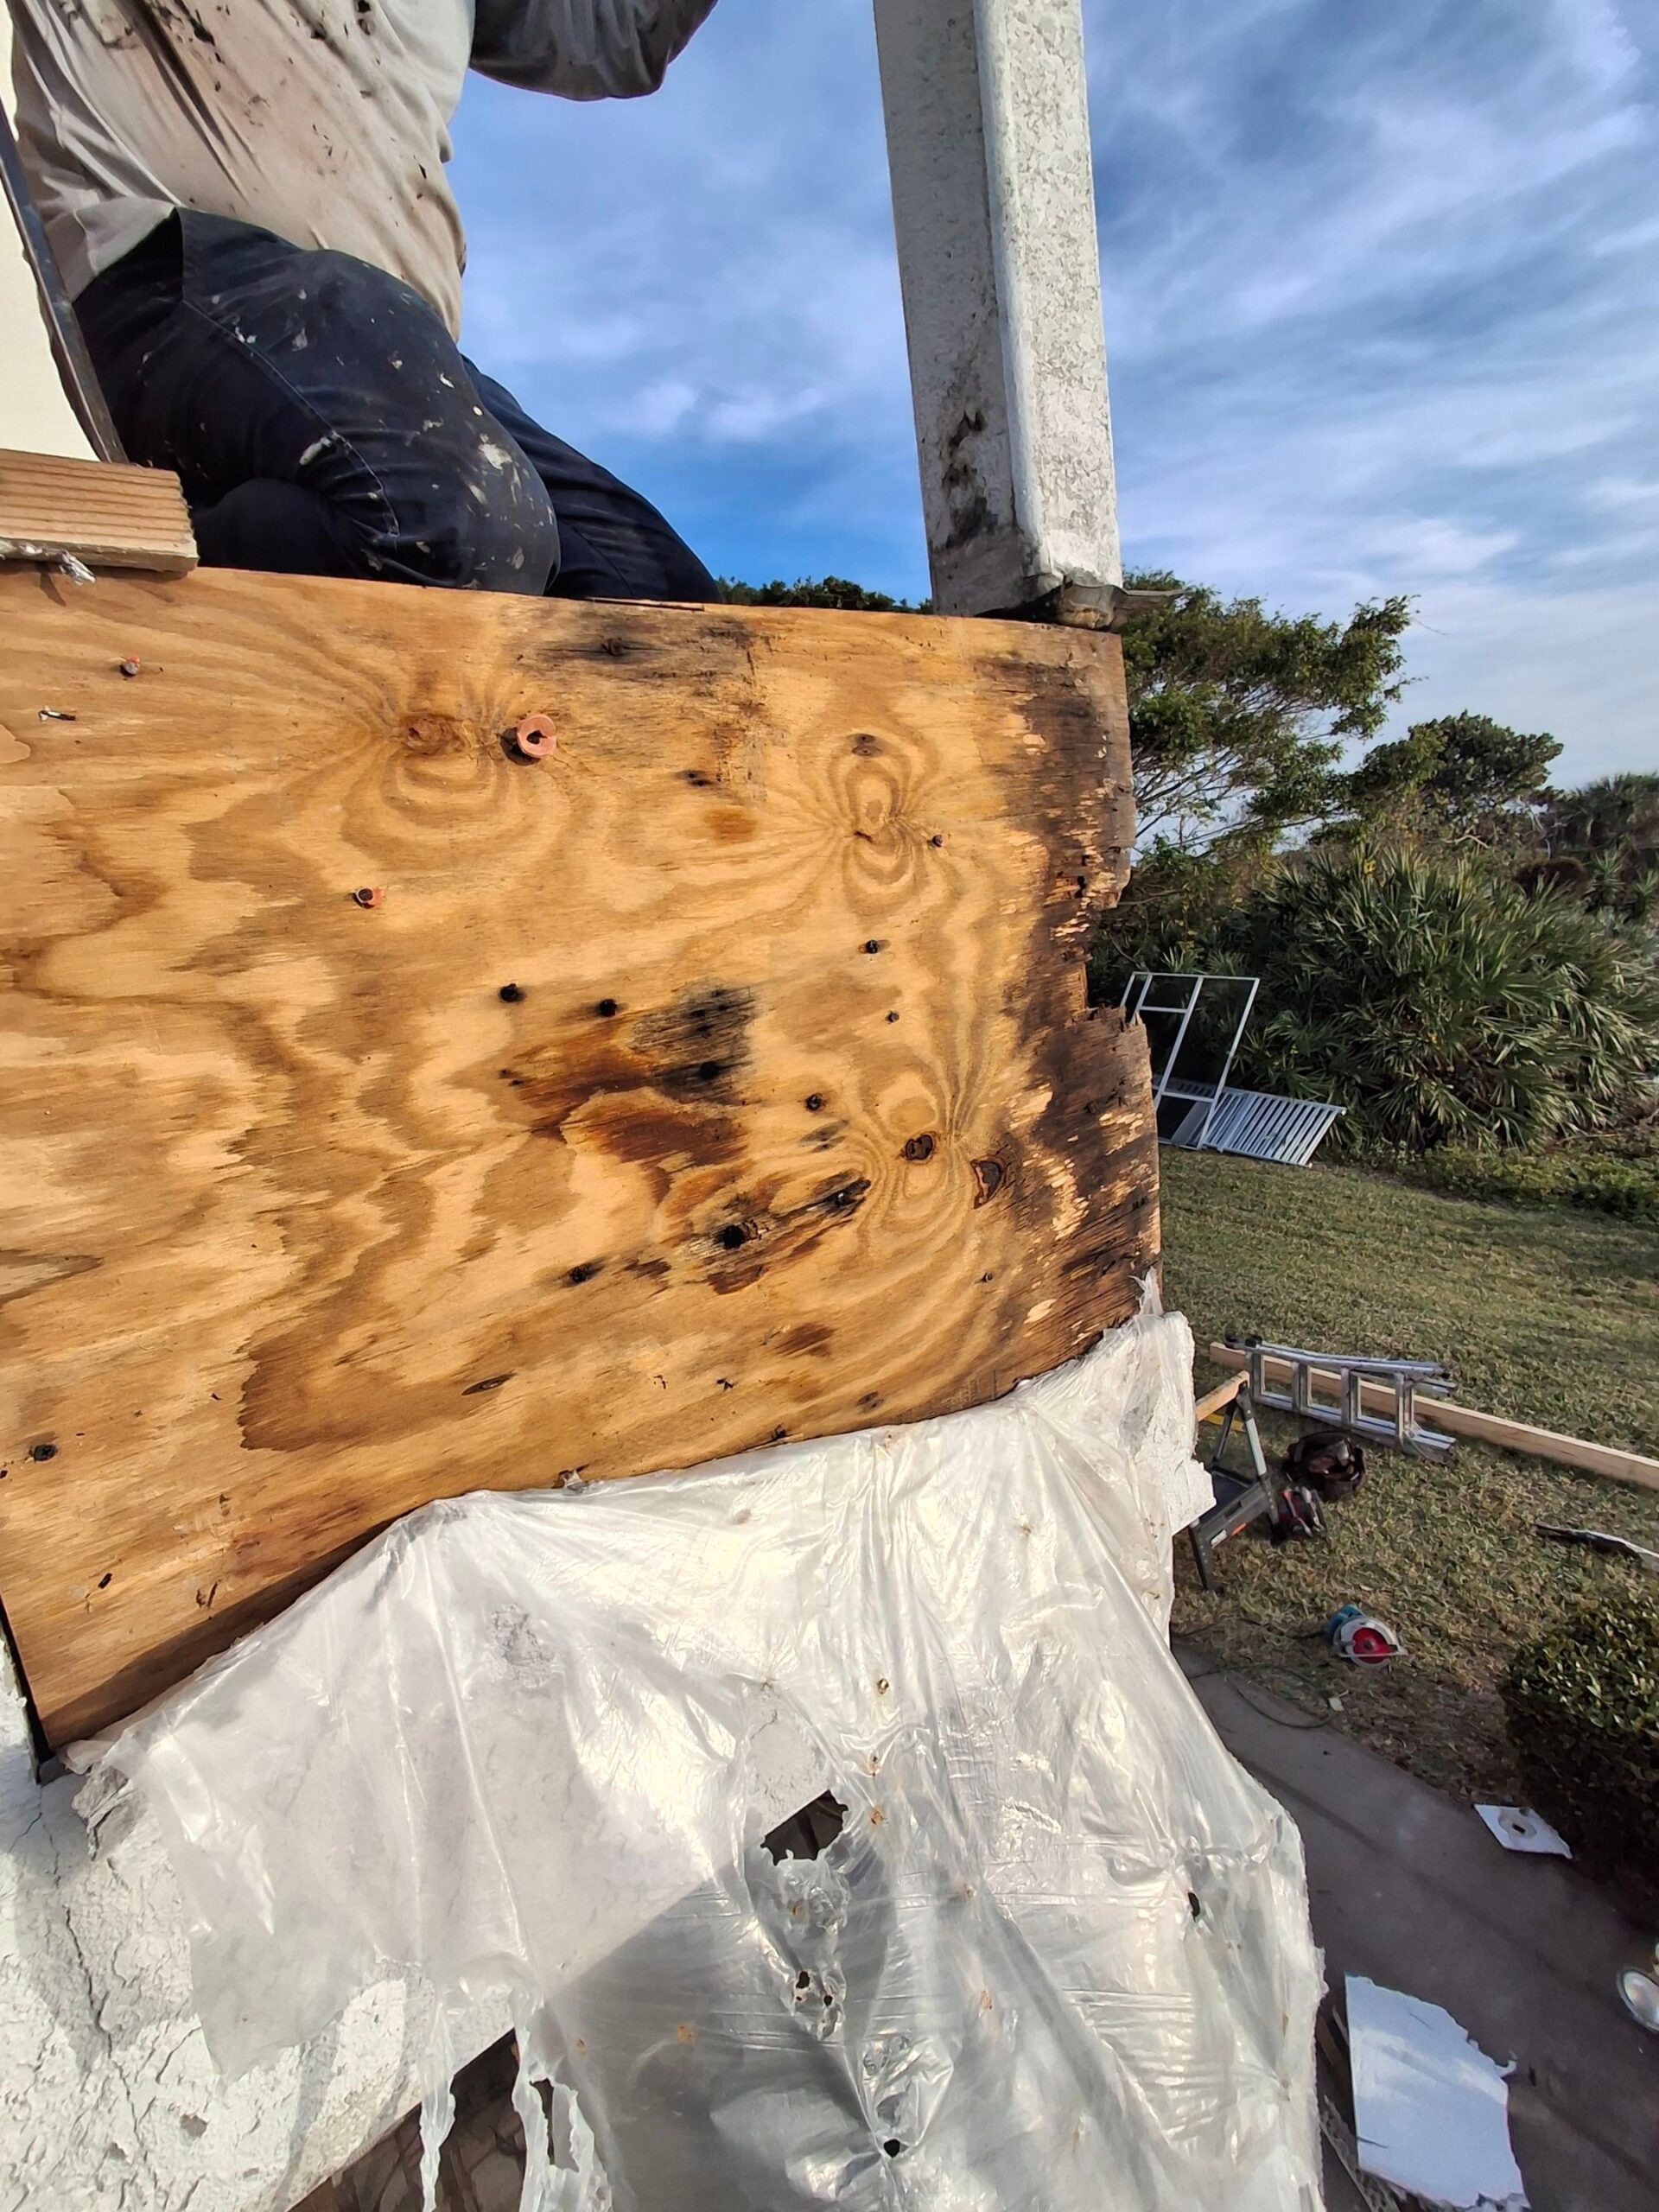
Rotted Balcony Plywood
Rotted Balcony Plywood
Top Post Carrying Roof Was Not Supported
Top Post Carrying Roof Was Not Supported
Old Decking Was Laying in the Ground
Old Decking Was Laying in the Ground
After Pictures Of Rotten Balcony Deck
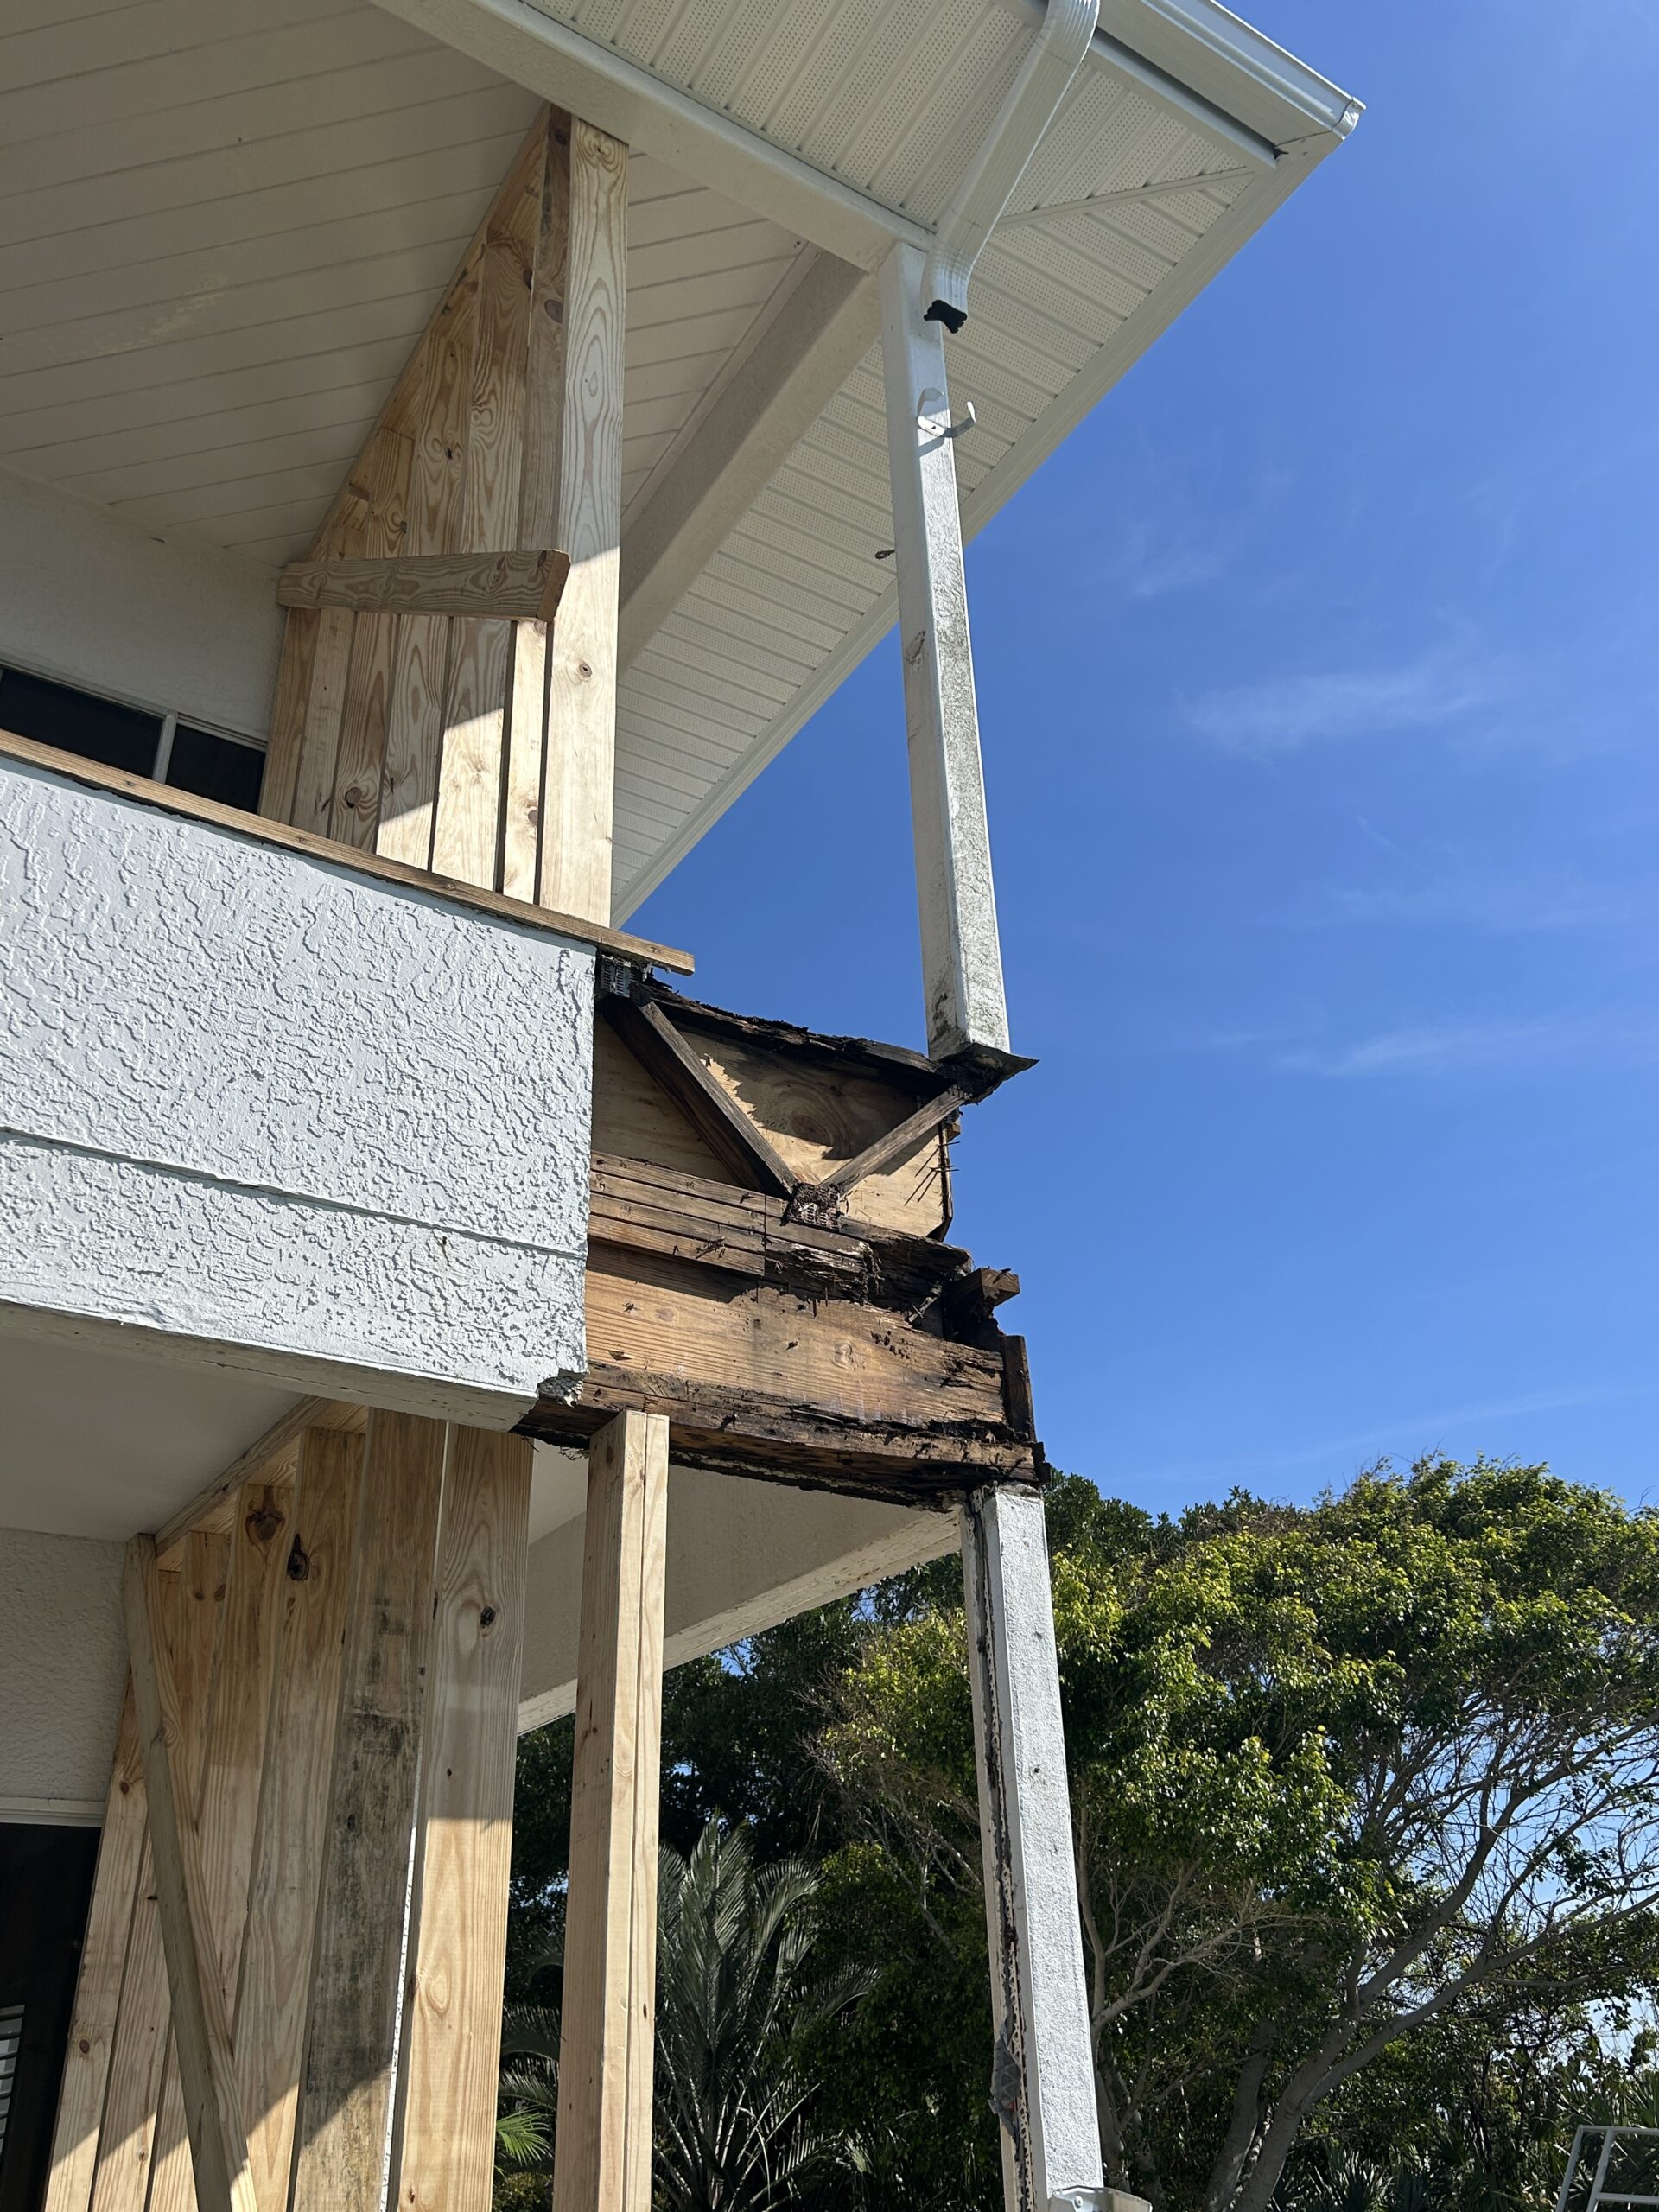
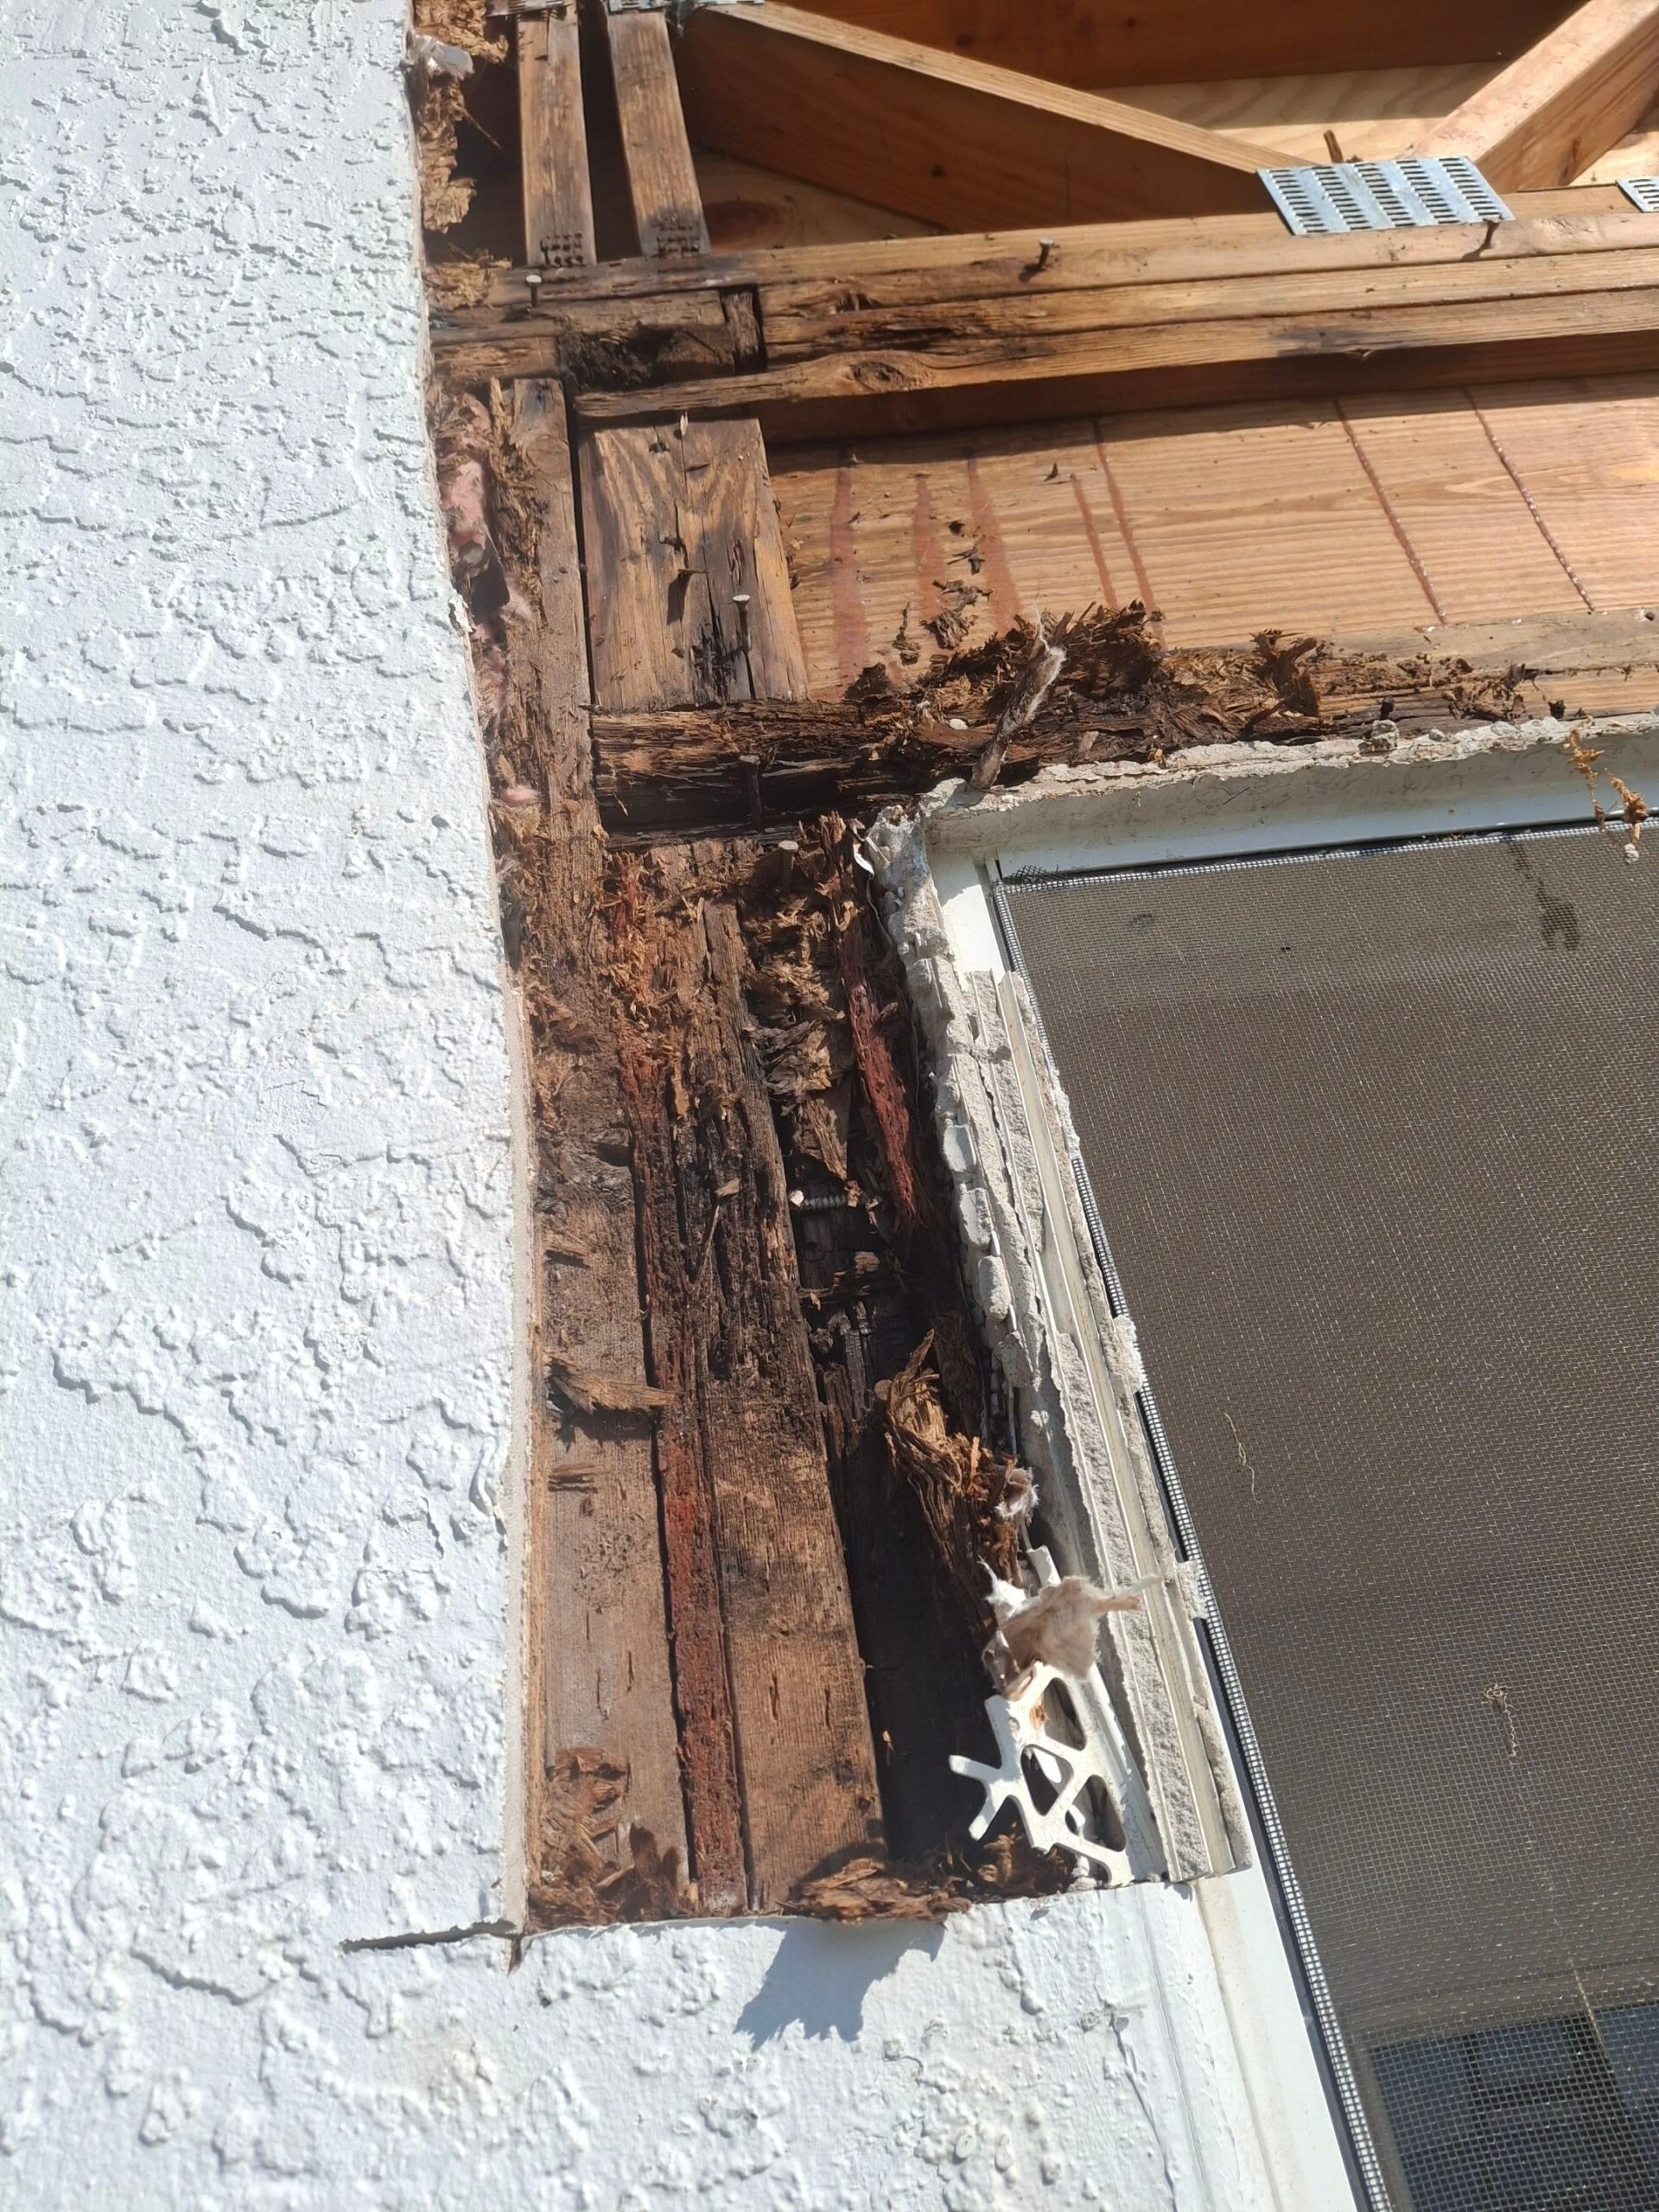
Rotten Wood Both Sides Of Bay Window
Rotten Wood Both Sides Of Bay Window
Ready for Weather Wrap and Stucco
Ready for Weather Wrap and Stucco
All Rotten Wood Replaced
All Rotten Wood Replaced
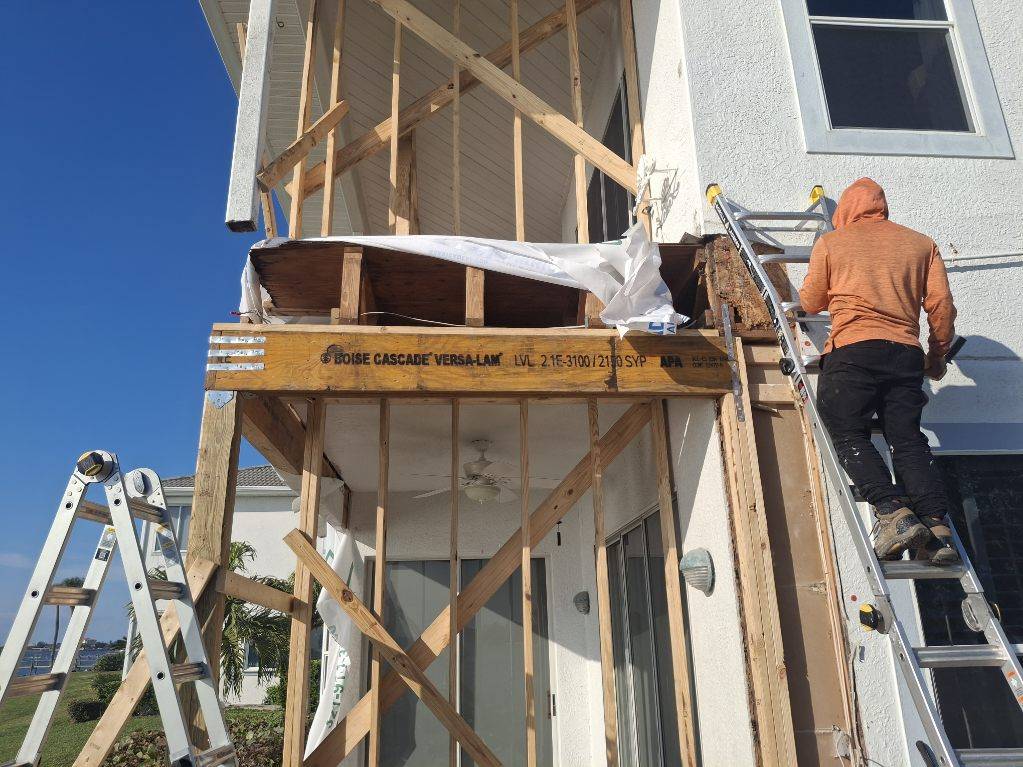
LVL Installed and Strapped
LVL Installed and Strapped

Post Waterproofed
Post Waterproofed
Flashing The Flashing
Flashing The Flashing
Before 6×6 Trim
Before 6×6 Trim
Leveling Stringers
Leveling Stringers
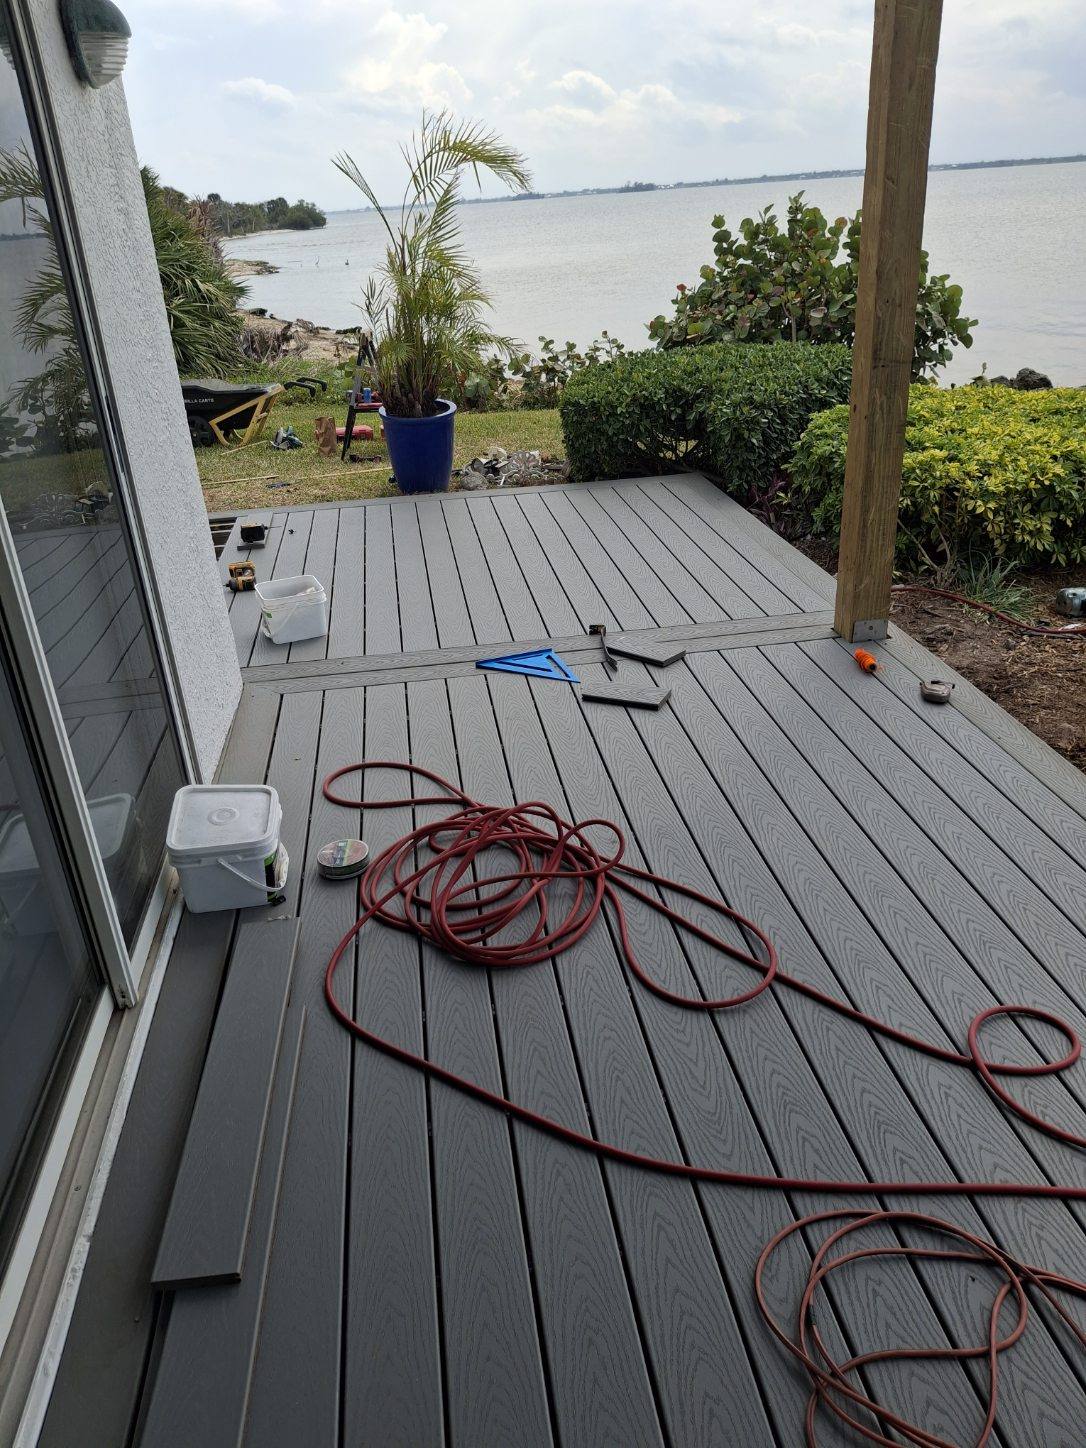
Picture Framing Decking
Picture Framing Decking
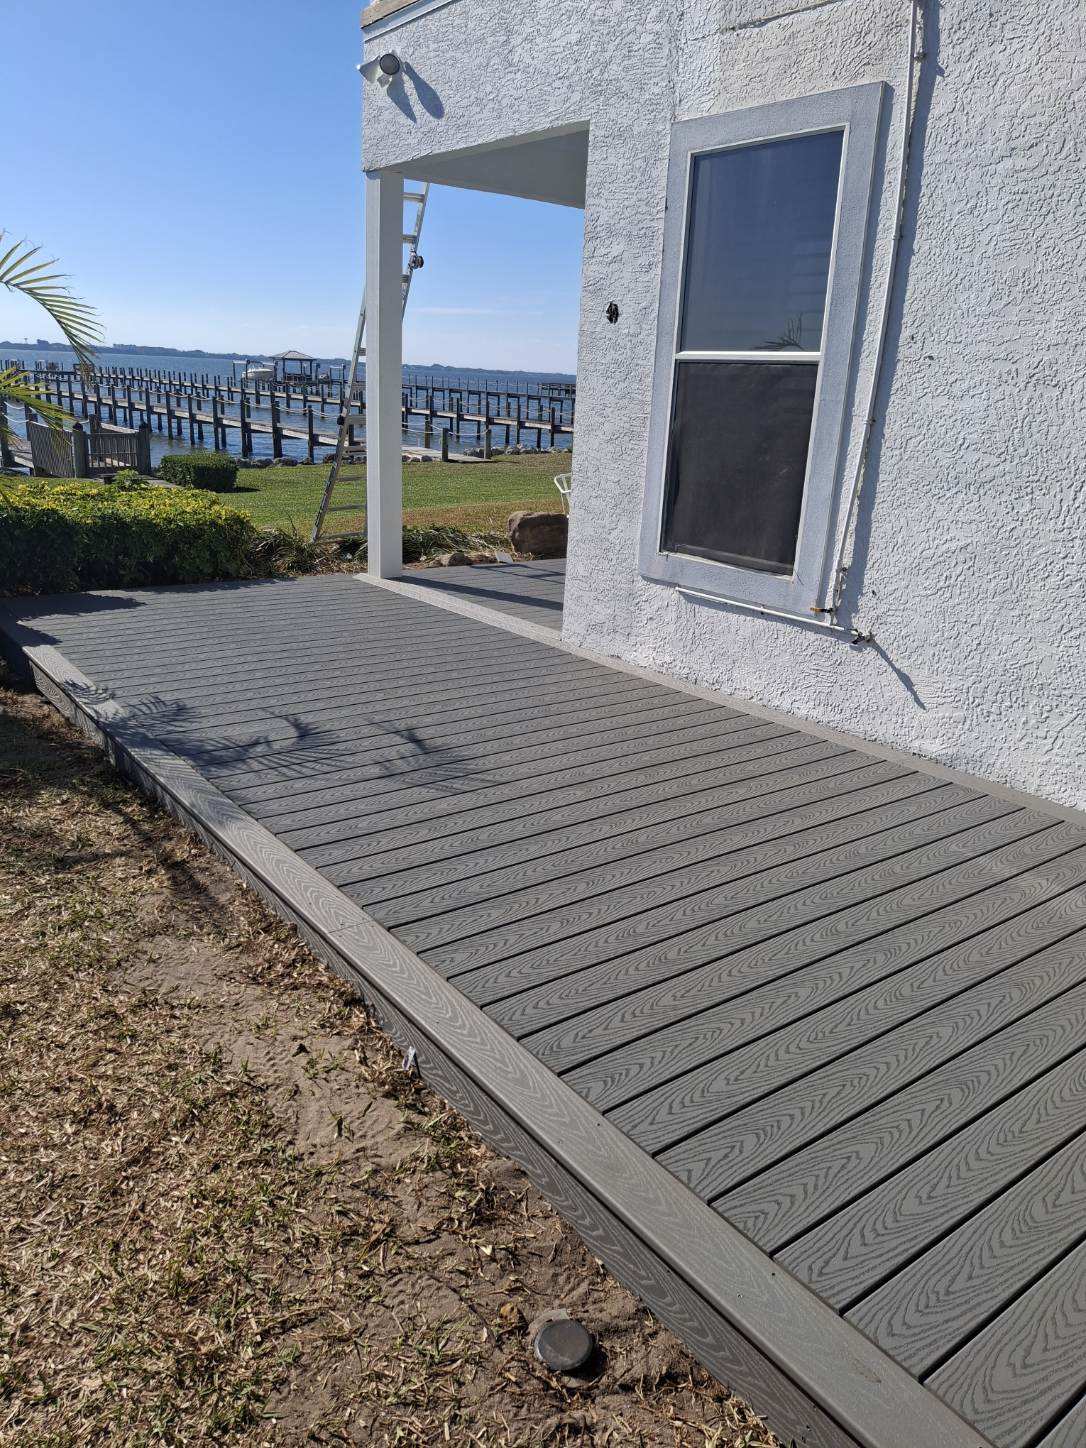
Last Board on Balcony Deck
Last Board on Balcony Deck
Trek Decking Level
Trek Decking Level
Only a little painting left
Only a little painting left
Railing Last To Install
Railing Last To Install
Finishing Touches on Balcony Deck
Finishing Touches on Balcony Deck
Railing Installed
Railing Installed
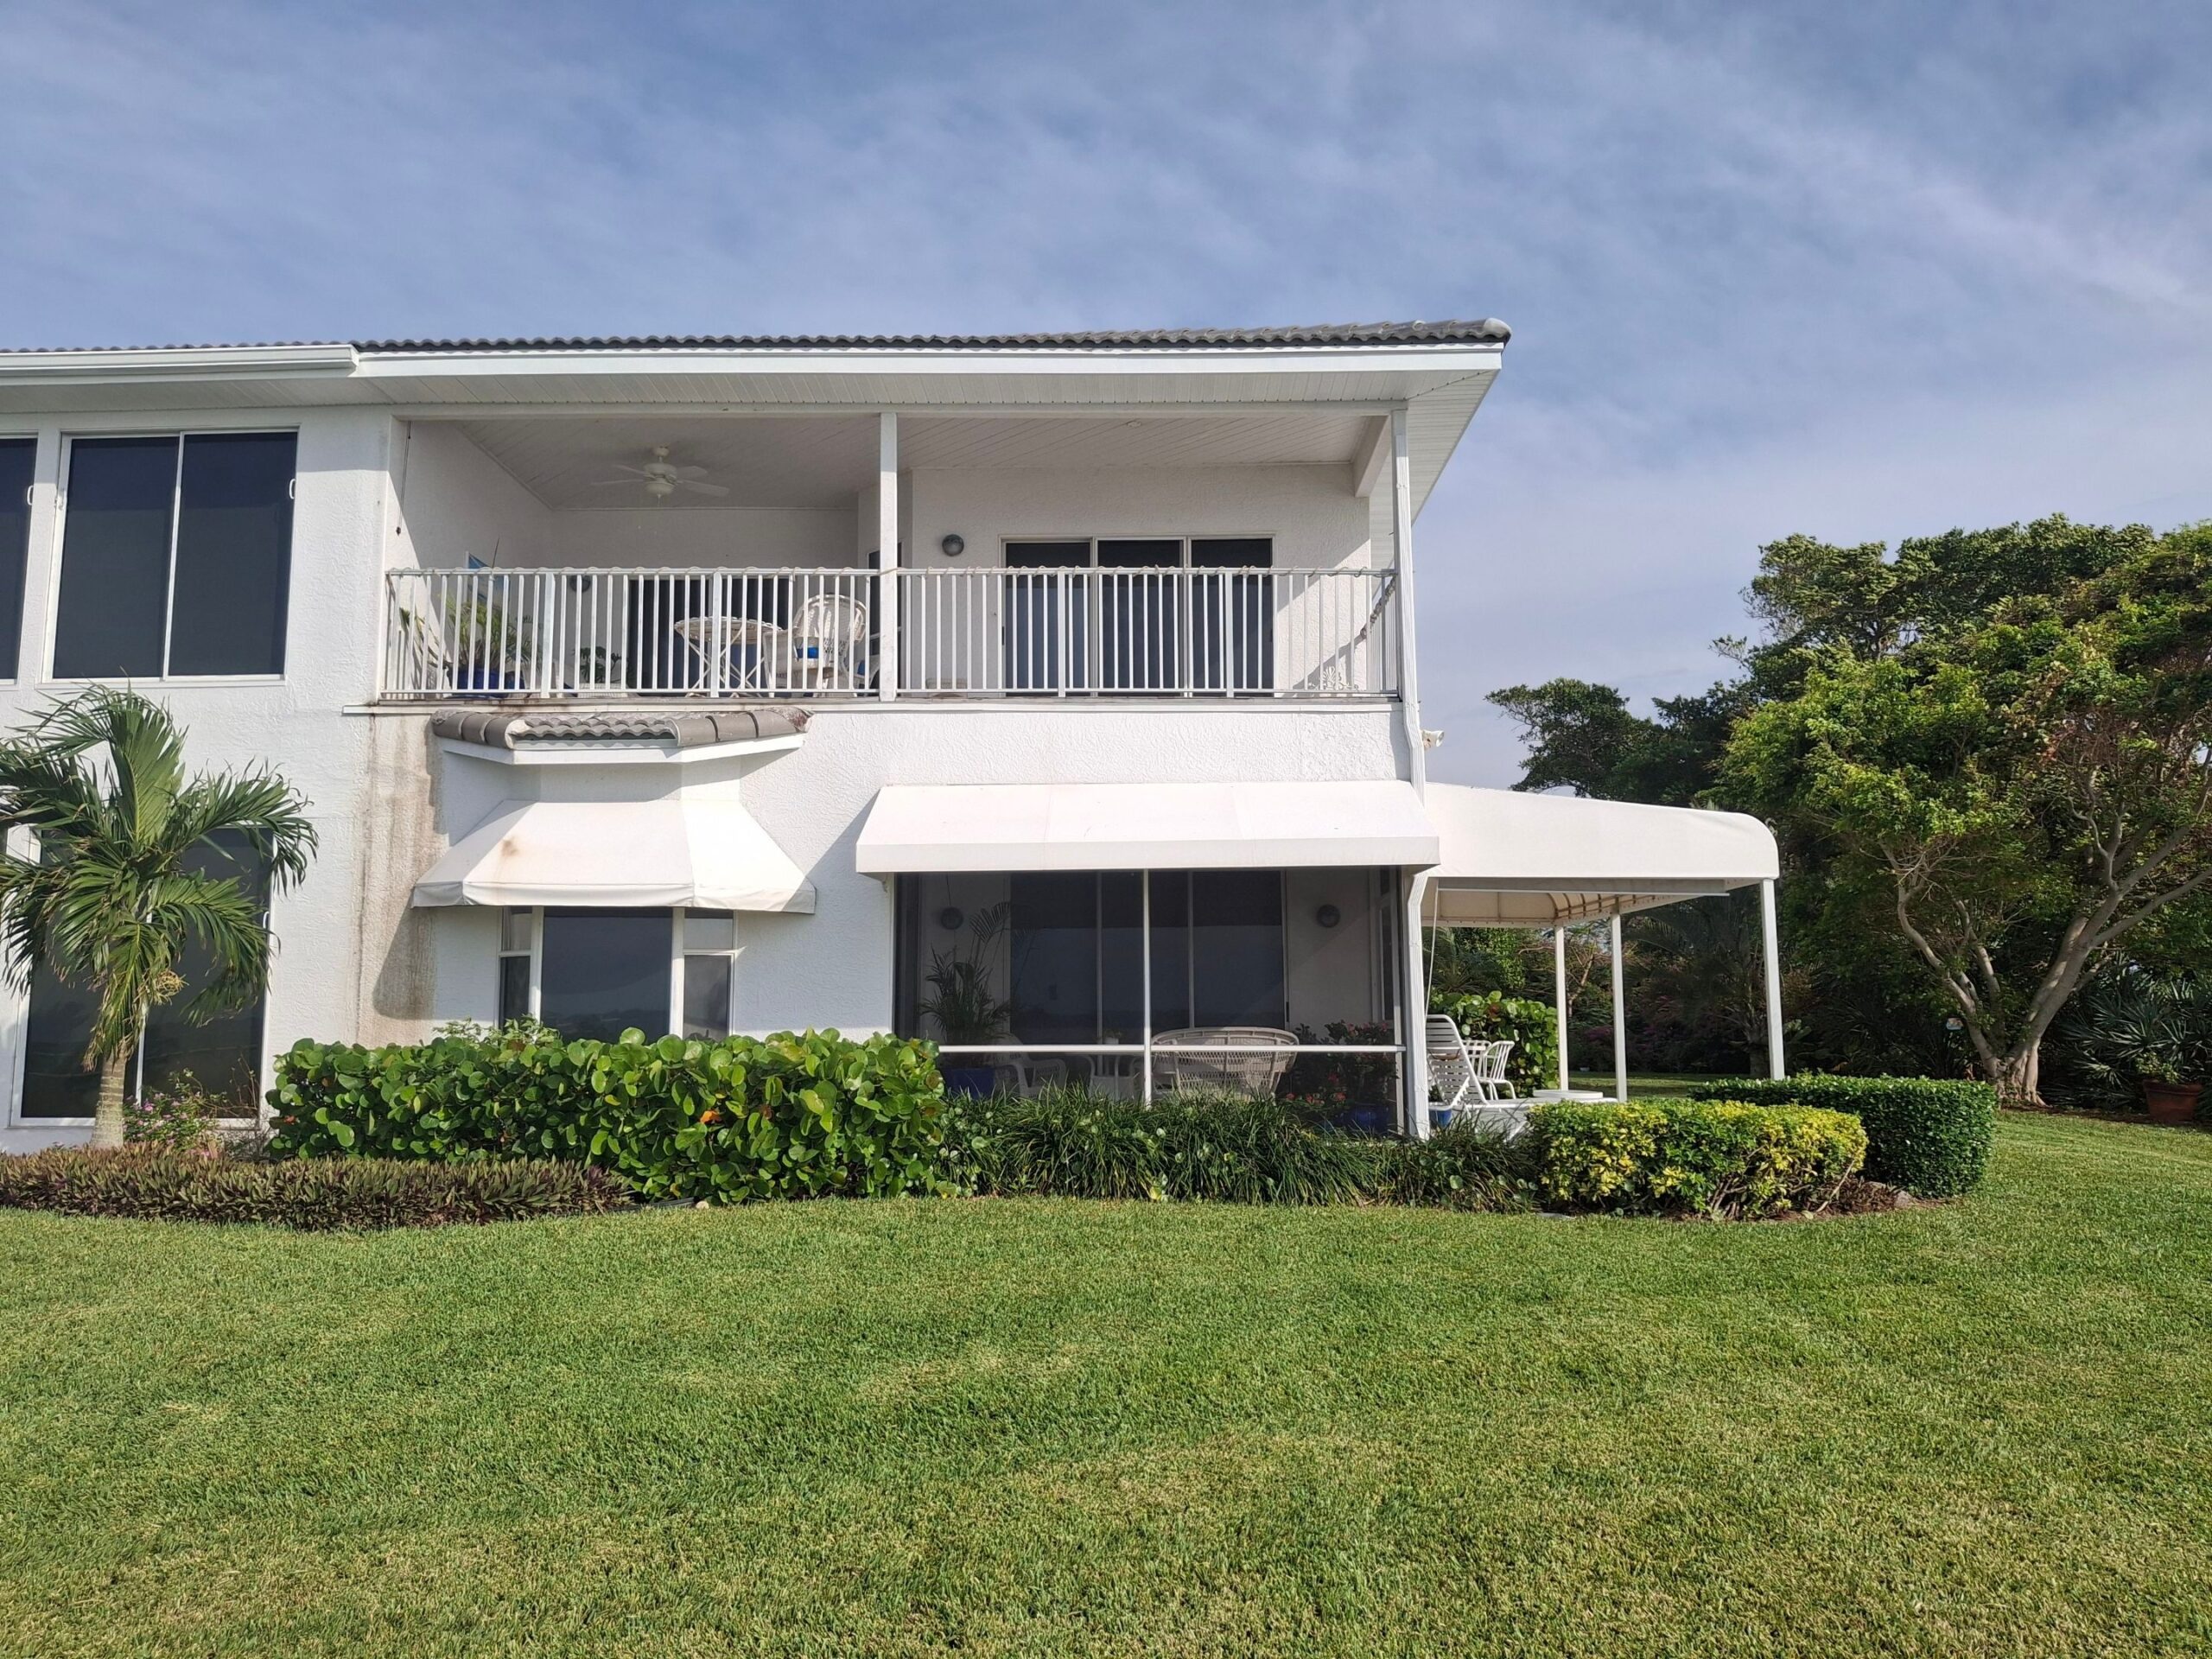
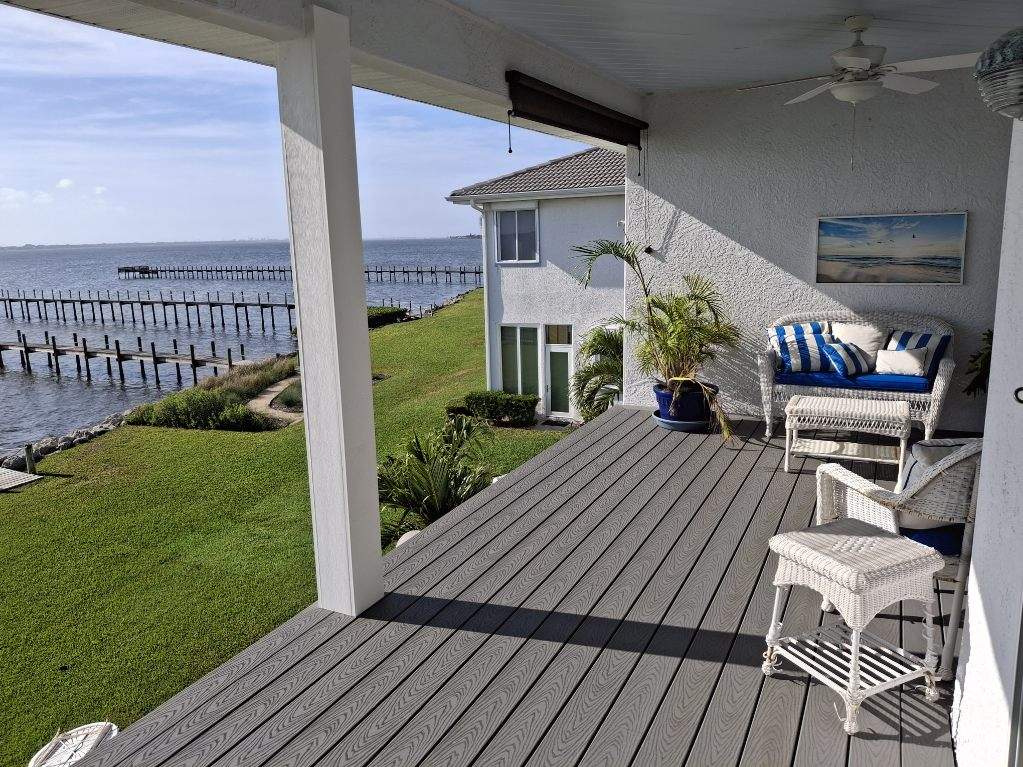
Replaced Balcony
Replaced Balcony
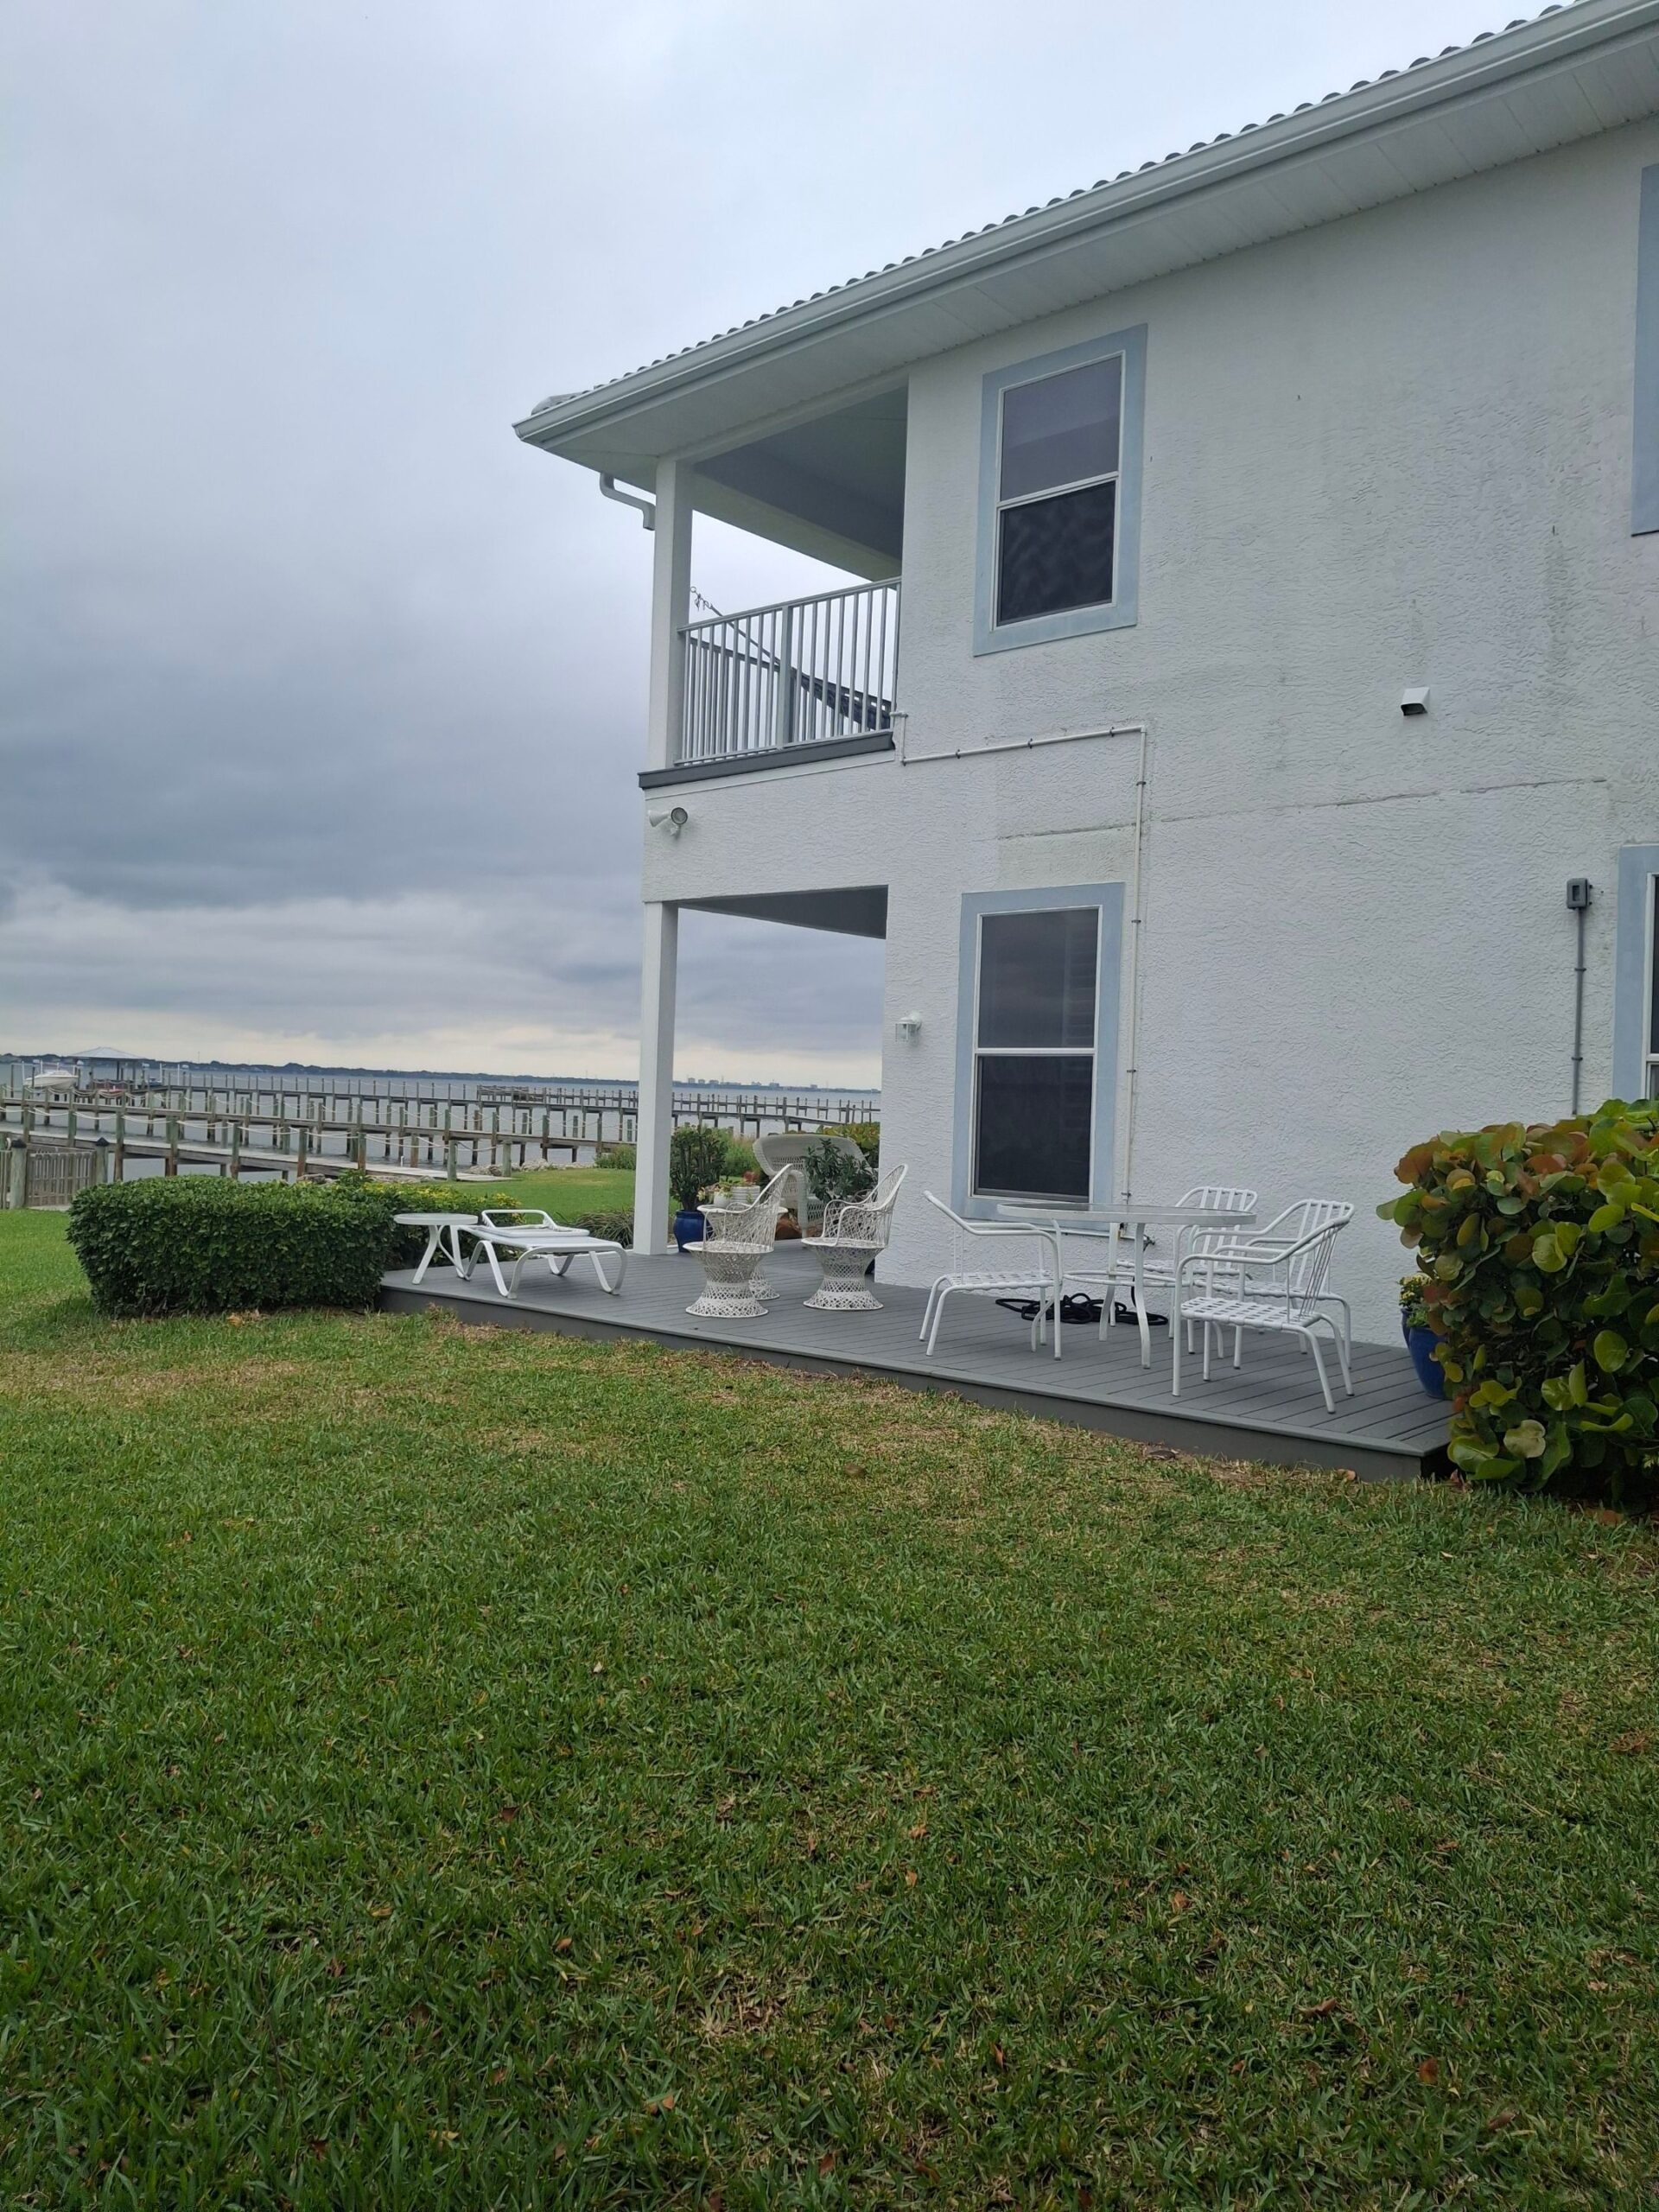
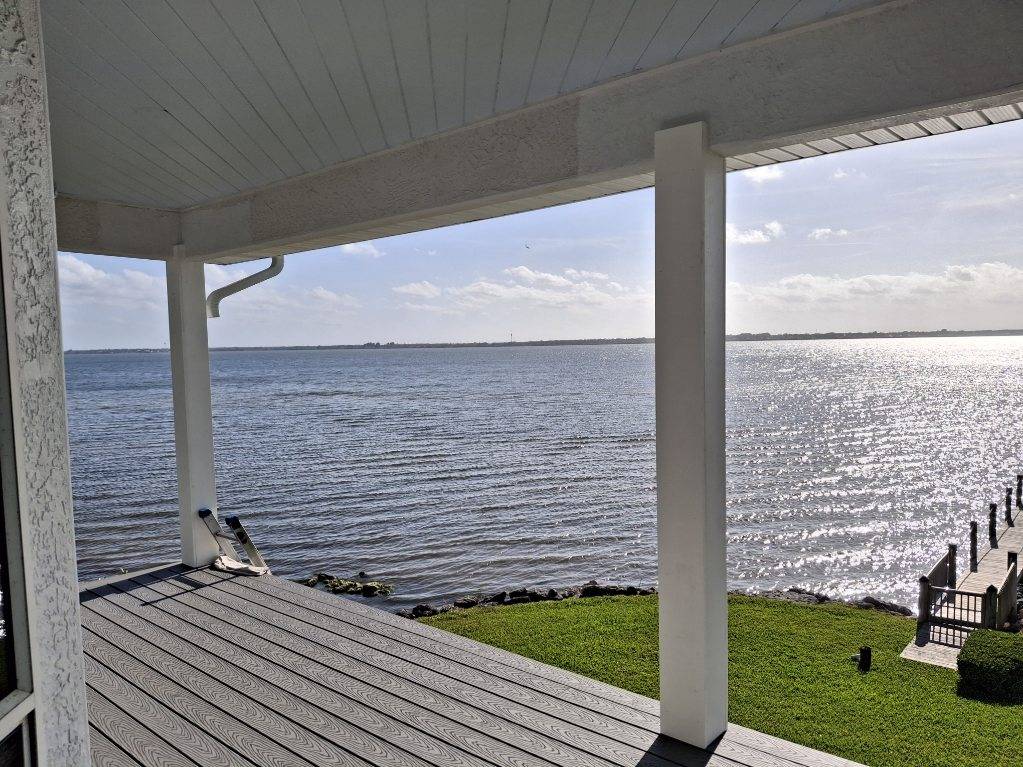
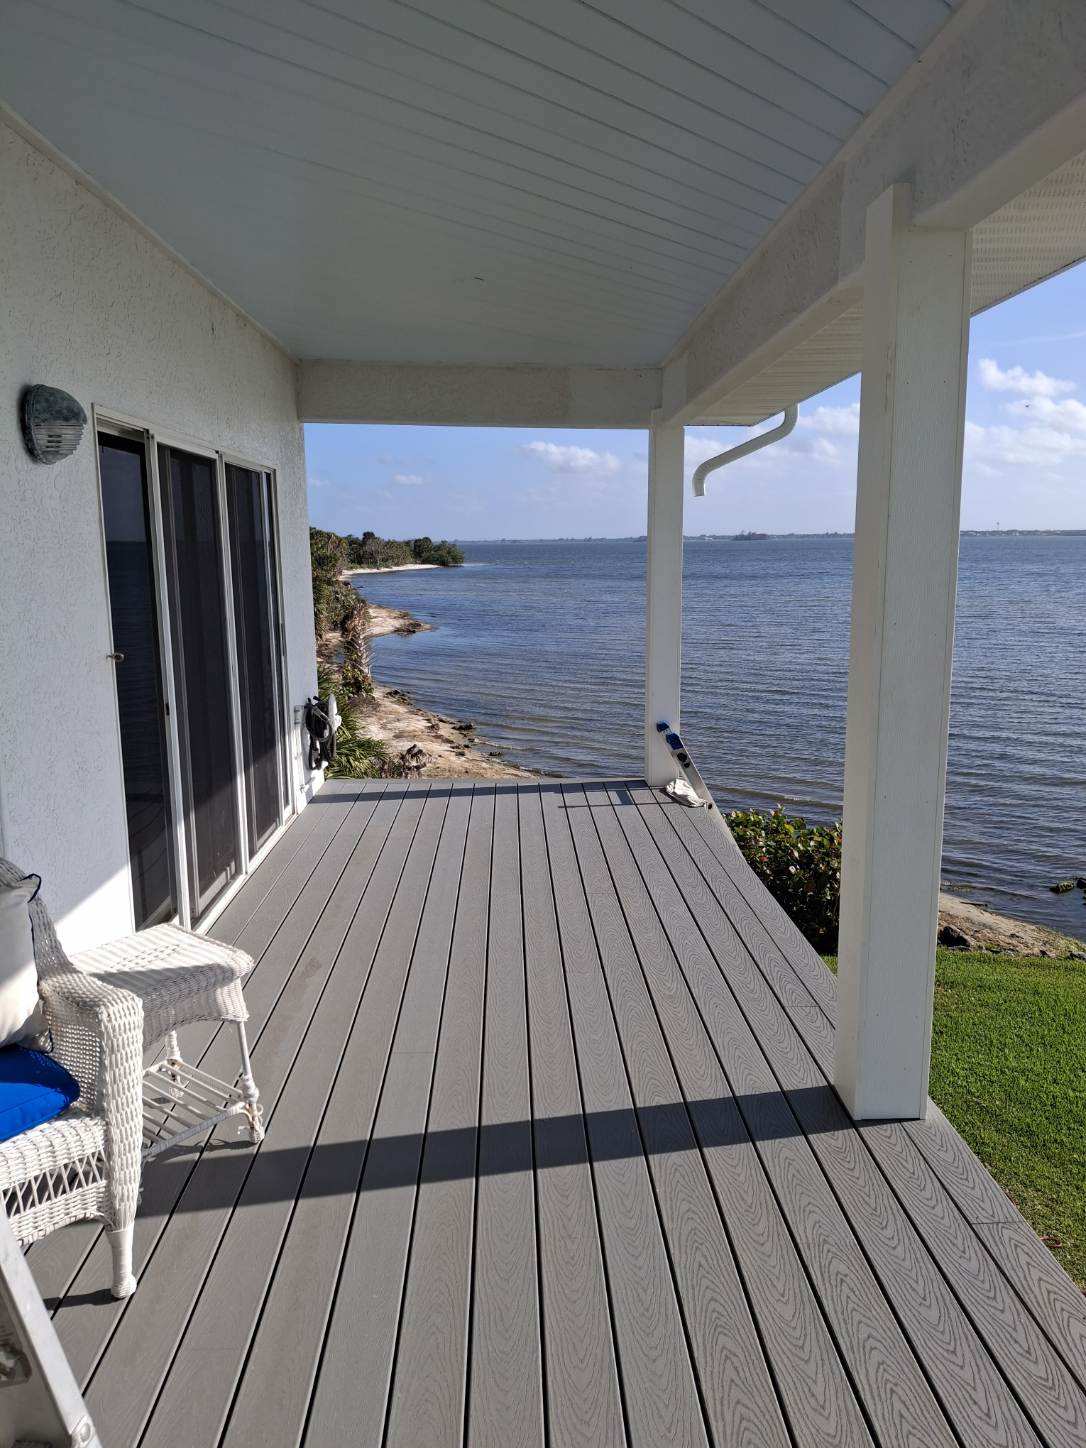
Replacing A Balcony Deck After
Replacing A Balcony Deck After
Picture Framing Decking
Picture Framing Decking
